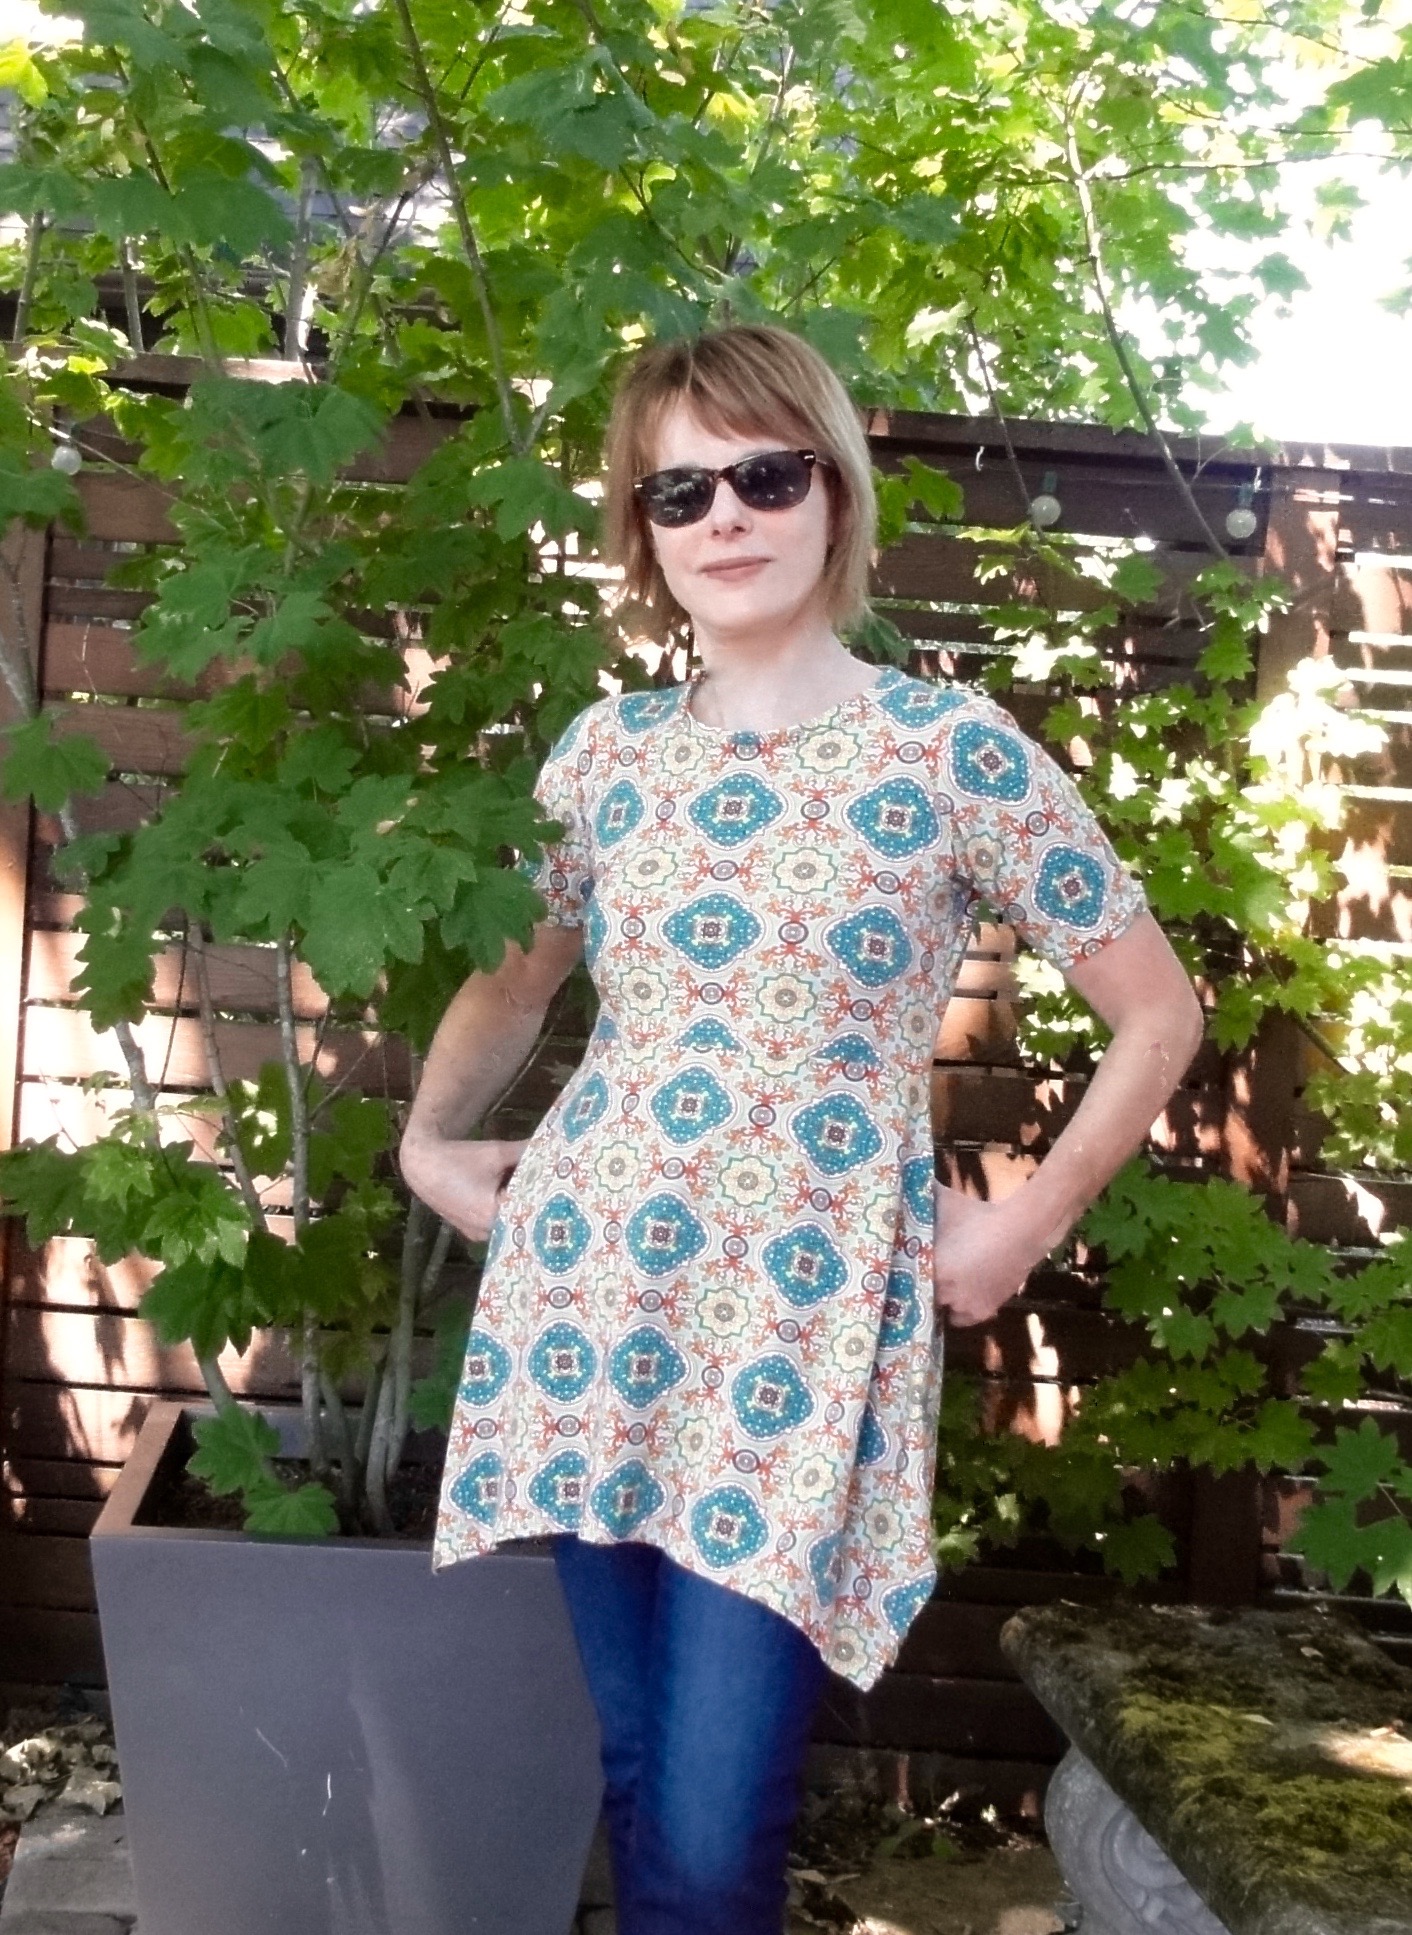
Summer clothes must be effortless. Right? We’re too busy soaking up the sun to spend time fussing with our frocks! My daily uniform consists of a tee shirt and a pair of shorts, maybe a skirt or two. Nothing could be easier to throw on in the morning.
One of my favorite easy-to-wear tees of all time, was a peplum top with a handkerchief hem that I bought during an Anthropologie spending spree a couple of years ago. After many, many wearings and washings, it is finally time to send it to tee-shirt heaven. But of course, I want another to replace it. But as is often the case in the land of ‘ready-to-wear’, that ship has sailed. The only way to get a replacement tee is to make one of my own.

So, I decided to replicate the look by modifying my favorite basic tee pattern, Vogue 8536, a tried and true. It has several sleeve and neck variations, and my copy of the pattern has been used so many times, it’s practically in shreds! The fabric I chose is cotton with moderate stretch, purchased at Fabric Depot.

To make this tee top, I cut view A, a version with short sleeves and a crew neck. Then, in order to accommodate the addition of a skirt, I shortened the tee to the natural waist line. I wanted the skirt/peplum to attach right above the natural waist so by cutting it there, after the addition of a 5/8” seam, the skirt would attach at the perfect spot. Then, I drafted the peplum/skirt portion.
First I cut a rectangle, 28″ by 18″.
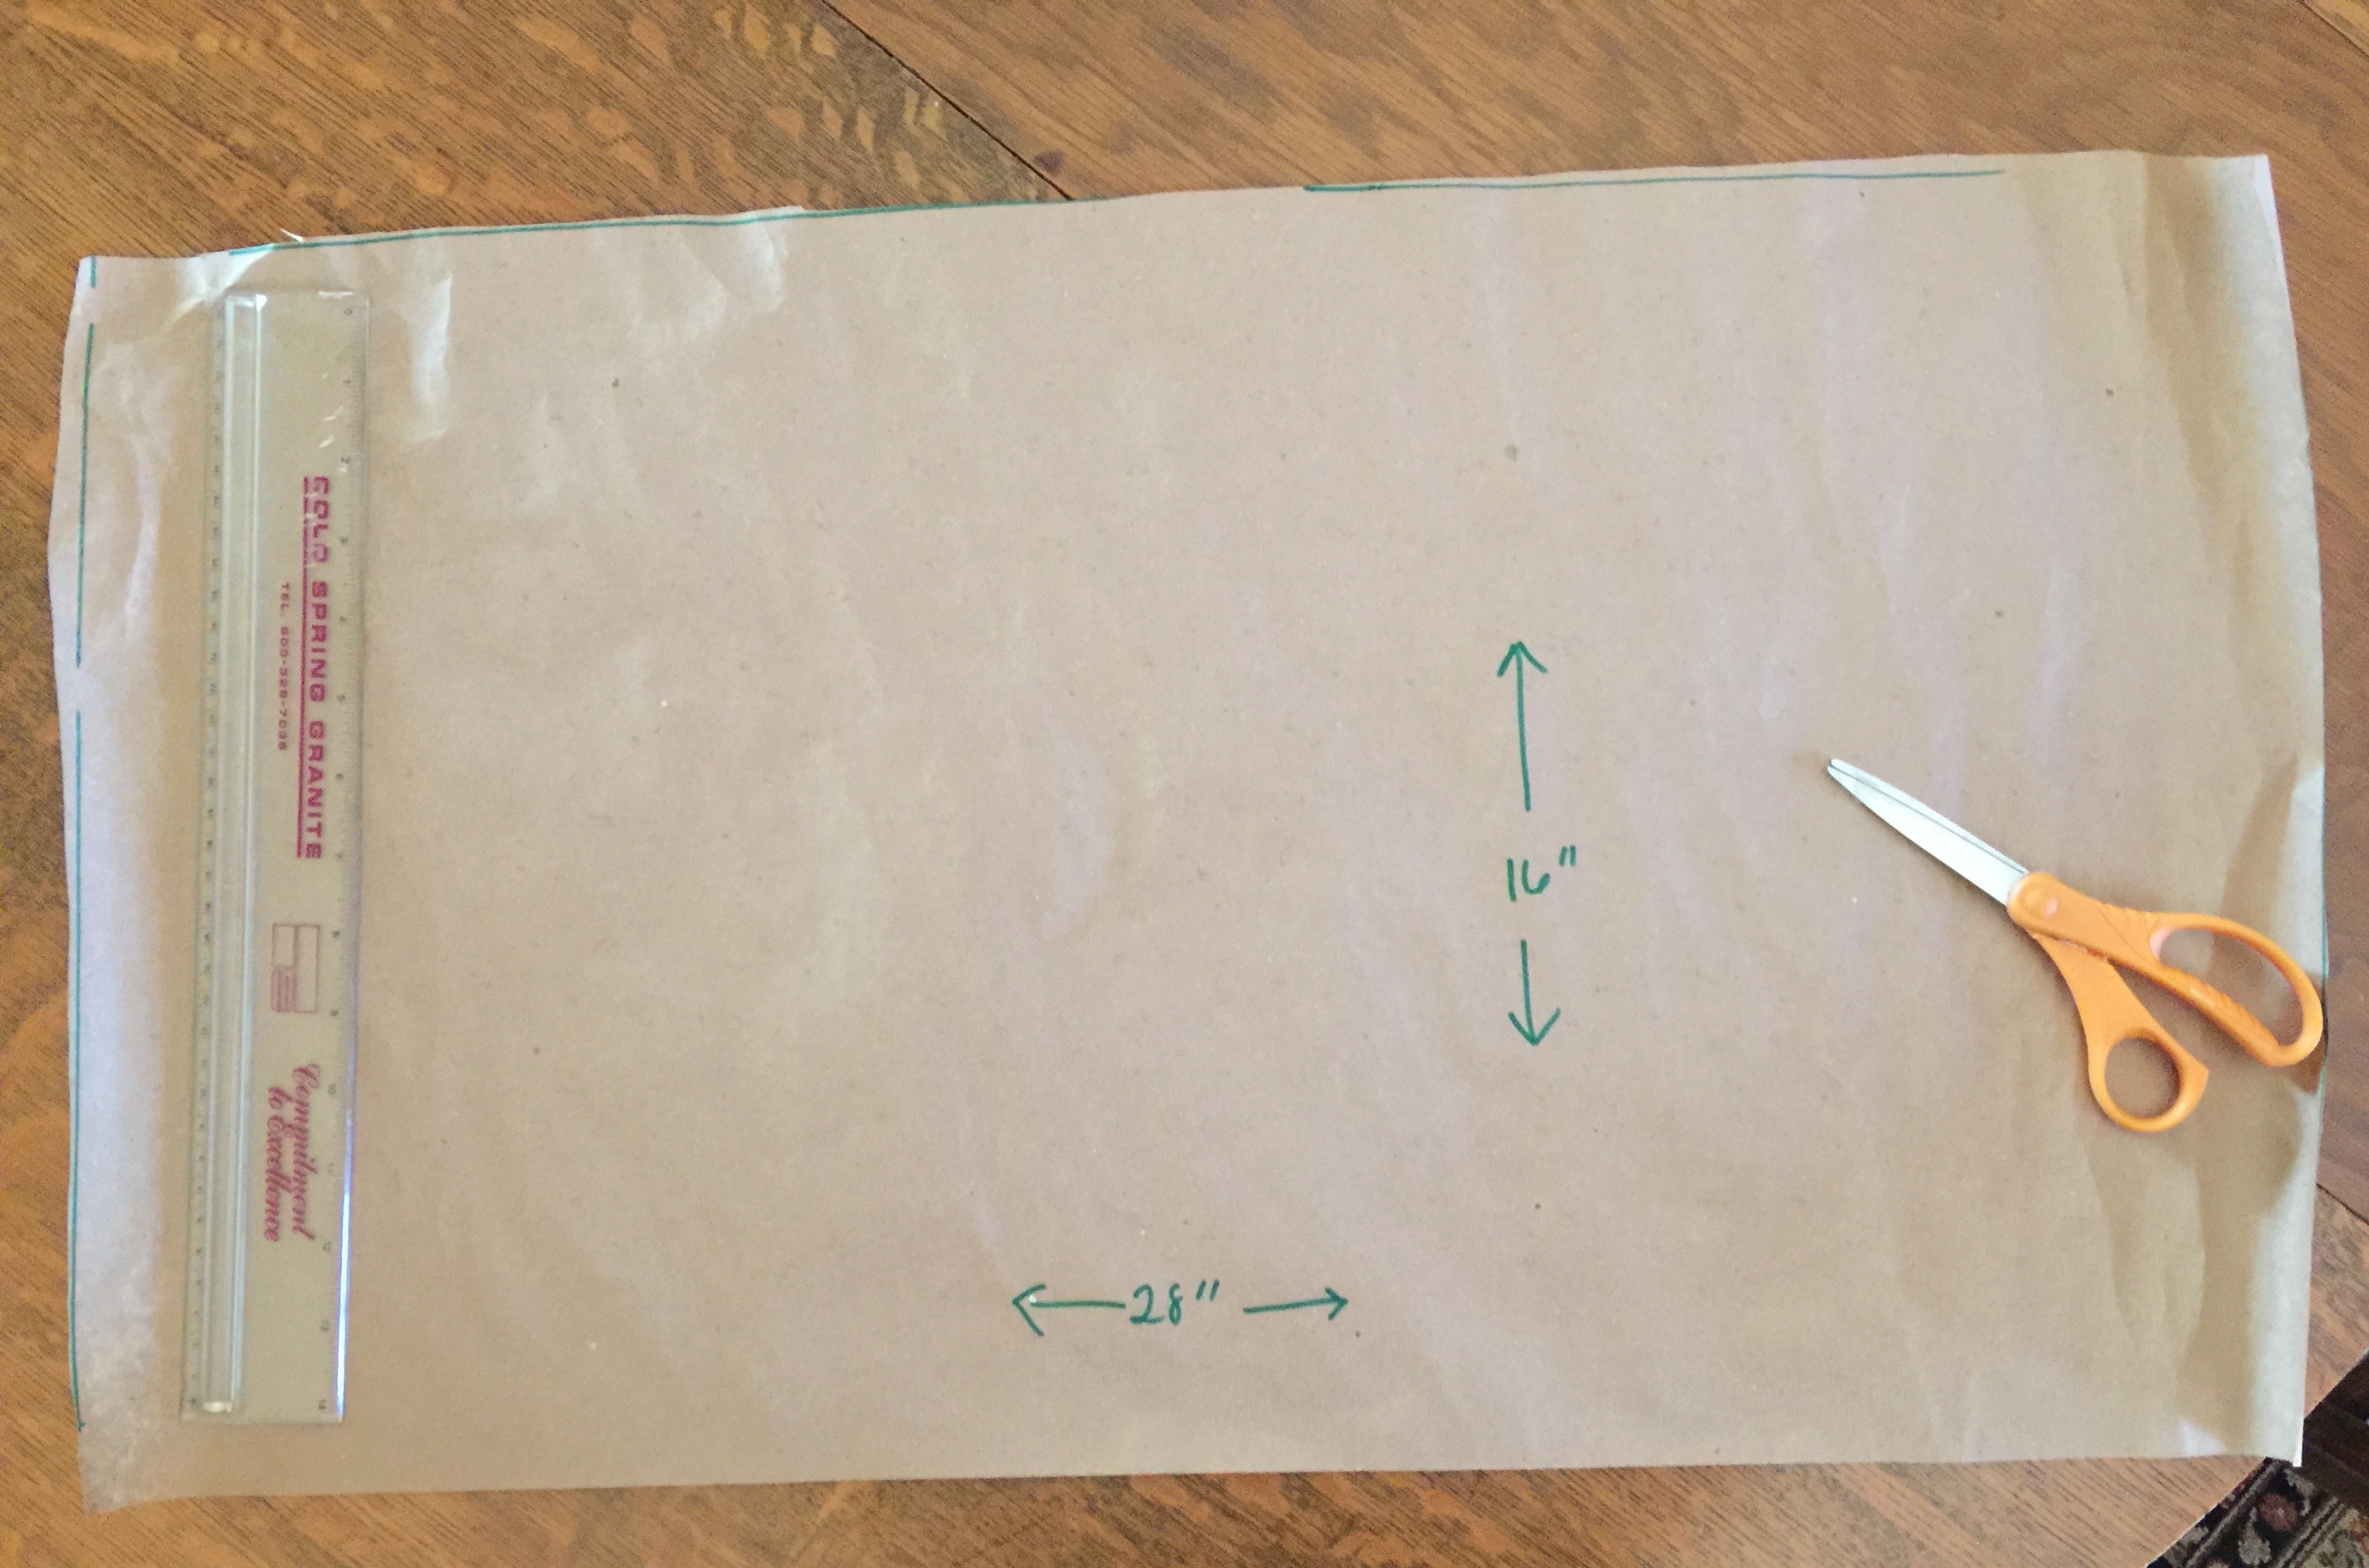
Then I measured the bottom of the tee. On the center of the rectangle’s long side, I marked that width.
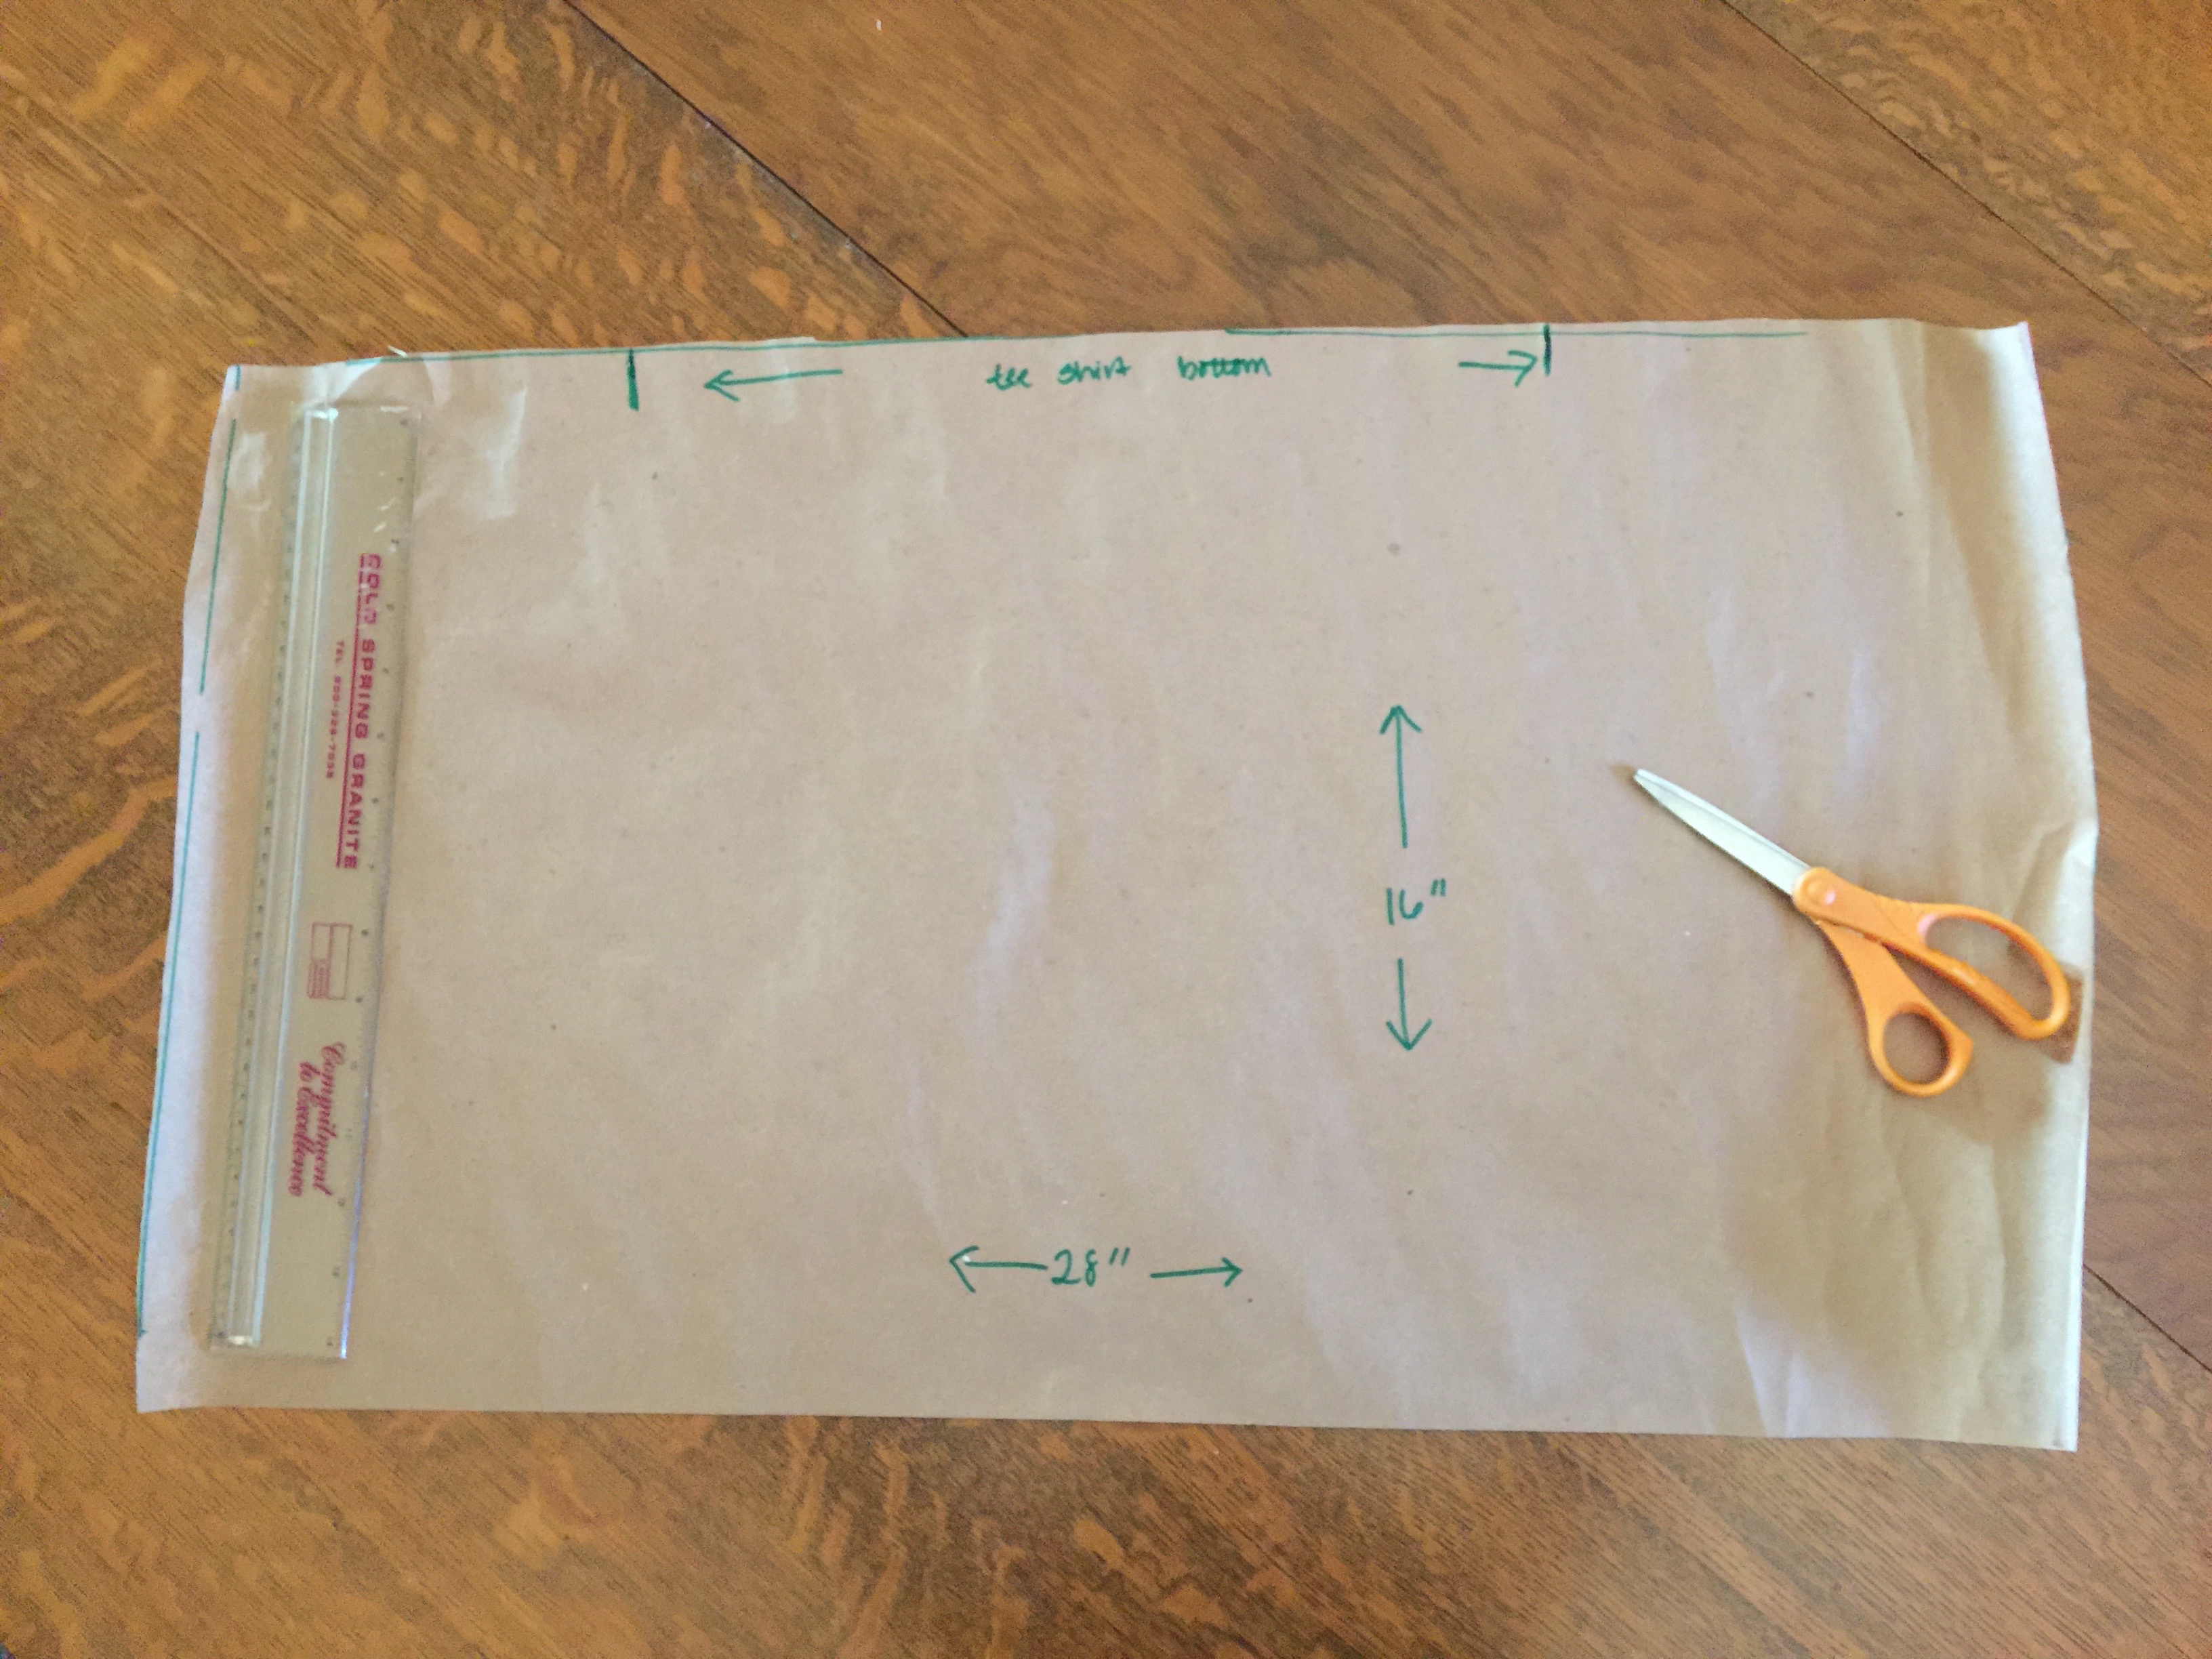
Then, for the draped handkerchief look, I marked 12″ from the bottom of my rectangle for the ‘drop’. From this 12″ mark, I drew a line to the edge of the tee shirt hem mark. On the diagram here, that’s where the ruler is placed.
.

Then, I cut of the triangles created by these lines. This creates the side seams for the angled peplum.
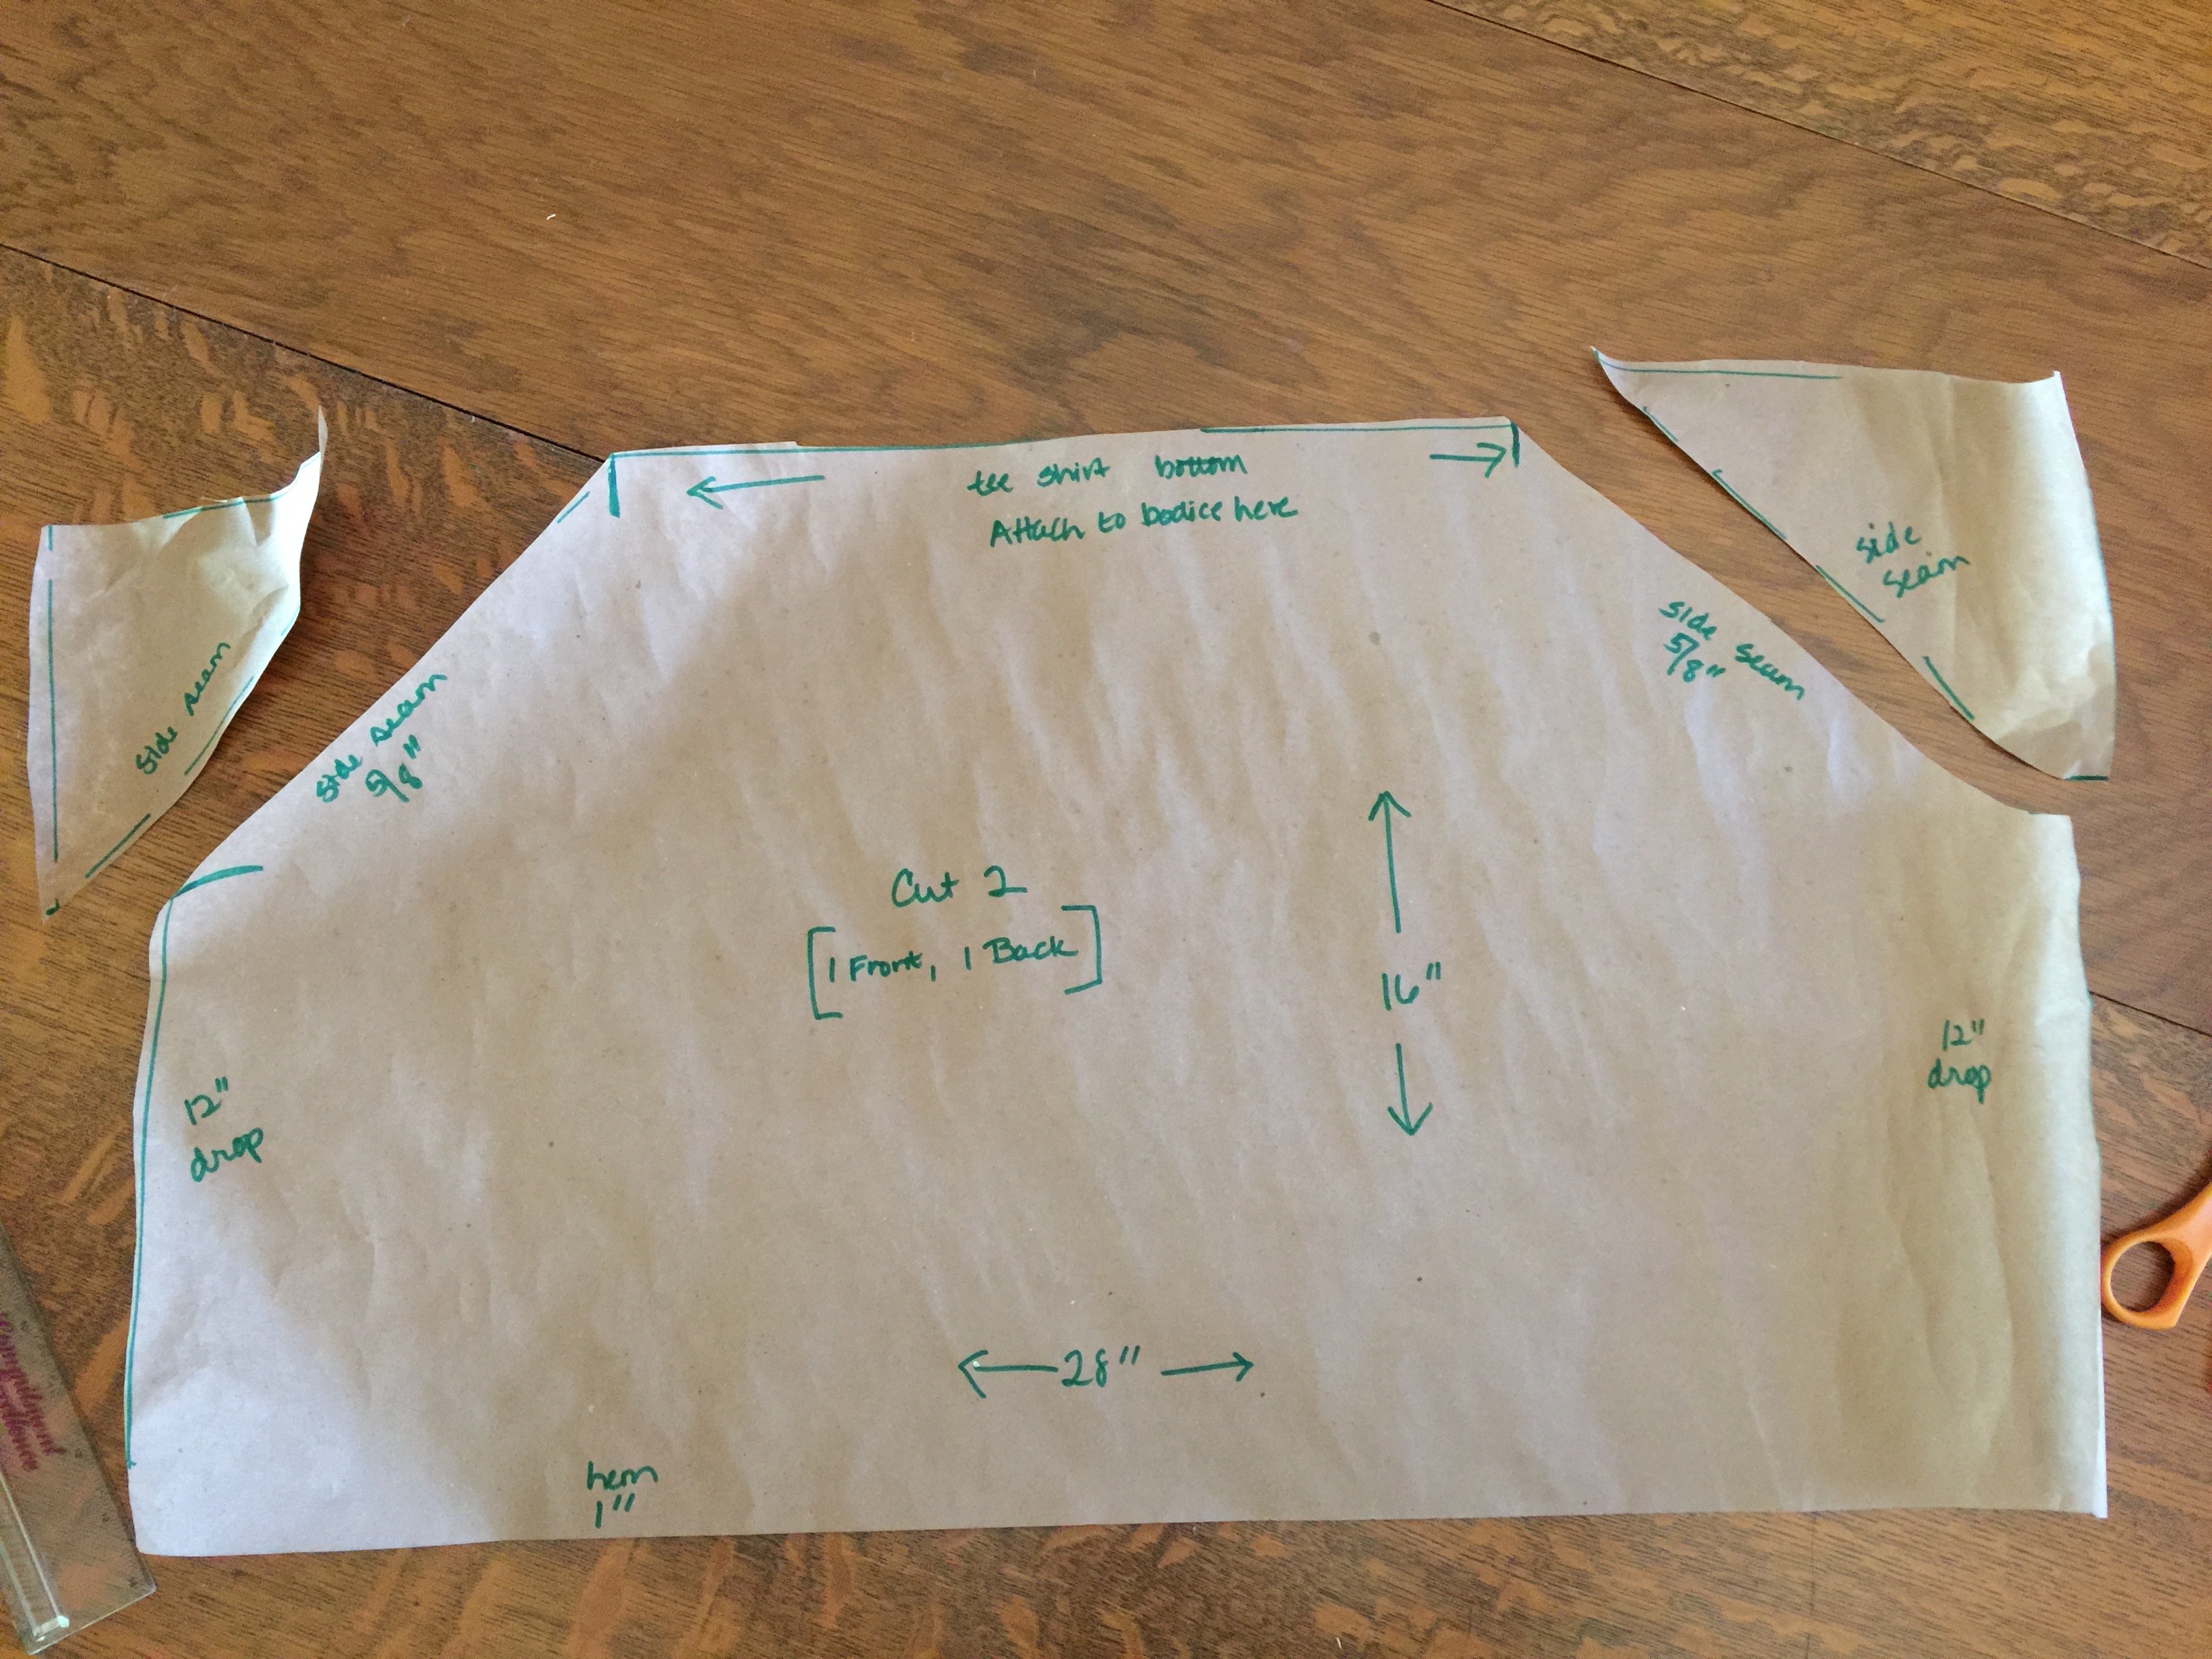
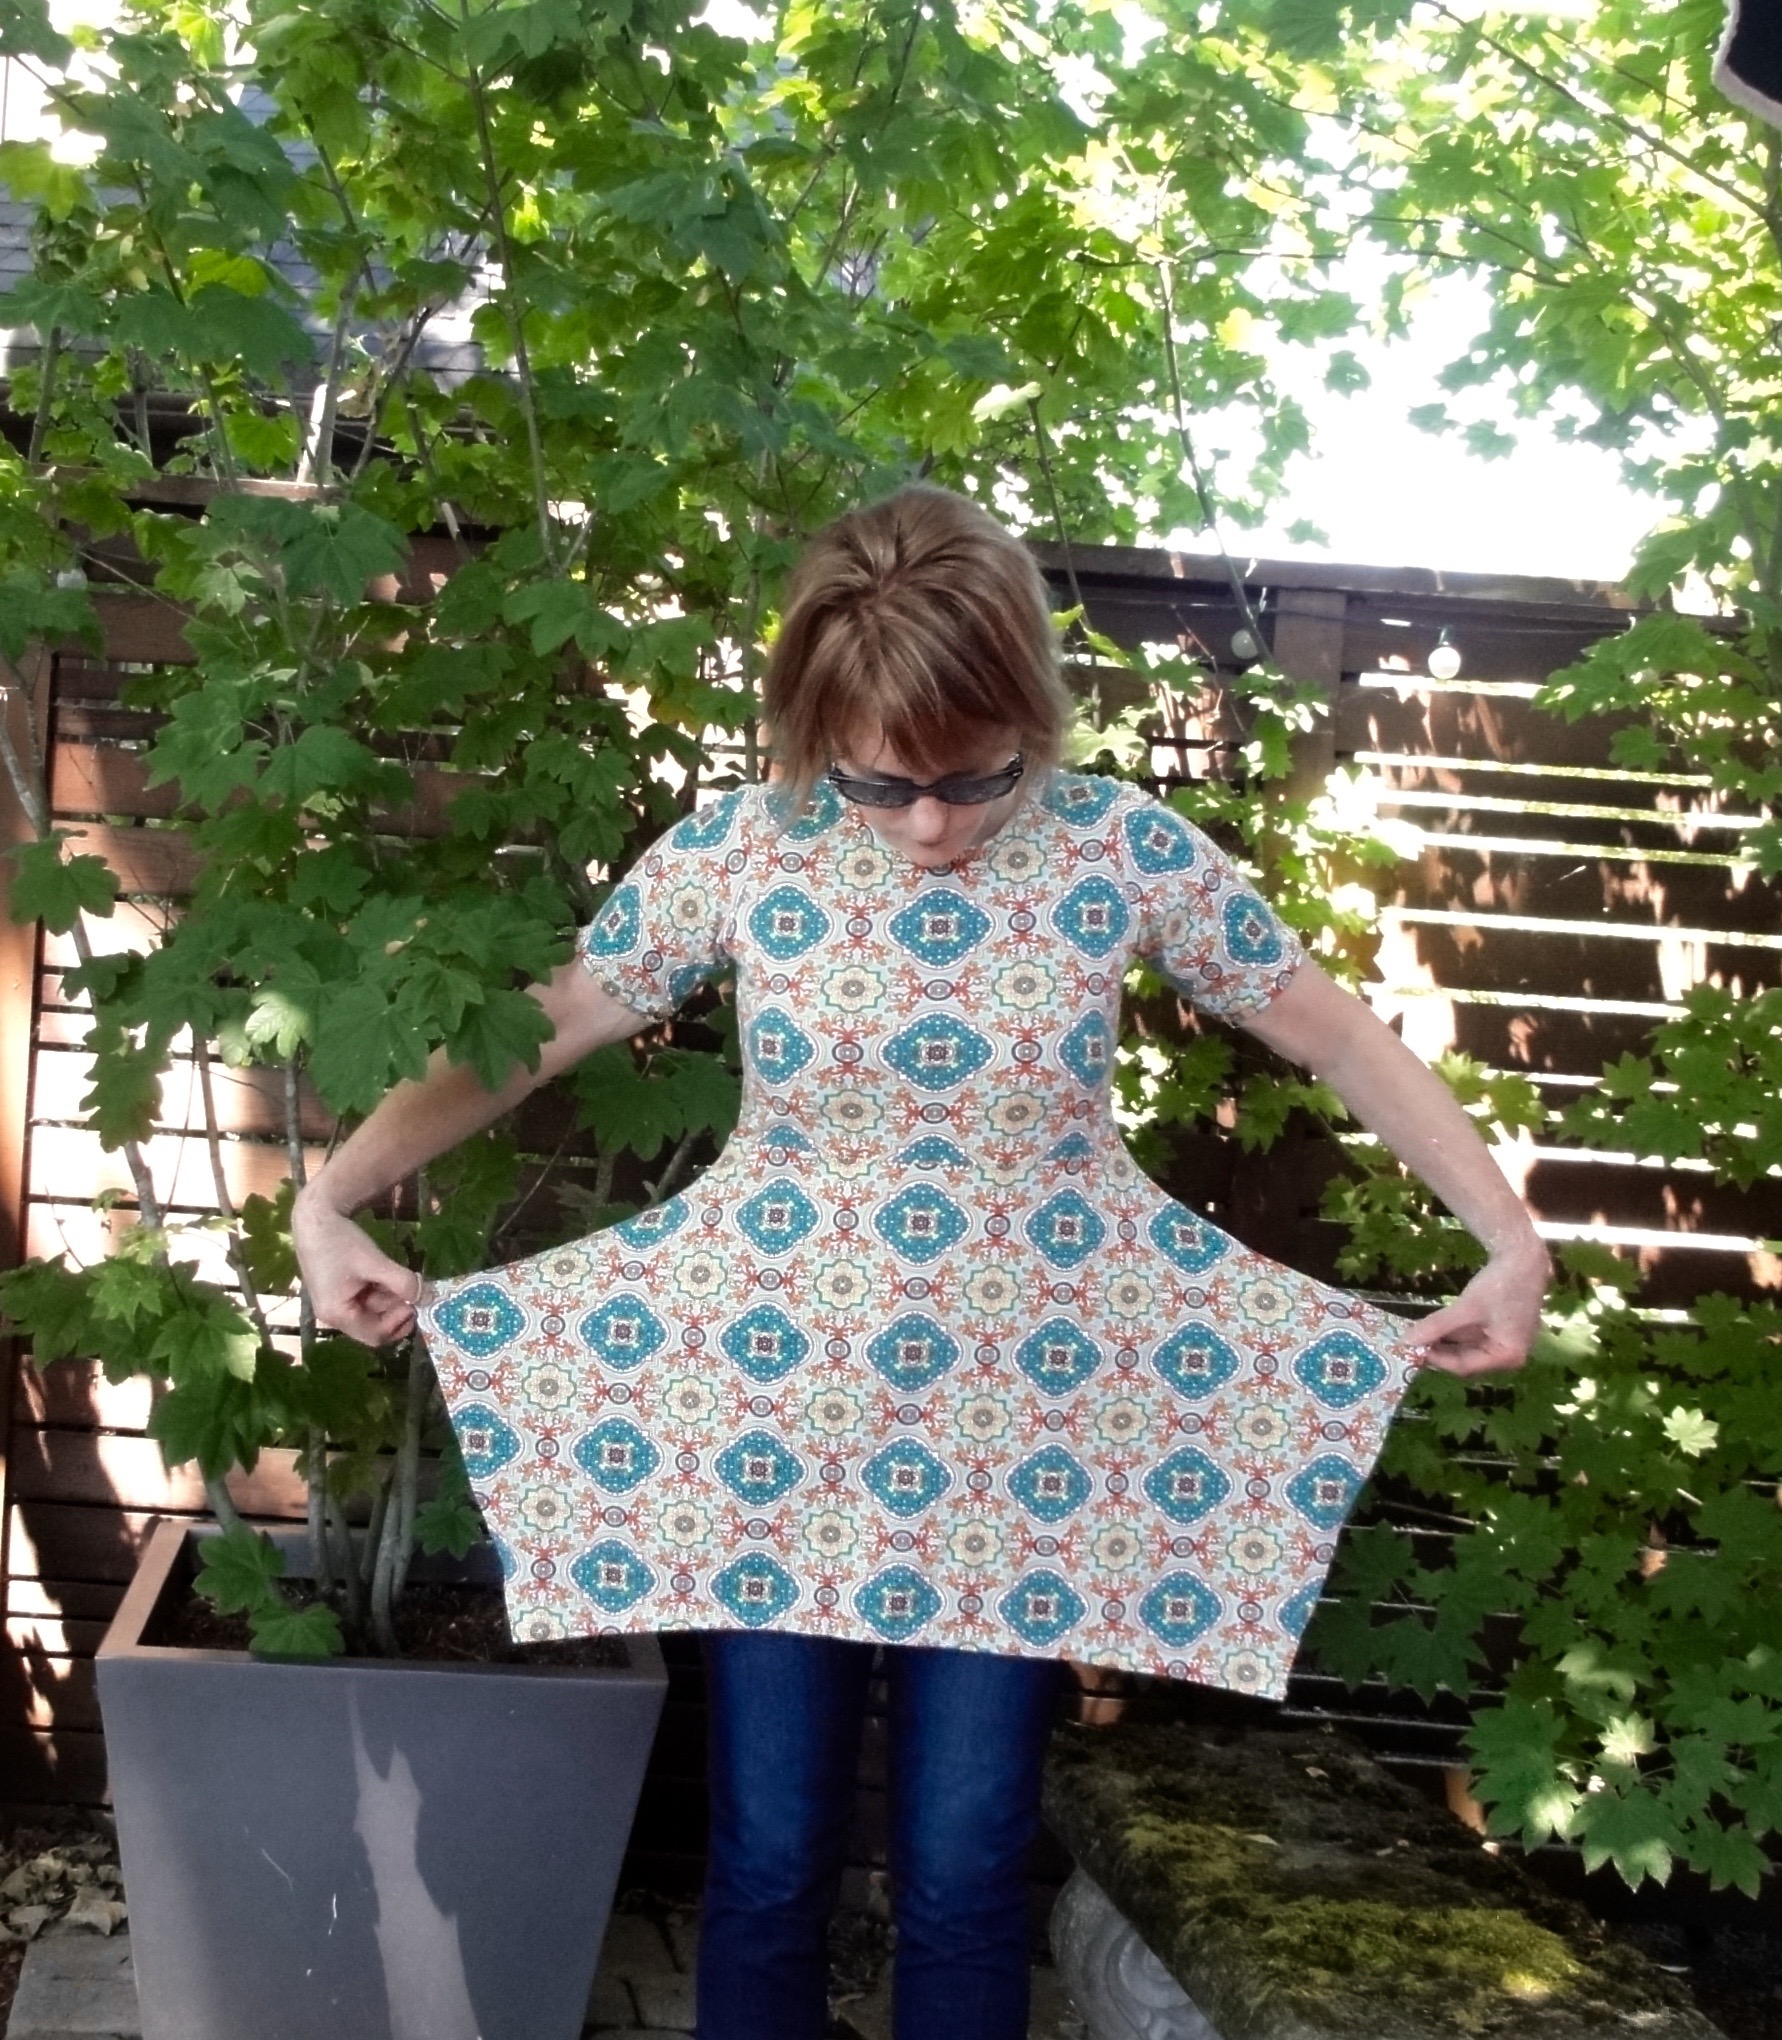
The finished peplum looks like this.
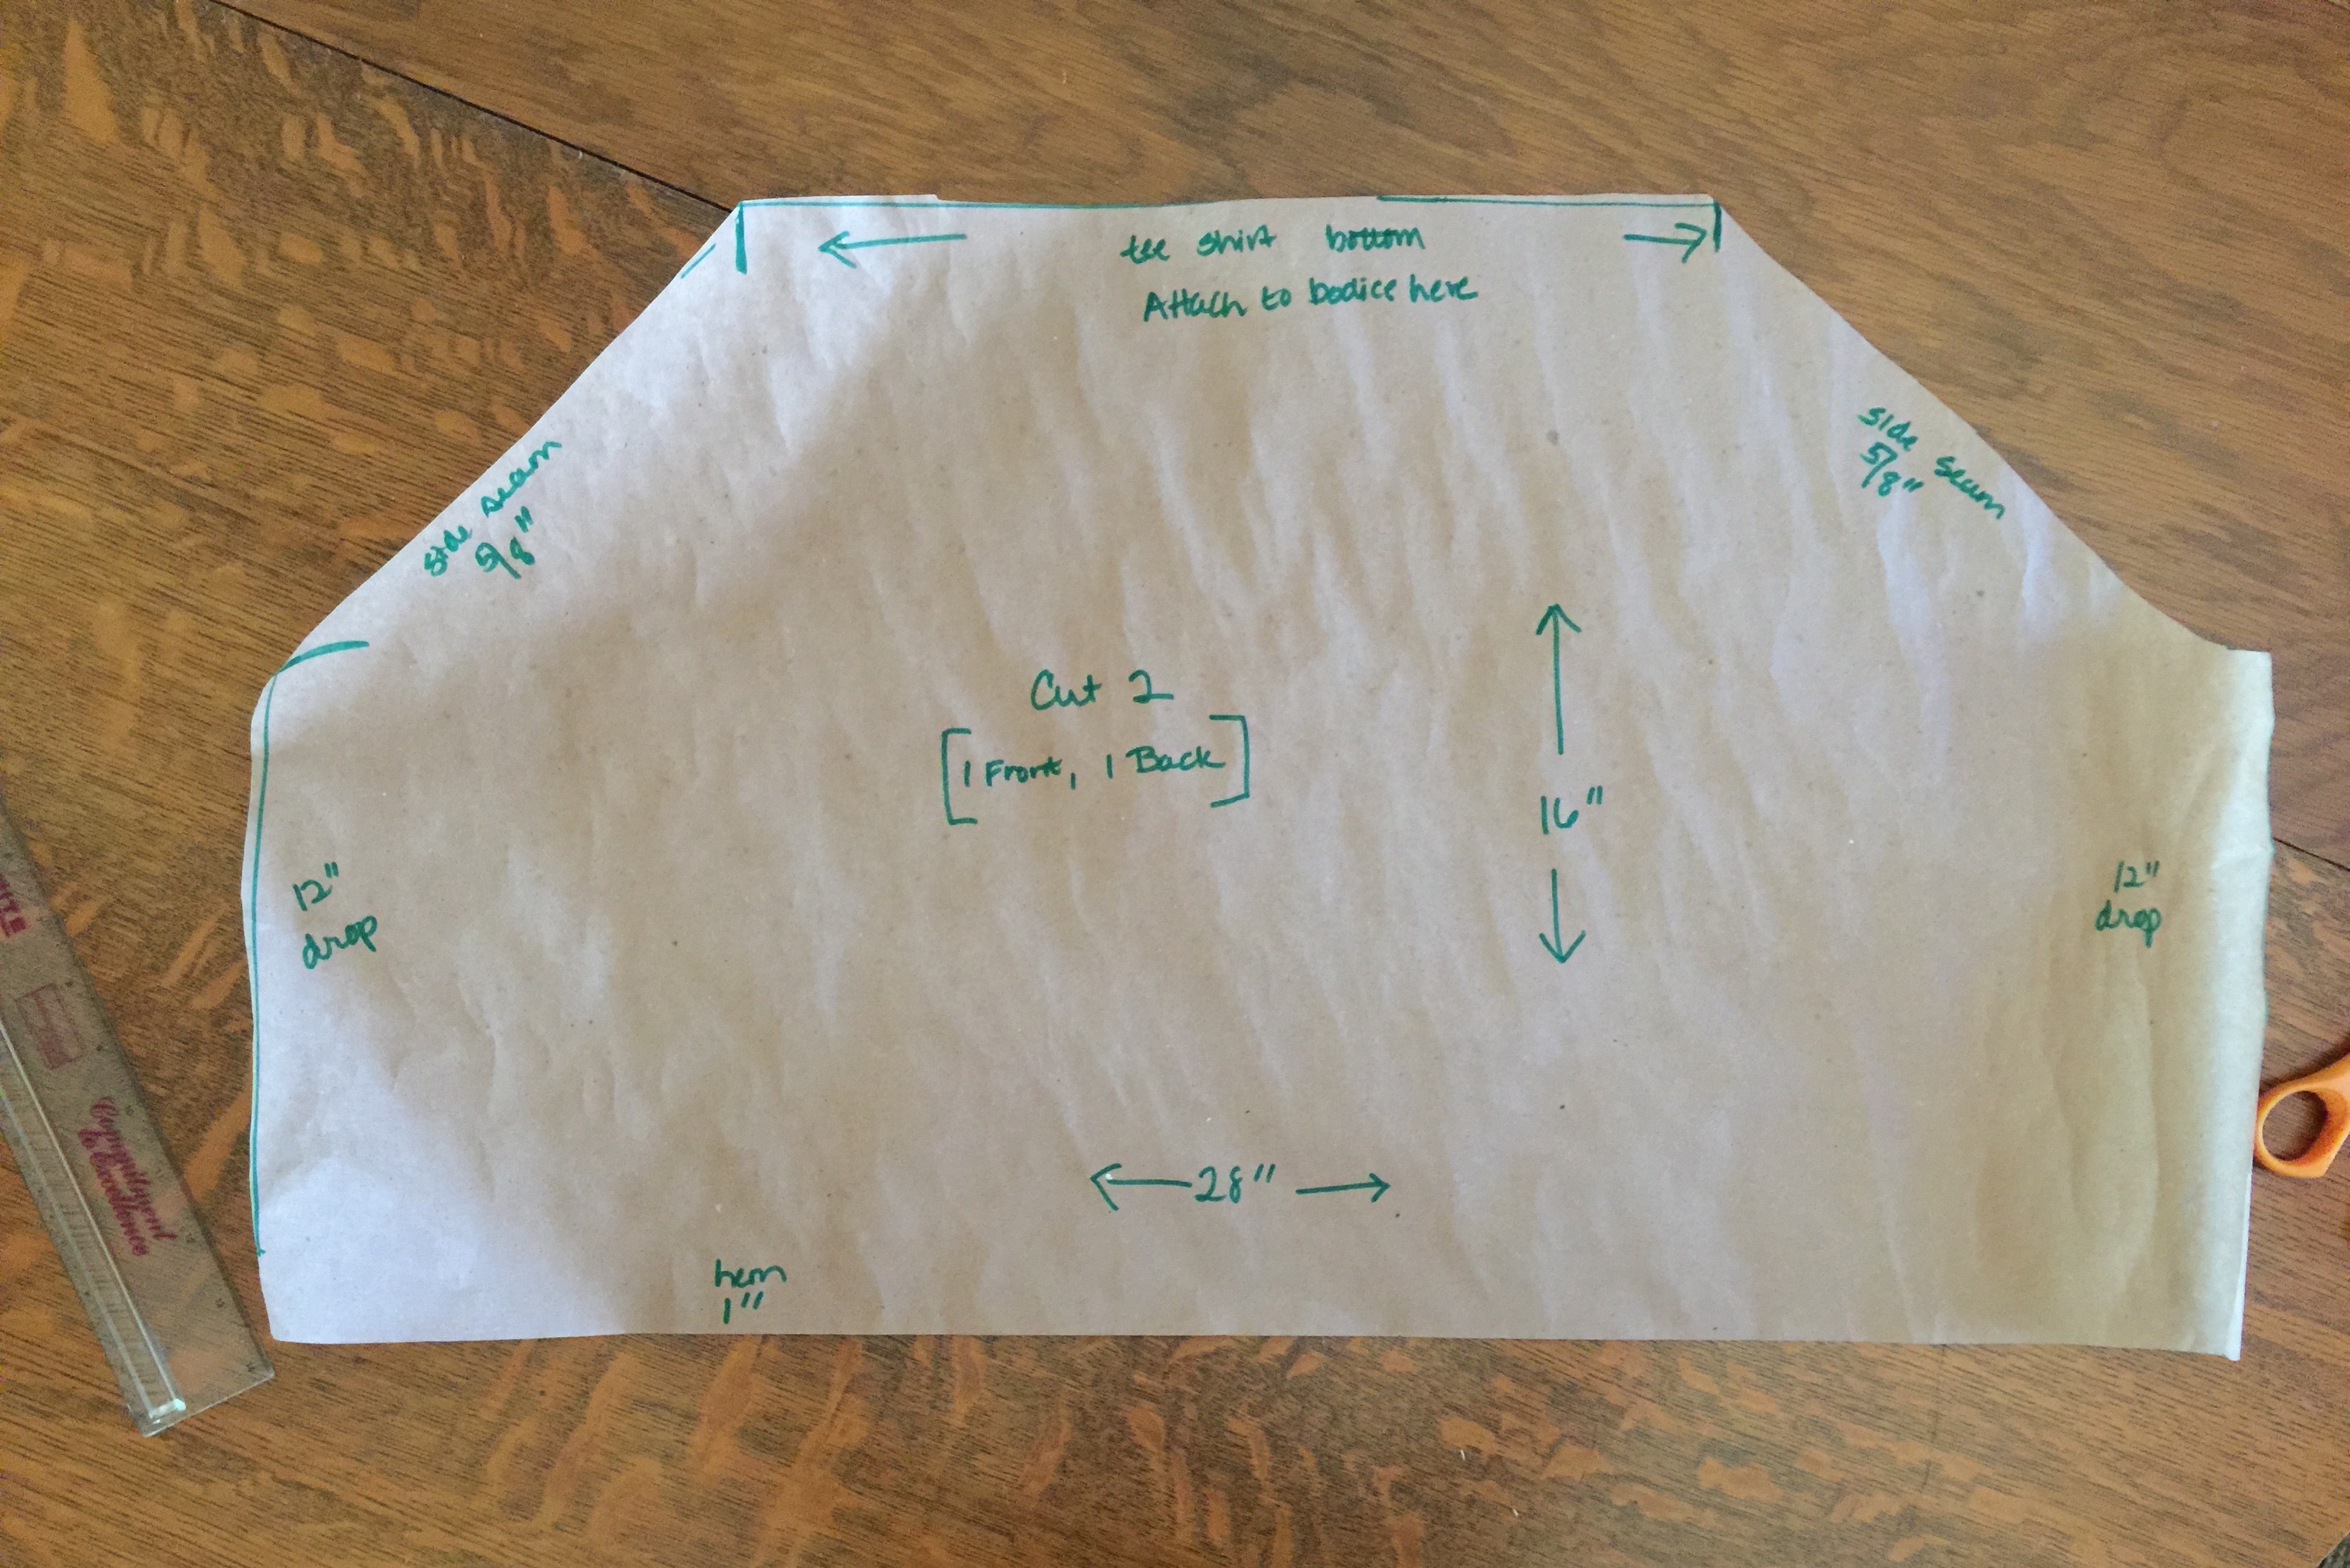
You cut two of these peplums, then sew them together at the angled side seams, and attach them to the tee shirt bottom (see the marked area above.) I used a one inch hem on the bottom.
Clear as mud? I wouldn’t be surprised! If I’ve left out anything, please let me know, and I’ll try to clarify. There’s probably a prepared pattern somewhere that is similar to my self drafted top. But after sorting and filing my patterns this weekend, I can easily say, I Do Not need to buy another pattern. Really. I am on a self imposed pattern purchasing hiatus. (My stash could fill a storage locker).

I hope your summer sewing is easy and fun. Thanks for stopping by!!


Very nice…And your instructions made perfect sense to me!
LikeLike
Thanks! Of course, this is simple compared to that Lisette dress, am I right?
LikeLike
Very well done! I love the hemline. Why buy another pattern when you can do it yourself!
LikeLike
Thanks!! I know! I’ve got to cut down on my pattern purchases, although after seeing the new Vogue patterns today, I find myself trying to justify buying just one more….
LikeLiked by 1 person
I understand… I told myself NO more fabric when I was shopping with my sister and I bought three!
LikeLiked by 1 person
Good for you :). After all, you may never see fabric like that again!!
LikeLike
What a cool shape and an excellent tutorial! I’m taking it easy on the PDFs these days and sticking to my Burda myself . So many times I have gone to buy something new and realized that I had something similar or better in one of my magazines. Plus working from tnts really makes you think in the best possible way.
LikeLiked by 1 person
Thanks! You’ve reminded me I need to pick up the current issue of Burda Style. My tried and trues are in binders and organized now, so I’m hoping that will encourage me to use them frequently, exploring all of their wonderful options!
LikeLike