


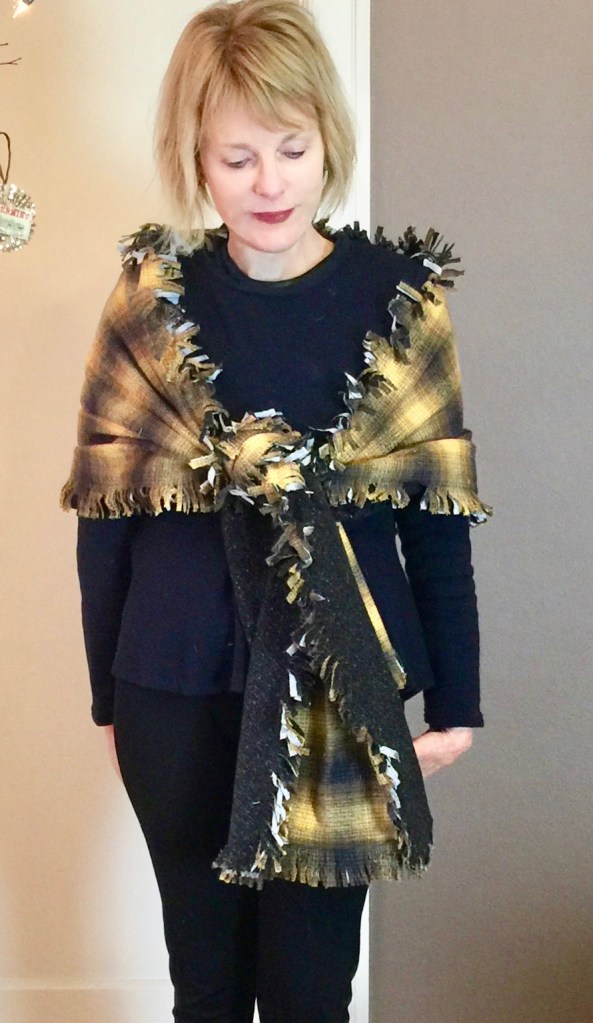
Well, it’s almost too late to pull off a DIY gift for a friend, but here’s a last minute gift you can sew in an hour – – A fringed scarf that’s so versatile! It’s cozy and lovely as a scarf, but also wide enough to wear as a shawl. When I saw a version of this scarf on a mannequin at Fabric Depot, I just had to sew one for me and a few for friends. They’re popular gifts as the scarves are reversible and can be worn a variety of ways.


Here’s how to make a quick reversible scarf of your own.
The best part of this project is selecting the coordinating fabric. To make one scarf you need 1 1/3 yards each of two coordinating flannels, 44/45″ wide.

From each piece of coordinating flannel, cut two (2) 20″ high pieces.

You now have the four panels that will make up the scarf. For each coordinating flannel, place the two 20″ high panels right sides together and sew a 5/8” seam down the center.
You now have two long pieces of two coordinating fabrics. Place wrong sides together, aligning the center seams and the edges, smoothing out wrinkles. I use clips to hold the edges in place.

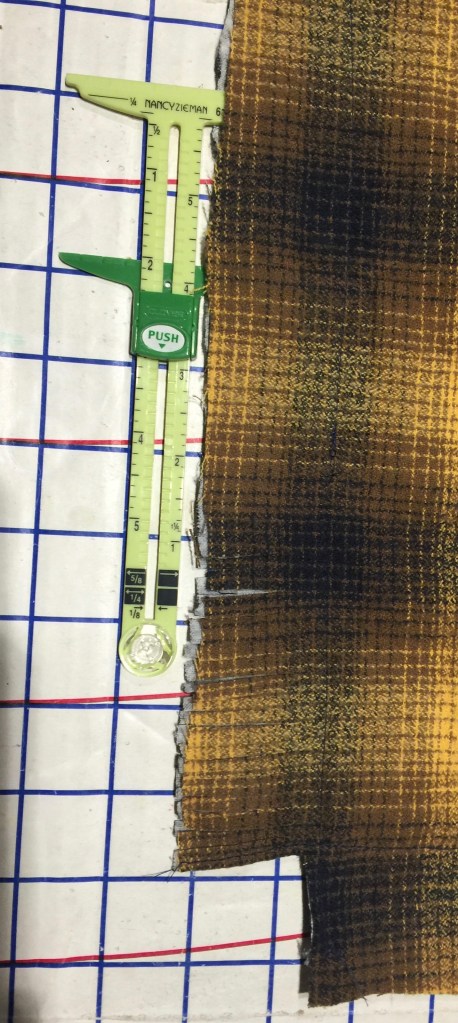
Sew these two pieces together around the entire circumference of your scarf placing your stitching line 1 and 1/2 inches from the edge. ( I used a piece of tape on my machine placed at 1 1/2 inches as my stitching guide.) This stitching line is important as it will be your guide to cut the fringe. You can double stitch it if you want for extra security.
From each corner, cut a 1/1/2’ square, then begin to cut your fringe, using a small scissors at 1/4” intervals, being careful not to cut through your seams.
You can see my edges don’t meet all that perfectly. That’s okay because the fringe will be fluttering about when you’re done, so precision is not essential. It looks so great after it’s been ruffled by your hand or the washing machine.
That’s all there is to it! I’m not sure which scarf is my favorite….
Another fringe option that’s more time consuming is to take a darning needle and carefully pull out fibers at the scarf’s edge to fringe it. This requires alot of patience. 
These scarves are quick to sew and cost effective as gifts go. They’ve been quite popular with friends who enjoy throwing something stylish around their shoulders on damp wintery days.
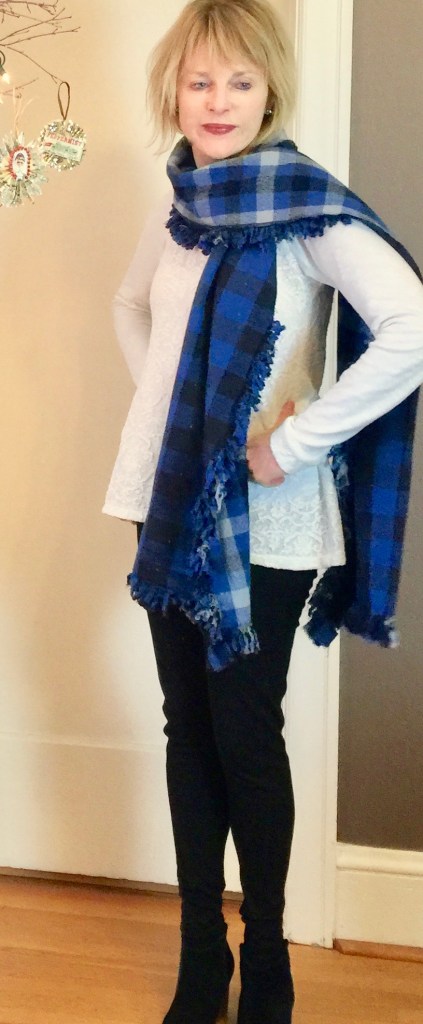
I’ve experimented with various combinations with regard to fringe. On this scarf, I only fringed one side and serged the other. It’s a tidier look if that appeals to you. I also made this scarf a bit longer, using 1 1/2 yards of fabric. The longer length makes it very easy to wrap . I chose to keep this scarf for myself, because, well, it’s blue!!
Here, in Oregon, the weather is damp, and I love wearing my scarf as I enjoy dinners around the fire with friends.
It’s a great time of the year to reflect on the past and plan for the future. I’ve loved reading everyone’s top five hits posts and I’ll be posting my own list here before the year ends. Happy sewing and thanks for stopping by!


The scarf/wraps are gorgeous and cozy. Thank you very much for sharing!
LikeLiked by 1 person
Thanks, Faye!
LikeLike
I swear you’re my fringe sister! What a fun easy project–the mustard and blue is my favorite! Your friends are lucky to have such a cozy gift!
LikeLiked by 1 person
Fringe forever! They are sooooo easy and so fun because you get to pick and choose coordinating fabric, almost as satisfying as a color blocking project!
LikeLike