A White Shirt and Jeans: Classics Recharged

IMG_5707
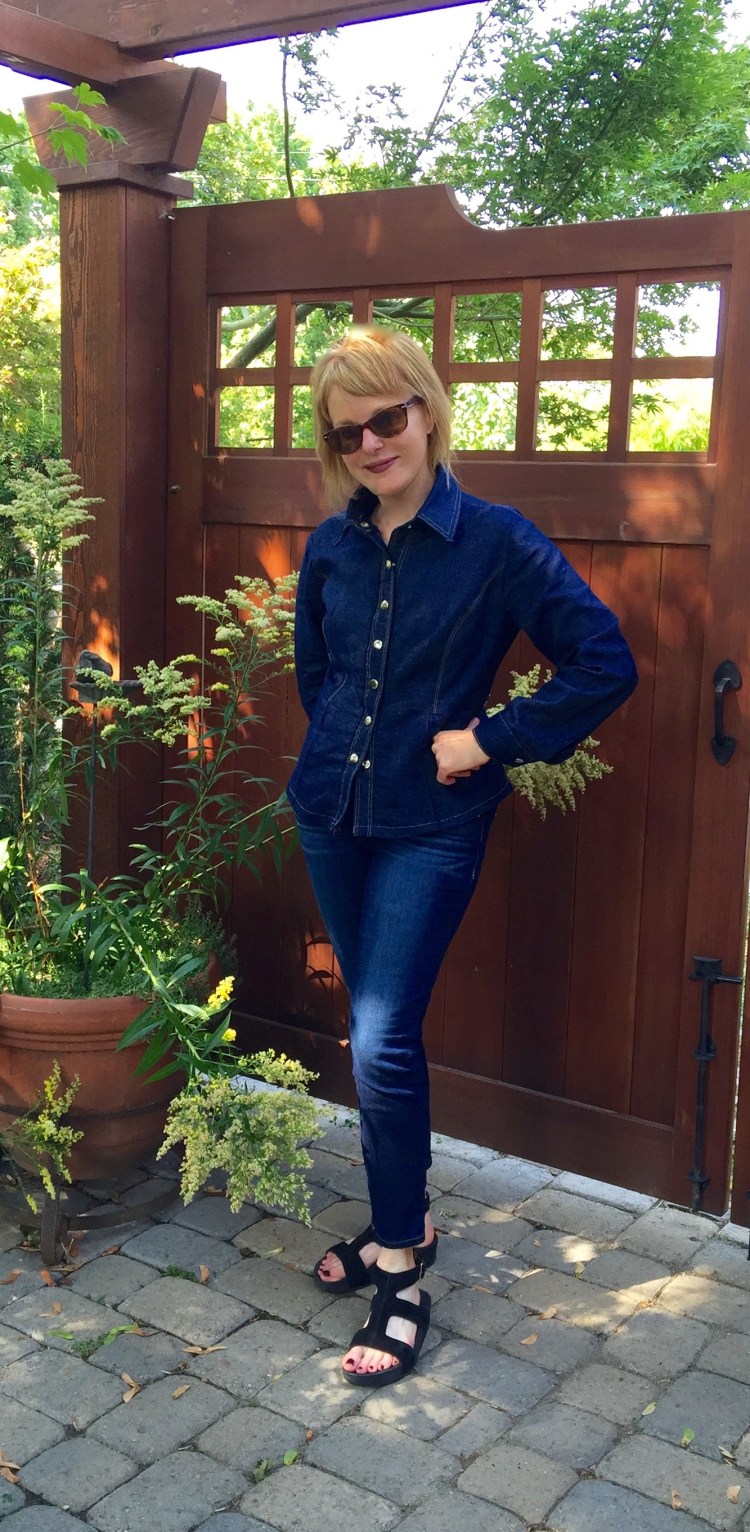
I’m such a fan of wearing classics – jeans, button-down shirts, tee shirts to name a few, so it’s always fun when you see an updated classic that brings something new to the game.

_100282034

When I saw this white Vince Camuto shirt in the Nordstrom catalog, I just had to make a DIY version. It’s a classic redefined with bell sleeves. I love this version except for one thing. The Vince sleeves are a bit too long for me. They’d end up in my soup. So my DIY sleeves are a little shorter.IMG_5635

For the shirt, I used a tried and true pattern, Butterick 5526 (made here) and modified the sleeves. This shirt is one of my favorites because it has princess seams and fits well. 5526

I used a linen/cotton blend from Fabric Depot. It has just the right amount of body to support my bell sleeves. To make the bell, I used the bell off of another pattern, Butterick 6456 (made here). It was just my luck that the top of the bell sleeve on that pattern fit the shirt sleeve of B5526 perfectly! If it hadn’t, I would have tapered it slightly to make it fit.

IMG_5691 My jeans were inspired by the Nordstrom catalog too. I used the  Jalie Jeans pattern for my DIY version, and used stretch denim from Modern Domestic, one of the awesome fabric stores here in Portland. This is my second pair of Jalie’s so they went together without too much struggle. I did forget how to do the front pockets though. So I referred to a great tutorial on this blog, Jillie Be Joyful. It was so helpful! I kept the design on back pocket pretty simple this time.

IMG_5722 2To make the jeans straight legged, I tapered the pattern’s legs by using a ready to wear pair that I love to guide me. For a little variety, I added some of the raw jeans salvage to the hem as a border. It’s a popular look in ready to wear so I couldn’t resist giving it a try.

I like the fit of these jeans, but I’m a bit frustrated with the knees. As I took these photos, wrinkles started to appear. Grrr. I might make a pair of legging jeans next (maybe Mimi G’s version?) to see if that works better in the knees.

IMG_5674

DIY jeans are fun when you’re a top stitching maniac like me. I’m determined to get a pair with perfect fit though, so I’m considering ‘rubbing’ a favorite RTW pair to copy them. Have any of you ever tried that? Does it work? How about legging jeans? Do you have a favorite pattern?

Happy Spring sewing and thanks for stopping by!

A Moto Jacket, part of a..capsule wardrobe?!?

IMG_5087

When Pattern Review announced their Wardrobe Sudoku Contest, I said, Never!  10 garments in two months that all have to coordinate with each other and shoes and accessories? Too mind-boggling for me. So I told myself I’d play along and use only fabric from my stash.

Well, the phrase, ‘never say never’ now clearly applies to me. I suppose my reluctance to join the fun had to do with the fact that I throw a hissy-fit whenever someone suggests I might sew with a plan (SWAP). I prefer to sew on a whim! But I’ve also secretly envied those who have used their sewing skills to achieve their dream capsule wardrobe too, which is basically what the Sudoku Challenge is all about.

sudoku_big

Here’s my completed Sudoku wardrobe.

PicMonkey Image

The grid shows ten combinations that work together, but the truth is, there are many, many more. The Mimi G jacket is one of the key pieces because it goes with everything, so it’s an accessory on the grid. I’ve wanted to sew this jacket for a long time. It’s a cool girl thing, you know? And this one is designed by Mimi G, no less! Definitely on my sewing bucket list, but it took this contest to get me to push through.

IMG_5109 2


I’ll wear it open, closed, over jeans, skirts and dresses. Here it is with other pieces in my Sudoku wardrobe.

The pattern; Simplicity 8174 is cute, but it’s not an easy make, to say the least. It’s a well designed pattern, but very complicated. It has a side zipper, back shoulder insets, epaulets, a waistband with carrier and belt detail, and inset zippered pockets, and it’s lined. There are lots of pattern pieces to manage, but once I got them labeled clearly, things started to work better. Here’s a shot of the back waistband, and the back shoulder panels. Cool details, eh?IMG_5094 2

I used brushed twill from my stash and cut my usual size, comparing my measurements to those on the envelope. It turned out to be perfect! Challenges….Construction took awhile, and required my full concentration. For me, the shoulder panels were the most frustrating part. They’re faced with another piece of fabric which gives them stiffness and makes them look cool when they’re top stitched. But, I found the instructions confusing. Mimi G’s video on U tube saved the day. In fact, I used it constantly through the process. It really helped, although I did find a few challenges even with that. She constantly says, do the same thing to the other side. That works for everything but the front bodice which has a right and left side.  In error, I applied the facings to both sides, but in reality, you have to wait on the left side until later in the process so that you can insert the front angled zipper correctly. So, I had a few stitches to rip out.

I did cheat on the belt carriers on the top epaulets and on the waist band. I could not get my thick fabric to turn, so I just winged it, making carriers without turning them.  My fingers were grateful.

This complex pattern had so many twists and turns, I had to turn off my new binge-watching obsession, Bloodline, so that I could concentrate. It was worth it though. I know this jacket will get worn alot, a key piece in my spring wardrobe.

Check out the contest over on Pattern Review.com for some great inspiration. I just love seeing how everyone puts together a wardrobe, and many are only using their stash like me. One of my favorite wardrobes is Elizabeth’s of Elizabeth Made This, so inspiring! Check out her fabulous makes on her blog.

My wardrobe is done and posted now,(my denim ruffled skirt is one item) and it feels good to have it behind me. Over the next few days, I’ll do some posts on my other makes, including two statement sleeve tops, a safari jacket, an alder shirt dress and a long blue cardigan. I stayed with blues and neutrals, which seems to be all I have in my stash these days!

Will I always sew with a plan? I doubt it….no new leaf being turned over here. How about you? Happy sewing and thanks for stopping by!!

A Ruffle Skirt and Cold Shoulder Top

IMG_3737 2
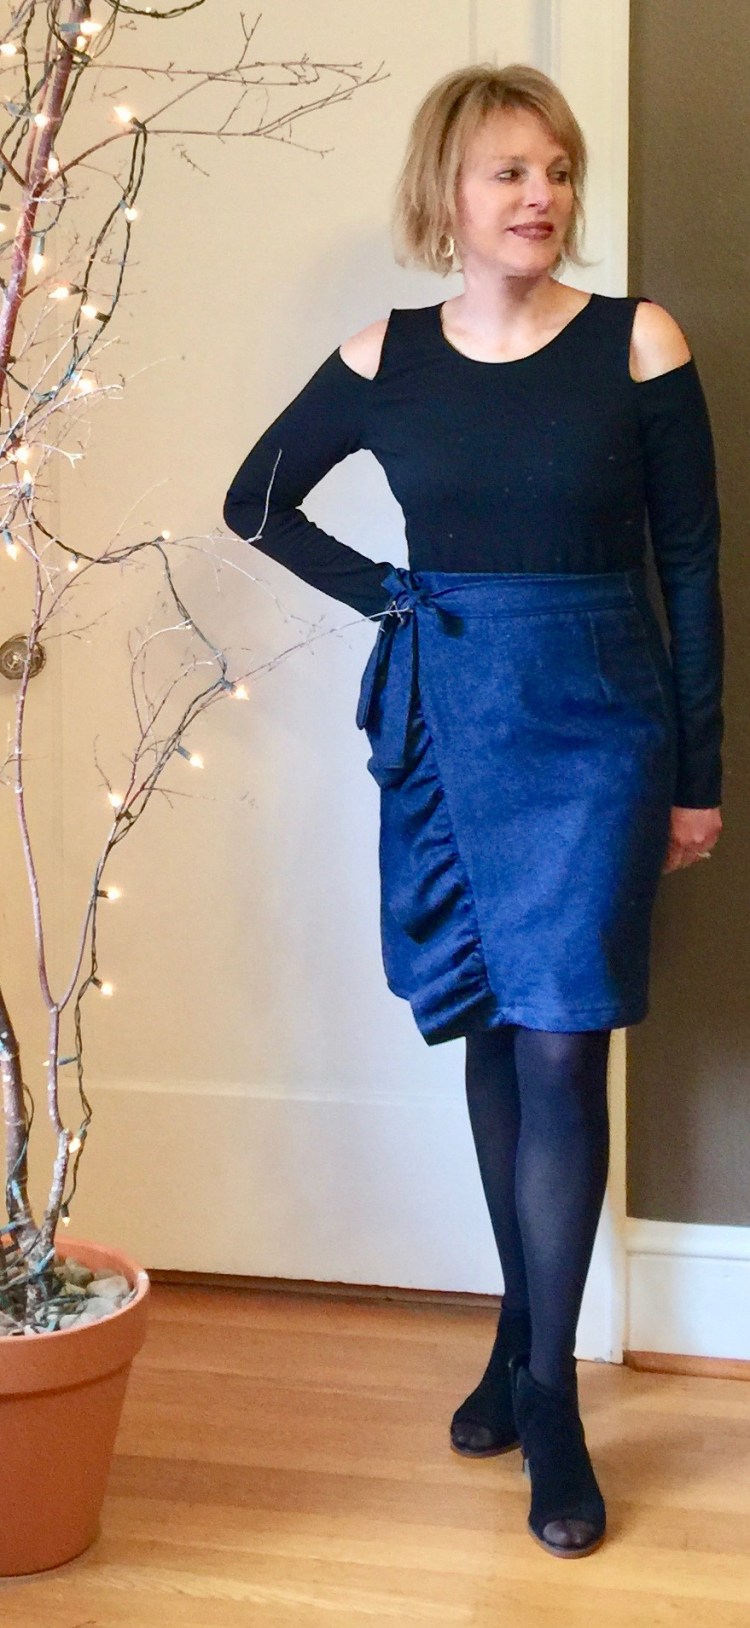
If you told me a year ago that I would be sewing a ruffle wrap skirt in denim for Spring, I would have laughed out loud. Ruffles have never been my thing. But if you show me enough of a trend, I am usually happy to hop on board!

Such is the case with this skirt.  I couldn’t resist modifying a simple skirt pattern to mimic some of the ready to wear ruffled gems I’ve been seeing around town.

IMG_3751In this photo, I am noticing that my bootie is unzipped. So ridiculous (!), but I had to include this shot because the ruffles on the front of the skirt are so easy to see. Honestly, this modification was easy. I measured the front edge of the right front of the skirt. I made my ruffle 1 and a half times that length (to allow for gathering), and 6″wide. I love how a simple modification can completely change the look of a pattern.

This skirt is Simplicity 1322. It’s meant to be a mock wrap with a front and back yoke and back zipper. But I made it into a real wrap skirt be eliminating the yokes and cutting a waistband and tie instead. I used  a lightweight denim; a cotton/linen blend. It’s been in my stash for so long, I have no idea where I bought it.

IMG_3771I’m happy with this skirt, but I’m not sure about the length. I might need to shorten it a couple of inches? Opinions? I won’t wear this with tights when it warms up around here and it might look more Springy if it’s a bit shorter?

This cold shoulder top (another trend I have happily embraced) is my first Style Arc Pattern. I wanted a basic top I could wear with anything, so I chose black ponte knit with moderate stretch and lots of body. This fabric was perfect to support the shape of the cut out shoulders.

IMG_3747I’d heard that Style Arc patterns are challenging because there are very few instructions. In the case of this pattern, the instructions were sparse (less than one page), but the instructions were enough to get the job done. There aren’t any facings to deal with on this top. The neck is finished with a turned edge as are the shoulder cut outs, so there just isn’t that much to say! It fit perfectly without modification, a rarity for me, so I’m fairly impressed with this pattern!


I’m more comfortable wearing ruffles when they’re paired with something that is simple and not so fussy, like this top. So, I imagine I’ll wear this skirt with simple knit tops most of the time.

IMG_3741I’m pretty happy with this make, and it was a stash buster too. What do you think of the ruffle trend? Thumbs up or down? And do you have any Style Arc Tried and True’s that I should try?

I hope it’s warm and sunny where you are, because it definitely isn’t here, which is not great for my Spring Sew-Jo. Nevertheless, there is a silver lining to the weather. Rain is a perfect excuse to ignore my yard and sew…. Happy sewing and thanks for stopping by!


DIY Jeans and a Burda Spring Top

IMG_1471

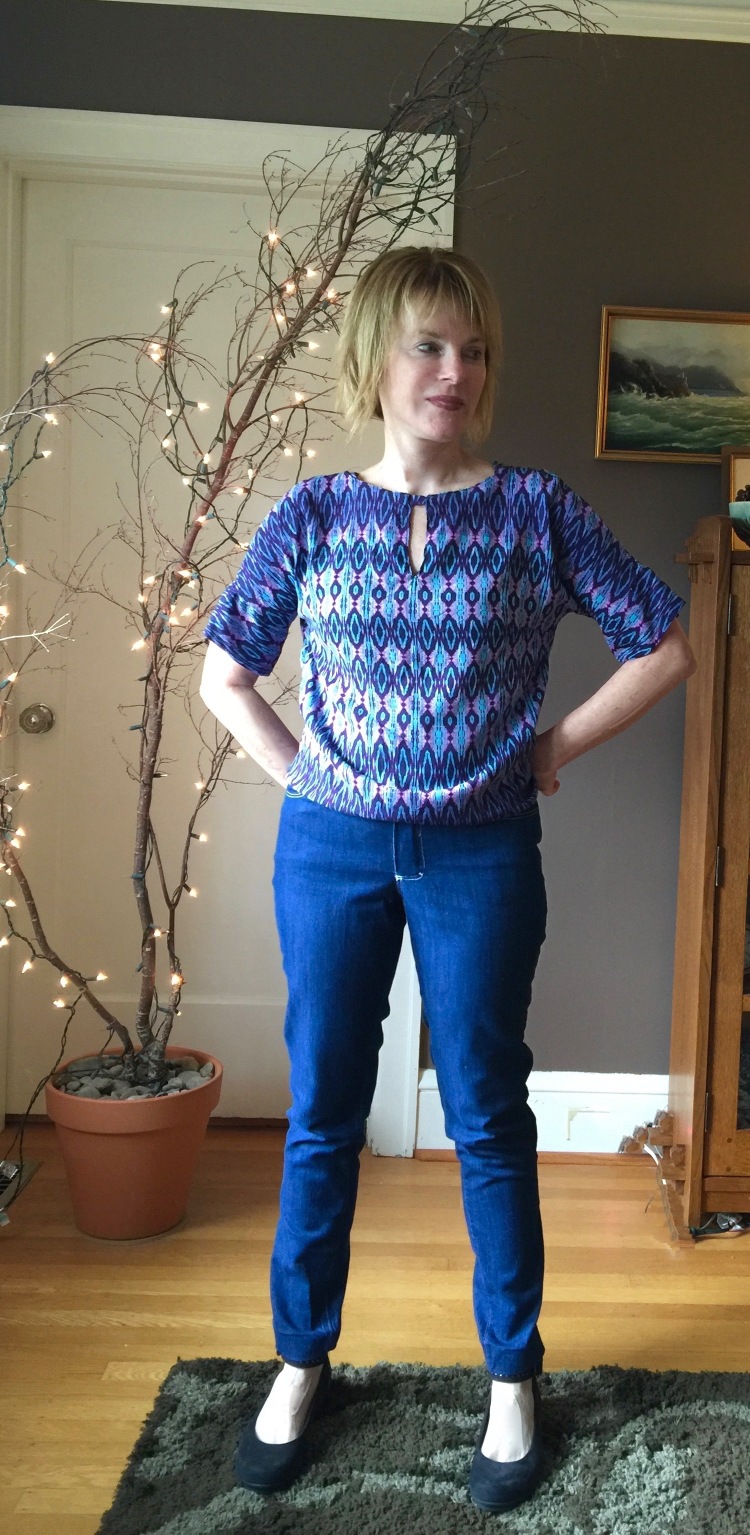
Hi all! Yes, I have FINALLY finished my first pair of jeans. My class at Modern Domestic here in Portland is over and I squeaked over the finish line with only five class minutes to spare! It feels sooooo good to have this project under my belt. I have wanted to sew a pair of jeans forever, but deep fear led to serious procrastination. But now I know. People, it is not that hard! Seriously, if I can, you can.  I’m already planning my next pair.

First, for those that don’t care about jeans, I’m going to give you a quick run down on this Burda top with a cool cutout in back.

IMG_1619

Pattern: Burda 114 from Issue 4/2016. Instructions were easy to follow (not always the case I have found with Burda) and you can make this top in about four hours or less. There’s also a dress length version. My fabric is a lightweight rayon that wanted to move around a lot, but after multiple tries, I did finally get the pattern pretty straight and centered on this wild print. Of course, the pattern doesn’t include seam allowances so don’t forget to add those :). One nice detail, the sleeves are short but finished with sleeve bands. I love the finished look this gives. It’s an easy pattern and the fit is very loose so I had no issues there.  I plan to make another one, maybe even a dress as I love anything with a bit of interest in the back.

The Jeans: There are so many tutorials in blog-land and on UTUBE that take you through the process of sewing jeans step by step so I will not bore you with that here. Since I’m generally impatient and easily frustrated, I took my first spin into Jeans Land under the Guidance of a Trained Professional, and I’m glad I did. My teacher was great and has made about 30 (?!?!) pairs of jeans. She has it down to a science and can whip out a pair in about four (4) hours. I think my pair took me only twelve (12) class hours. LOL

IMG_1445 (1)

Pattern: Jalie is the one we used in class because it has lots of sizes to play around with. The instructions are good, and the diagrams are clear. Yes, there are ALOT of steps, but they do a good job of holding your hand through them.I chose the low rise version and it was just right.


FIT: This is the part that scared me the most. The trick? Swedish Tracing Paper (I’m probably the last person to know about this great stuff?) It’s the same texture as interfacing so it doesn’t rip easily.  We traced our jeans pattern pieces onto it, then just basted those puppies together on the machine to check fit.

IMG_1622

Because this is durable paper, it doesn’t tear easily so you can try the paper jeans on then mark any necessary changes right onto the them before using them to cut out your jeans. HANDY! I hate making muslins (so much so that I never do which is not good) but this worked for me. BTW, the legs on this pattern are wide, so I straightened the cut of mine from the thighs down.

Interfacing: We used shape flex, which has a bit of give, a necessity on the waist of jeans. Tip…Cut it out with the grain (I forgot to do this first time through) so that you get a bit of stretch on the waistband when you need it.

IMG_1459

Topstitching: I used white thread (ARGH!!!). If I had to do it again, I would not. It made me crazy and my class got a good laugh as I took out things out over and over again. Pick a thread closer to your jeans color and save yourself some Grief. TIP; My Bernina isn’t fond of topstitching thread, so I used two spools of regular thread which could be pulled through the wider eye on a jeans needle. (don’t look too close at my white topstitching, LOL)

IMG_1451

Pockets: There are lots of templates on Pinterest for topstitching designs. Anything goes! I made up my own design and used a tracing pencil to mark it.

In summary, I like my jeans and will definitely make another pair using this pattern soon. The trickiest bits were the seams around the crouch and I didn’t love making bar tacks (not sure what that’s all about as it’s basically a tight zigzag stitch?), but I think those things will be much easier second time around. I also wish my knees weren’t so baggy. Not sure what to do about that?

What I will do differently next time. I will not topstitch with white. I will not topstitch with white. I will not topstitch with white. Ha, famous last words….

Happy sewing and thanks for stopping by!


PR Sewing Bee Round 1 – The Good News and The…Other News

IMG_3865 (1)

Some might say I’m crazy, but this year, I entered the Pattern Review Sewing Bee, a contest that contains four challenges, each a week in length. As a rule, I don’t usually get too excited about competitions, but I decided to try this one to push myself a bit. It’s time to try something new, I told myself, and to learn a few things in the process.  Sounds good, eh? Still, I waffled, until the specifics of Round 1 were announced. The first challenge was to make a fitted blouse. And wouldn’t you know, I already had fabric in my stash for another peplum blouse. Is that destiny or what?!?

For my contest entry, I used Butterick 6097, a fitted blouse with a peplum I made here and here. This time though, I wanted to try something different. Since my fabric was a linen that had a denim look, I decided to use french seams and double topstitching to play up to the ‘jeans’  vibe of the fabric.

IMG_4724

The french seams turned out to be essential as this linen blend unraveled every time I even looked at it. I overlocked in some places too. I thought sewing all the topstitching would drive me crazy, but once I got into it, I couldn’t stop. Really. I went a little berserk. I put those double yellow lines everywhere.

To fasten the front, I used snaps instead of buttons. For those who haven’t tried inserting snaps, it’s really quite fun! You get to pound them in with a hammer. The first time is a bit…well, scary, since a screw up leaves a hole in your fabric that’s too big to deny, but then, you relax right into it. The noise made my poor cat a little insane though.

IMG_4756

Once the shirt was done, I posted photos on the PR website, wrote my review and waited. And waited. If you haven’t taken a look at all of the gorgeous shirts entered in the contest, you really should. They were all amazing. I can’t imagine how the judges decided who would go forward to the next round. But, as luck would have it, I passed muster and am moving ahead. Yahoo! That’s the good news.

IMG_4657 (1)

The Other news? Well, here’s the description of Round 2’s challenge. To quote: “In this round you will add surface embellishments to existing fabric to make a piece of fabric (or fabrics) something truly unique. You will then make a garment out of the fabric(s) that you embellished. Because the embellishment process may take additional time, participants will have TEN days for this round.”

Say what?!?  My first reaction was, WTF! My second reaction was, ‘how much wine did I have the night I decided to enter this contest’? After a good night’s sleep and a nice long bike ride this morning though, I’ve settled into the idea of this challenge. Sure, I’ve never applied a surface embellishment (whatever that is LOL) to anything other than a bit of make up on my face, but hey. There’s got to be a first time for everything. And, with any luck, something like inspiration will strike in the next 24 hours (the clock is ticking here, brain!). I will swing into action and it will be fun. (Yes, this is a pep talk :))

A few of my favorite bloggers also entered the PR Sewing bee. You might want to check out their lovely makes – –  Saturday Night Stitch, Gray all Day, Thanks I made them, to name a few.

I hope you’re enjoying our lovely fall, and are finding inspiration everywhere you look. Happy sewing and thanks for stopping by!