First Make of 2020: Another Cocoon Coat

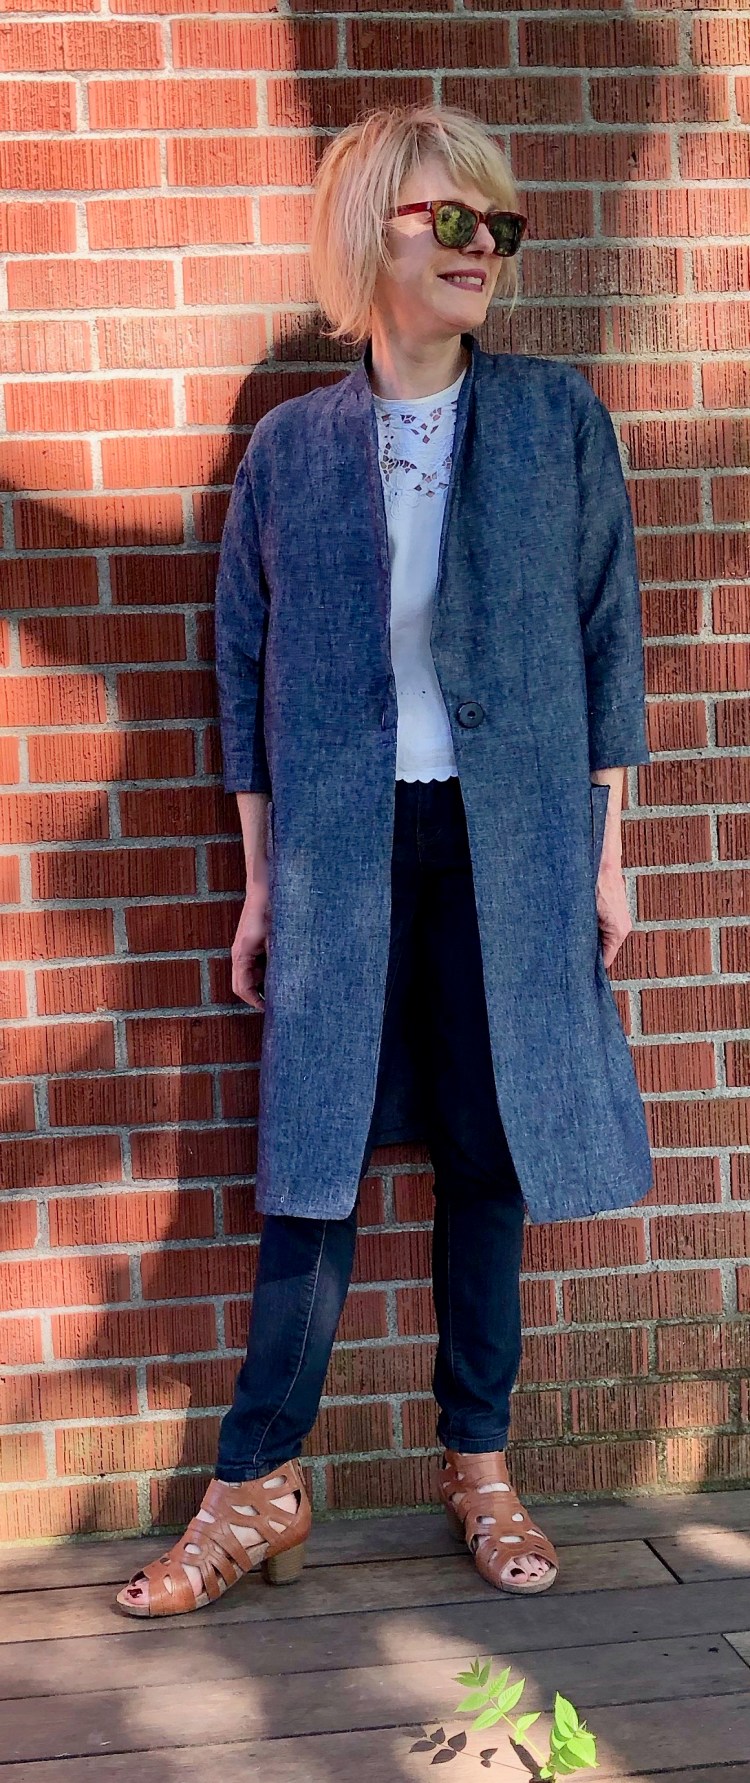
Happy New Year! This is my first make of 2020 and I am happy to say it was a success. It’s always good to start a new year with a project that you love.

I’ve made the Coccon Coat before (see it here), based on a version Sew Over It released as part of Lisa Comfort’s magazine. Now they’ve released it as a PDF pattern, available on their website (I received a free copy as a Pattern Insider). I loved the pattern so much the first time, I had to give it another go!

There are many things to love about this pattern. The cocoon shape of the coat is modern but classic. There are two piece sleeves and two pocket options. I chose the welt pockets, which can be challenging, but with their in-depth instructions made it seem easy.

Pattern Construction and Modifications: The Cocoon Coat is meant to be worn open, but that just isn’t an option that works very well in Oregon. So, I extended the front lapels by an inch and added hidden snaps to secure the opening. It changes the look of the lapel and collar a bit from the intended design, but I still like the look, and it makes it much more wearable for me. My coat is made of a good medium weight wool (Millendstore) and lined with silk from my stash.

Construction of this coat is a breeze. The lines are simple so there aren’t any tricky fit issues to resolve. I think the Cocoon coat would be a good option for someone who has never made a coat before.

2019 was a pretty successful sewing year for me with 39 blog posts:). It seems as though the number of sewing blogs has thinned out a bit in response to the growing presence of Instagram and the option to post quickly and often. I understand that, but I quite like the longer format of a blog post and the chance for a more detailed discussion. So, in 2020, I’ll continue to post here too. Thanks for reading and for keeping me company here.

Happy sewing and thanks for stopping by!

#sewjapaneseinjuly meets #tableclothrefashion

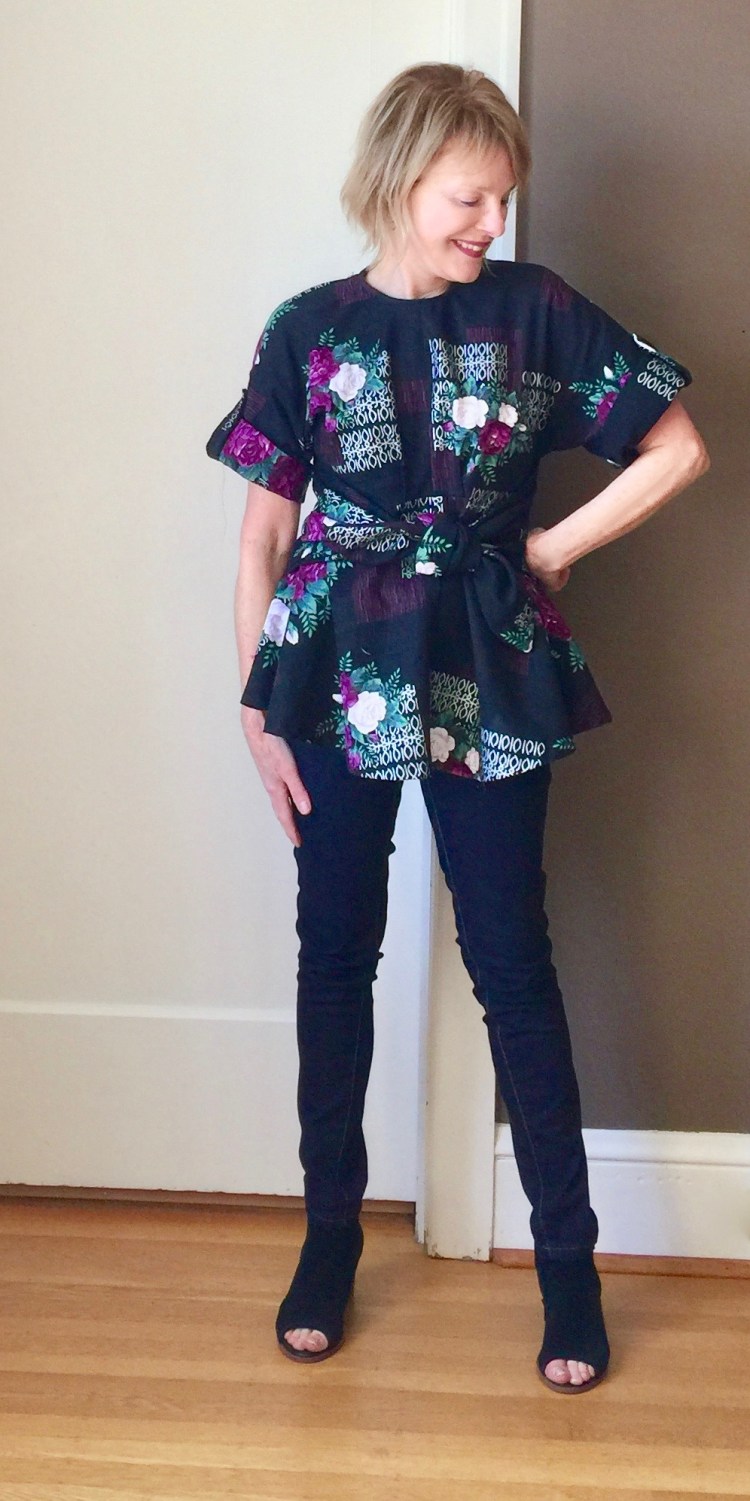
July was a big month for sewing challenges. There were so many on Instagram, I coudn’t keep track of them all. For me, two challenges stood out above the rest: #sewjapaneseinjuly and #scarfrefashion, which also includes tablecloths. Yes, my last post was about a tablecloth refashion, but as you all know, one thing always leads to another for me, and that project was so fun. I guess it isn’t too surprising that I had to do another revashion before July was done.

But first, my #japeneseinjuly make…

IMG_2306 This is the Summer Jacket from the Nano Iro sewing studio book.


Nano Iro is a watercolor artist who creates beautiful textiles. Her designs are transferred to cotton and linen, which are perfect for clothing. Not only does she create beautiful textiles but she is an author. On a recent shopping trip to Bolt fabric here in Portland, I discovered that her recent book has been translated to English! Of course, I couldn’t resist….this is the summer jacket from that book.

images

To me, Japanese sewing books are great because the styles are simpler and cleaner which allows the fabric to take center stage. That’s why, for this jacket, I reached deep into my stash for one of my favorite pieces of linen.


IMG_2318My linen has the tiniest bit of sheen which makes the denim color really pop.

IMG_2241I love the classic lines and the shawl collar of this summer jacket. The construction is basic but clever…the shawl collar is supported by a back neck facing that keeps the neck from rolling.  The pockets are patched onto the jacket, which gives it a utility jacket feel, so on-trend! It’s unlined so construction is a breeze. If you can set in a sleeve and attach a basic collar, you’re good to go! Use a medium weight fabric for this project with a bit of drape.  IMG_2305This style works with everything in my closet – – I suspect this jacket will be in my suitcase when I go to Italy this September!

On to the  tablecloth refashion…

IMG_2284This is the Basic Blouse, cut from a circular vintage table cloth purchased at an estate sale. I wish you could see from these photos that the cut detailing is embroidered with blue thread – – Love!!


Construction of this top was simple..The sleeves are cut into the bodice so there’s nothing much to it. The trick was in the layout….I had to place the cut detailing appropriately. I used the scalloped edge of the tablecloth as the hem and the center of the tablecloth as the yoke of the bodice. The sleeves are highlighted with more cut detailing, and after some tricky maneuvering I managed to get the sleeves to mirror each other. IMG_2287I added a back slit at the neckline and finished it with bias binding.

IMG_2246 2

I love my new outfit…and to think both pieces were inspired by sewing challenges! What challenges are you inspired by?

IMG_2190 Happy sewing and thanks for stopping by!


Finding Violet and Vogue 9363

IMG_4895I’ve really enjoyed the #sew happy color challenge on Instagram. It’s inspired so many lovely posts by members of our sewing community! The premise of the challenge (created by @katiekortmanart) has been to explore combining complimentary colors in new ways. For me, it’s been an opportunity to look at the colors I love and to think about ways I can have more of them in my wardrobe and life.

This last week of #sewhappycolor features violet and blue. Blue…well, you all know how much I love that color (LOL). My wardrobe includes so many blue options, I could wear the color every day if I wanted. I love violet too, but my stash of fabric and wardrobe doesn’t really reflect that at all.

IMG_4849

So I took a trip to the fabric store, intending to buy a beautiful piece of violet fabric. Instead, I ended up with a print. It’s the scale of this one that caught my eye. The areas of solid black provide negative space that really allows the large violet flowers to pop. I really love this print….Hmmm, need/want more like this…

IMG_4980

Vogue 9363 is my pattern, new this Spring. I can’t resist a pattern with a front tie!  (see my other tie makes here, here and here)

Construction: Although the fabric recommendations include rayon and crepe (lots of drape), I chose Japanese cotton because I wanted the top to look more structured. It was such a such a dream to work with. It shapes beautifully and is a joy to press. The pattern is well drafted too. I cut my usual size and have absolutely no complaints about the fit. The curve of the front bodice seam gives it a unique drape, and the sleeves are easy as they are cut as part of the front and back bodice. There’s a zipper in the back and the loose fit is shaped by front and back bodice darts as well as the wide belt. It’s an easy top to fit and wear.

Changes modifications: I made the short sleeve version of the top/tunic. The pattern suggests the sleeves be finished with a machine hem, but since the print has a bit of a vintage vibe to it, I decided to add a rolled cuff to the sleeve with a buttoned sleeve tab. I really like the finished look of the rolled cuff on this generous sleeve.

IMG_4981

This lovely print has reinforced my love for violet. I’m hoping there will be more of this happy color in my future. For more inspiration and information about complimentary colors, check out Katie’s blog…it’s a wealth of information very enthusiastically presented. #Sewhappycolor was such brilliant idea – – Thanks Katie! Have you all enjoyed #sewhappycolor too? Any new revelations?

Happy sewing and thanks for stopping by!

Jersey and Fall: Two Variations

There’s nothing like Fall to get the sew-jo going, is there? At this time of year, fabric choices are at their best for me. The color palattes tend to be richer and more intense, which works best with my personal color palatte and there are more knits to choose from too.

IMG_3117

This jersey knit is great to wear, but the print is a bit out of my comfort zone.  For one thing, it has alot (!!) of circles all over it, which makes layout a bit tricky around the chest, if you get my drift. And it’s sort of…busy? But I loved the colors, so in a fit of inspiration, I drove back to Fabric Depot and took the plunge. I’m glad I did, because this print goes so well with the long cardigan I made last Spring (here). This cardigan is not a closet orphan, BTW. I wear it all the time.

IMG_3313

The dress above is simply a lengthened version of this tunic, made from jersey. IMG_3210

This cotton jersey is so fabulous to wear! And I love this Art Gallery print (Fabric Depot).

I’m such a fan of tunics because they’re so easy to throw on with jeans or leggings. When I finished this tunic, I decided I needed another version, pronto, so I lengthened the pattern by 8 inches and made a dress . The pattern is a new favorite: New Look 6435.

I wasn’t attracted to it at first because I don’t like the way it’s made up on the envelope – I’m not a big fan of the print on the bottom/solid color on the top. Somehow though, the pattern came home with me….

The fit was great without any adjustments, always a plus for me. New Look runs a bit big, so I always cut the smallest size. The shoulders fit me perfectly, even though I’m on the narrow side. It’s a fairly loose fit, so there’s a bit of wiggle room, making this an easy-to fit style for most figures. I modified the sleeves on both my dress and tunic by adding a bell cuff.

IMG_3213

Although I love the dramatic look of a big bell cuff, I chose a smaller version here so that the sleeves would fit easily under a cardigan. To add the cuffs, I just cut a seven inch swath of fabric, as wide as 1 1/2 X the width of the sleeve. I seamed it to make a circle, gathered one edge, then inserted it into the sleeves, right sides together.

This was a fast and fun sew and I love a pattern than can have two identities as both a top and a dress. I think this pattern is a winner!

I love how statement sleeves change up a style. But I worry that they’ll go out of fashion quickly and my closet will feel dated. Hmmmm, what do you think of sewing to a trend? Trouble, or true love? Future plans – – I’ve been loving all the denim on the runways this fall, so I’m going to attempt a Maisa jacket (Named clothing) and a Helmi shirt dress to wear with it. Stay tuned! What’s in your queue?

Happy sewing, and thanks for stopping by!


Black and White Polka Dots…so french!

IMG_9046 2I’ve been obsessed with shirt dresses this Spring because as dresses go, they have so many advantages! For one thing, the front opening makes them ideal to let in air on a hot day.

IMG_8872 2Also, they’re so versatile. You can add a pair of leggings /pants under them for a completely different look.


IMG_8891 2

My latest shirt dress is made from a lightweight rayon that drapes beautifully. I fell hard for it…a black batik print with little white dots on it (Fabric Depot). The batik process makes the dots uneven in places which gives the look a bit of an edge. And what’s not to like about black and white polka dots? They’re so french!

IMG_9040

I used my new favorite shirt dress pattern for this make, McCall’s 7351, also made here. I’m a big fan of the design details of this pattern including the high low hem, the french darts and the forward shoulder seams. I made a few modifications to this version; 

  • I eliminated the collar and added a v-neck opening, then drafted a facing for the neck.
  • The sleeves are ruched with a three inch piece of elastic.
  • I made a long tie from the fabric that is long enough to wrap twice around my waist. I prefer to wear a single wrap tie belt most of the time with really long ends. But on a busy day, the long tie can get in the way. In that case, I can double wrap the belt which make the ends shorter.


I think I’ll wear this dress alot, as it’s easy to dress up or down. I know when the temperatures drop again, I can slip it over leggings too, even though I might get a few strange looks when I do. What about you? Are you a fan of shirt dresses over pants/leggings?

I’m back from my trip and what a fabulous trip it was!! I found beautiful fabric stores in Lisbon, Evora, Porto and Barcelona. If only I’d had a bigger suitcase (and budget, LOL). I purchased a few lovely fabrics, most of them in Barcelona; some japanese cotton,rayon challis, tencel, double sided gingham gauze, an embrodiered cotton, and a lovely plaid linen.

IMG_9062

Yes, I love to travel, but it is good to be back to my sewing machine. Happy sewing and thanks for stopping by!

McCall’s 7542 times two: Bubble and Tulip Sleeves

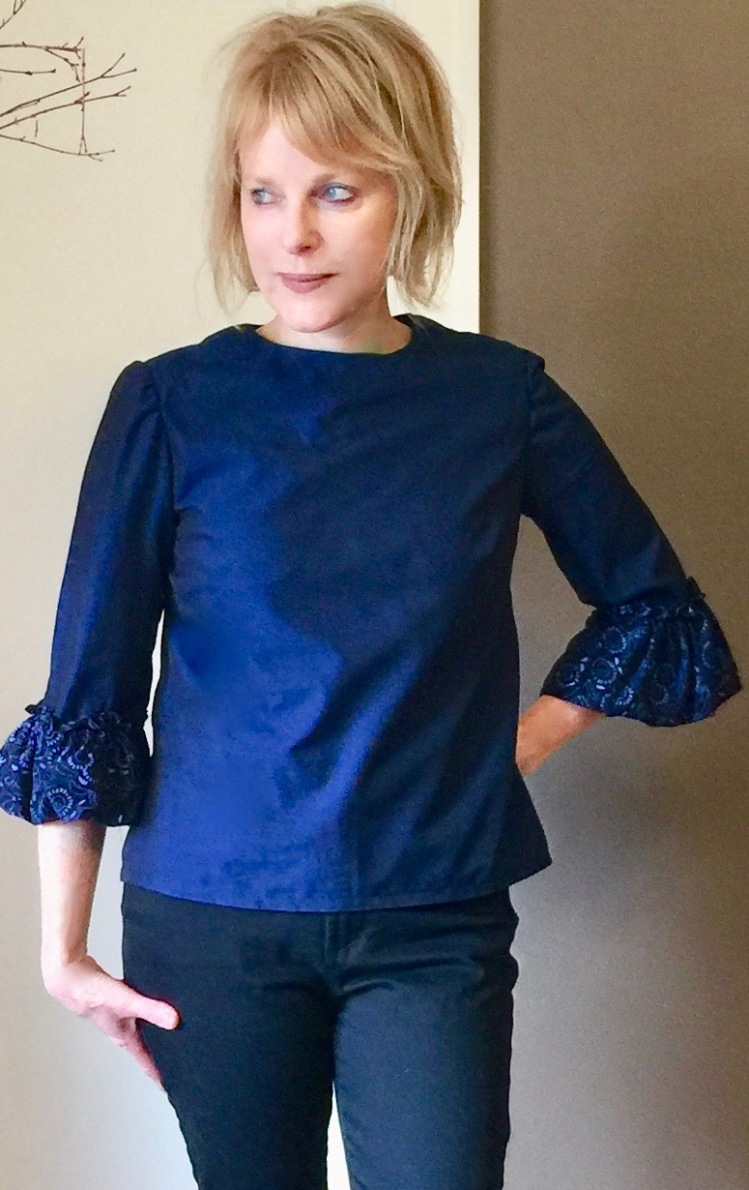
Hi all! I meant to post this earlier this week, but a horrid stomach virus took me out of action. According to my doc, it’s extremely contagious, but the good news? You can’t catch it by reading my blog :).

Spring hasn’t exactly sprung here, but I continue to sew as if it has! These two versions of McCalls 7542 are my attempt to lighten the mood in my closet by adding some more statement sleeves. It is one of the hottest trends around, probably because they are pretty fun to wear! You just have to believe warm weather is on it’s way when you’re wearing something this fun.

Bubble sleeves are how version one is described.IMG_5297Okay, I’d never heard this term, so I googled it, and was amazed at the varied interpretations of the word, ‘bubble’. The bubble look is made by simple gathering. After you’ve gathered the sleeve, it’s turned up to the outside to make the little ruffle where it attaches to the elbow of the main sleeve. It isn’t hard at all, and it’s a great way to take an ordinary sleeve to something special.


IMG_5324For fabric, I used a cotton shirting from Fabric Depot, and a remnant of rayon that I found on the sale rack there. Of course I love them both because they’re blue :), but they are also dreamy to sew with. The cotton shirting is crisp, but not too heavy, and feels as good as silk to wear! I wish I’d bought more of this!

My second version is with tulip sleeves.IMG_5386I made this version out of cotton double gauze from Fabric Depot and I love the way it drapes. The tulip sleeves are created by two pieces that overlap before you insert the sleeves into the bodice. It isn’t tricky or hard. These sleeves need to hang softly, so a cotton that was stiff or heavy probably wouldn’t work. I could imagine these sleeves would be fabulous out of rayon or silk or crepe. In fact, I just might have to try this again out of one of those yummy fabrics!

McCalls 7542 was easy and fun to sew.

The instructions are great, and I was happy that it fit without any modifications. I just made the size that I usually do in McCalls patterns. I made the longer version both times. I’m short waisted, but the cropped version was even a bit too short for me, and I wanted to be able to tuck them into my ruffled wrap skirt.  This pattern is a pretty quick sew because it doesn’t have a back zipper. The back opening is just finished with a hook/eye. I made it in a Saturday afternoon!

Both versions are part of my capsule wardrobe.


M7542 is going to be a TNT pattern for me, and I love how many options you get with this one purchase. I’m definitely a fan of the statement sleeve trend, so I wouldn’t be surprised if I don’t end up making all of these options!

My only ‘issue’ with these ‘makes’ is that on my second version, the tulip sleeves fall open all the time.  Even though the pattern instructions don’t tell you to stitch the two overlapping pieces of the sleeve together, I’m tempted. But then, the drape-y look might be ruined…What to do? Opinions welcome…

McCalls Pattern Company is having a #M7542 Contest to see who can make the best version of this pattern! How fun is that? There are even prizes. I just might have to enter:).

Happy sewing and thanks for stopping by!


Stash Buster: Simplicity 1377

IMG_3440

Hi all …As most of you know, one of my goals for 2017 is to reduce the size of my huge (re: out -of-control) stash. To that end, I’ve produced my own Little Black Book, a three-ring binder that holds my catalog of fabrics.

Yes, it’s a bargain basement binder, but it holds the key to my heart…a record of my glorious, but soon to be significantly reduced, supply of fabrics. My method of recording is simple…I just take a snip of the fabric, note the amount I have and whether or not the fabric is woven or stretch, and what ‘bin’ it’s located in (big plastic containers I purchased at Target). I track all fabric that is at least a yard or more. Smaller pieces make it into the notebook if they are unique (sequins, silk, feathers, LACE….!).

Some fabrics stay in their bin for a long time….the longer the stay, the more special they become! This particular fabric lived in my stash for a couple of years before my mind could find something suitable for its vibrant turquoise.

IMG_3455

There were two barriers to making this fabric into something special – – It’s a substantial flannel, the sort of fabric that doesn’t know what the word ‘drape’ means and — – my piece was a yard and a quarter (11/4); not enough for the usual flannel styles like a button up shirt  or a style with long sleeves. (Side note: My stash is overflowing with small pieces like this…remnants from other projects, or small pieces I picked up on sale..too little for most things, but too much to toss!)

Simplicity 1377 was the solution.

Simplicity-1377 (1)

This simple pattern is one I’ve used before. It has a front and back bodice, two neck facings, and short sleeves with drop shoulders. Because I’m only 5’4″, I don’t need much length in the bodice, so I was able to cut this top as well as a pocket and sleeve tabs from my small piece of fabric.

IMG_3381

Pattern Modifications (Simplicity 1377:

  • My version uses the neckline of view D and the sleeves of View E.
  • The short sleeves in view E have been lengthened by 2 inches (roll-up length).
  • I added self drafted button-up sleeve tabs.

IMG_3457

  • I self drafted a 5 inch square pocket to the bodice front and trimmed it with fringe from the fabric selvage.

IMG_3421

  • I used extra fabric to draft a tie belt.
  • I added a side vent to the hem line.

IMG_3476

March is a chilly month here in Oregon, and I know I’ll enjoy this warm flannel shirt with tee under it for weeks to come, and then in a few weeks (I hope) without a tee under it. Unfortunately, cozy is still an important word here, and I’ll be wearing my heavier clothes off and on for the next few months.

I love my new top!

IMG_3475

It’s comfy and colorful with an added bonus – – it was a Stash-Buster. I  got to pull another swatch out of my Little Black Book!

How do you manage your stash? Do you catalog it formally, or are you more relaxed about the process? And what about my fascination with collecting (hoarding) small pieces of fabric? What do you do with your one-yard wonders?

Happy Sewing and thanks for stopping by!


DIY Date Night Dress

img_2281

After I made a swing dress for the Day and Night Dress Challenge, I knew there would be another in my future. What is it that makes a swing dress so fun to wear?!? For me, it’s the way the skirt moves. It’s not quite ‘twirl-worthy’, but fun just the same.

This dress is another attempt to fill in a hole in my wardrobe. The ‘dress up’ category is woefully lacking. So, now I have another ‘date night’ outfit and I used up some of my stash too! This fabric is so yummy; a black ponte knit that’s embellished with a  silvery rose lace pattern. I knew it was destined to be used in a garment that had simple lines so that the interesting fabric could take center stage.

img_2265

I do like to combine laces and patterns and textures from time to time just for the fun of it, so I enjoyed mixing and matching laces here. I used a very airy lace from my stash for the yoke and sleeves, then a silver embroaidered lace for one of the contrasting yoke bands. I also added a yoke band of solid velvet to add some contrast to all of the patterns and textures in the lace.

img_2279

This dress is a mash-up of a couple of different patterns, Vogue 8817 for the yoke and contrasting yoke bands, and Vogue 8952 (view B) for the swingy bodice. The reason I used two patterns is that I know that the bodice of Vogue 8817 has too much volume for my frame, so I used the bodice of 8952 to draft my a-line bodice.

I did a bit of the high-low thing on the hem to give it a bit more swing. I also lined the bodice with stretch satin so that it won’t cling to my legs. For even more contrast, I made very narrow velvet cuffs for the sleeves.

img_2249

I love the fun, flirty shape of this dress. It isn’t too serious, if you know what I mean. Lots of party dresses are a bit too fussy for me, but this one is simple enough to let me be free to party!

I’ll say one thing though. That yellow cat better not think he can lay on it. Those claws would absolutely destroy it.

img_2214Okay, I might be finished with swing dresses for a bit now :). My only concern with this dress is that I might have overdone it here a bit with the lace mash-up. I’ll probably wear it all the time anyway!

I’ve been eyeing my closet, and evaluating. I realize now that some of my makes from a couple of years ago aren’t getting worn enough to justify the space they take in my closet. Some of the fabrics are lovely though, so I might give refashioning a try, although I’ve very little experience doing this. Have you refashioned older makes to keep that fabric in your life? How have you gone about that?

Happy sewing and thanks for stopping by!


A Tale of Two Toaster Sweaters

img_1663

Hi all – – My photos were taken indoors again because of this!img_1525-2Yes, that’s about a foot of snow. In Oregon, this much snow is an event! No one tries to drive and many of my neighbors just shut themselves in. Some folks freak out, and long for it all to end. But, I love this weather. It’s perfect for skiing around the neighborhood, baking cookies and sewing Toaster Sweaters.img_1768-2The Sew House Seven Toaster Sweater pattern comes with two versions,

110

Version #1 screamed color blocking to me. The sleeve bands, collar and lower band are great details that make using contrasting fabrics so simple.

img_1652 I cut the sleeves from leftover ponte from my day dress (Day and Night Dress challenge) as well as the collar and hem band. It’s my plan this year to use leftover fabric right away.The bodice was cut from a remnant I picked up at Fabric Depot, a cozy thick cotton knit.

Version #1 went together nicely. The cropped  length is just about right for me, but I’m only 5’4″. If you’re taller, you might want to add a few inches in the length. I made one modification to the pattern. I shortened the collar by 1. I’m really glad I did because otherwise, that collar would have hit me at the chin which would have annoyed me to no end.

img_1704It’s a pretty easy sew and the instructions are great. My ponte knit had very little stretch though, and the pattern calls for 20% stretch. Next time I make it (and there will be a next time…), I’ll use a knit with a bit more give. That way the bottom band won’t be quite so snug. I love this cozy look, and can imagine making it again out of a furry knit, like the one on the pattern envelope.

Version #2 went together in less than two hours…(almost) instant gratification! The sweater knit came from the Mill End Store.

img_1793

I like the boxy shape of this top, and the easy look of the high low hem. It’s pretty fitted through the shoulders and in the sleeves, so it doesn’t overwhelm my small frame like some boxy shapes do. I like how it widens gradually to the hem, giving it a swingy shape. It has a funnel neck, mitered side vents and a hi-low hem.

img_1792This is an easy sweater to sew. Honestly, you can do this while you’re binge watching Game of Thrones. The funnel neck is actually cut as part of the bodice, so there’s nothing too tricky there. One warning though; This top is the perfect length for me (a shrimp) so if you’re worried about the top being too cropped, you might want to add a few inches. Next time, I might make it a bit longer so that I can wear it over leggings.

I think this pattern is destined for tried and true status. I plan on making more – a longer version of #2 and a cozier knit for version #1. This is my first Sew House Seven pattern, and I must say, I was impressed. Have you tried their patterns before? Any recommendations?

In spite of the snow, my winter sewing is starting to taper off now, making room for Spring projects. How about you?

Happy Sewing and thanks for stopping by!


Butterick 5526- One pattern, three versions

There’s nothing like a sewing contest to inspire you to explore the long forgotten bins in your fabric stash! That’s where I found these cottons. They were perfect for my entry into Pattern Review’s ‘One Pattern, Many Ways’ contest. As I result, my stash is considerably smaller, and let me tell you, it feels great!

For my entry, I chose to make three versions of Butterick 5526, a button down shirt with variations. It’s a tried and true pattern for me (see it here).

In the past, making three frocks with button closures in four weeks would have driven me to drink. Why? Because I hate to sew buttons on by hand. Please, just shoot me instead.

Then, during a unplanned visit to Modern Domestic (Bernina and Fabric heaven, here in Portland), I discovered the Bernina button attachment (#18), a nifty gaget that does it for you in about five seconds (I am not exaggerating here). I begged Santa for it, and he delivered. Seriously, that attachment was a game changer. Bring on those buttons!

My shirt dress version was inspired by a Burberry shirt dress with a big bold plaid.

1057222564e2986c39fd3d6a449ab065119cacc8

No, I could not find that fabric anywhere, so I settled for this (Mill End Store).

img_0001To make my shirt into a dress, I just added seven inches to the length. Because the dress is very unstructured, I will wear it with a belt made from leftover pleather. I also added sleeve tabs so that I can roll up the sleeves when the weather is warm.

img_0196

Version two is a lacy top that I wanted to look a bit ‘boho’.

img_9921To make the top look less tailored and more relaxed, I eliminated the collar and cuffs, and added lace sleeves and trim. To add the lace to the bottom of the shirt, I cropped it at the waist, then added a swath of left over lace to the bottom, hemmed with a machine stitch.

img_9933-2

The fabric is embroidered linen (such a rare find around here), and it is so soft and comfortable to wear. I’ll likely pair this shirt this winter with a long cardi-vest. The linen was very fussy, and I was glad I had a serger to finish the frayed edges of this fabric. My only complaint about this version of the shirt is the pocket placement. It’s a bit high for me?

img_9954

My ‘kite’ version is just a straight version of view C. Nothing too challenging here, except for the linear pattern of the kites. They made the fabric layout surprisingly difficult, but they are worth it. Of course,  I LOVE this fabric. So many shades of  BLUE, and it was a joy to work with. There’s nothing like a crisp, cool cotton to make your sewing machine sing.

img_9970

So, that’s my quota of button down shirts for the next year. Because I’ve been a good girl and sewn three projects from my fabric stash, don’t you think I deserve to go fabric shopping? So far, I’m satisfied with my new stash elimination policy – – I must sew two projects from my stash for every new fabric purchase. I’m determined to make a dent in it!

I hope you’ll pop on over to Pattern Review to see all of the great makes in the contest. It’s so fun to see how you can take one pattern and make it something new. Do you have a favorite sewing pattern that you use over and over again?

Happy sewing and thanks for stopping by!