The Challenge has a great twist this year. Rather than make two new dresses, the idea is to take a dress you’ve made but ignored, and make it more wearable by adding to the look. The challenge fit perfectly with my recent efforts to curate my wardrobe (inspired by the show, Tidying Up!). I’ve really been reviewing my me-mades in an attempt to figure out what works for me, and what doesn’t, a challenge I hope will illuminate my future me-made efforts.
My Basic Dress
Even though I used a lovely rayon knit to make this dress last year, I felt it was just too plain for me, and the color made me feel a bit like I belonged on the flight crew of a local airline, LOL! Yet, the rayon jersey is as comfortable to wear as silk, so I just couldn’t toss the dress. My first order of business for this challenge was to modify my original dress slightly, to give it more style by adding a ruffle to the sleeve, a design element I noticed in the Max Mara Spring line – – there are cool ruffles everywhere!
The pattern for this dress (McCalls 6886) is a simple one I’ve used many times before, so modifying it was really fun. To add the ruffle to the sleeve, I sewed a long, double-faced ruffle 1 and 1/2 times the length of the sleeve and three inches wide that I gathered with three rows of gathered stitching. To insert it on the sleeve, I first unpicked the sleeve from the bodice (since I’d already made the dress, LOL), and unpicked the sleeve seam itself so that I could lay the sleeve flat. From there, it was easy to sew on the ruffle, aligning it with the center of the shoulder, extending the ruffle to the wrist. Then, I re-sewed the sleeve seam, and inserted it into the bodice of the dress. The process was time-consuming, but the sewing was easy.
Once modified, the dress had more appeal to me, but it still didn’t feel that versatile. To work in my life, a dress work at the grocery store, at a business meeting, then to dinner with friends. So, to make this dress more functional, I added my favorite go-to accessory, a ‘topper’.
DAY LOOK: Adding some edge
For my day look, I used a Lisette pattern, Butterick 6169, a basic moto jacket pattern I know I’ll use again.
My fabric is a lightweight wool blend and I love the cozy feeling I get just looking at its fleece-like pile.
Construction was straightforward and the pattern fit without modification. Adding the zipper looks harder than it is, I’m pleased to say! This cropped jacket will be a favorite, I can tell as I can imagine how it will look with my ginger jeans, with skirts…with everything I own! I love how its funky animal print vibe gives a bit of an edge to my fussy-looking dress.
NIGHT LOOK: Adding BLING
To create my night look, I added another topper, a jacket with some sparkle (There are little sequins imbeded in the boucle. They’re hard to see in the photos.)
I used a long-favorite pattern of mine, Butterick 5569, a coat with a vintage vibe and a big wide collar (OOP but available on Etsy.)
I fell in love with this glitzy fabric without thinking much about how it would be to work with.
Wow – – It was a challenge and a half. This fabric unravels if you just look at it wrong and it doesn’t move easily under the presser foot. So, I had to layer tissue paper over each seam before sewing to keep the fabric from bunching. It was a time-consuming effort, but I love the result. Not only that, but I learned how to sew with a special fabric, something that normally intimidates me. I’m so glad I decided to line this coat with silk. It will always feel special to wear it. I know this jacket is going to be in heavy rotation…It will work with dresses, skirts, even with my Ginger jeans!
I loved the Day/Night Dress Challenge this year, and I learned a lot from taking it on. From a wardrobe perspective, I’m definitely a girl who loves to wear a good ‘topper’! For me, a jacket/sweater/wrap can take a basic dress from Ho-hum to a keeper. I also learned how to sew with a challenging fabric (sequins!). I know I’ll never be intimidated by glitzy fabric again:).
Thank-you Elizabeth, for the invitation to join and for hosting the challenge. It’s an honor to be featured here with these talented sewing friends.
Keep reading here to find out the latest. Follow Elizabeth Made This on InstagramandFacebook.
Post a picture of your newly styled dress and extra pieces in your day look and your night look to Instagram to enter yourself. Don’t forget to tag @elizabethmadethis and use the #dayandnightdresschallenge.
Grab the graphic below and post it on your site and/or repost on Instagram:
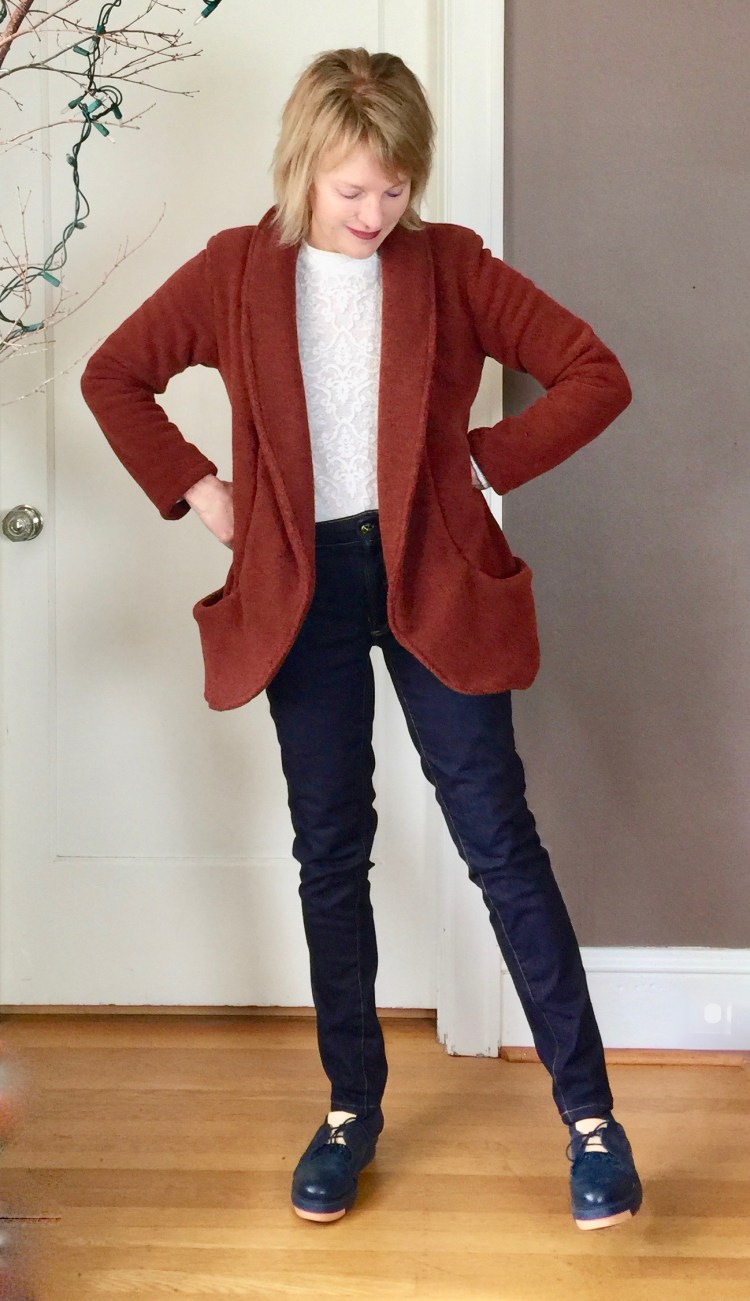
It’s June, and I would love to say that this make is out of season, but it’s still layering weather here in the Pacific Northwest. When summer does arrive, it usually lands pretty hard though, so I’ll be breaking into my stash of linen this month! But for now, I’m craving soft warm cozy layers for afternoon errands and evening walks.
I titled this post – – in two hours or less because that’s an accurate reflection of how long it took to make this fast and easy jacket from Butterick.
This project was easy in part because I used double faced knit (Mill End Store). LOVE IT!! The contrast hood and cuffs were created by the lovely lining on this knit.
They aren’t kidding when they say that Butterick 6394 is Fast and Easy! This pattern is simple and well-designed pattern; a good base for creativity and embellishment.
I really wanted my knit jacket to feel more like a anorak than a ordinary sweatshirt so I modified as follows:
I added deep four inch cuffs to the long sleeves so that they could be folded back.
I added four buttons to the front closure. It’s meant to just meet at the front, but, because this is a very loose fitting jacket, it was easy to overlap the front to make it a button up jacket.
I added a drawstring waist, using seam binding on the inside and black cording.
I added deep pockets to the side seam.
Even with those modifications, this was a quick sew, made possible in part by the fact that the drop shoulders and the easy collar-less hood.
I can guarantee, this jacket will be in heavy rotation during June, and again in the fall. This double faced knit is so great to sew and wear, I’ll always be on the lookout for more. Does anyone know a great source of lovely fabric like this?
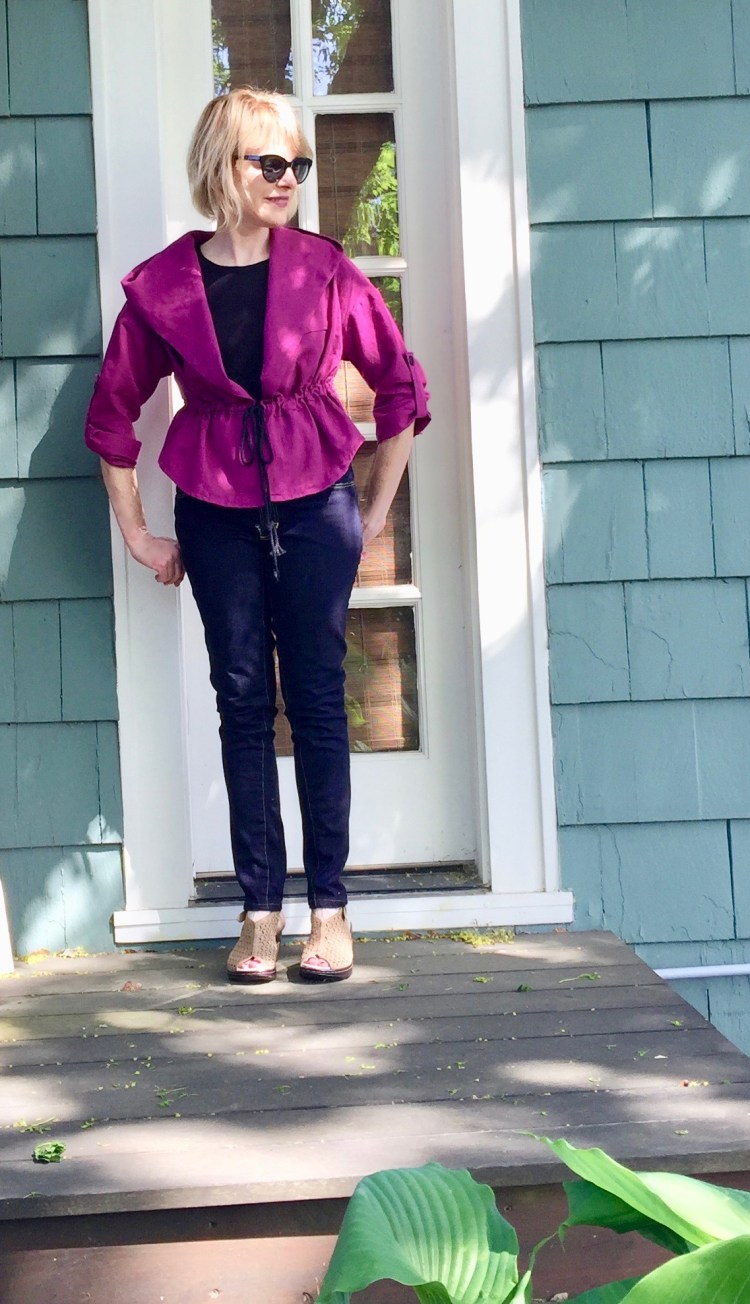
I have a new favorite color; fuschia. This fuschia linen jacket takes me back to my first handmade effort years ago, a Vogue Perry Ellis jacket pattern that I fussed over because it was so expensive! Everything about that project felt special to me, so I visited a specialty fabric store and splurged on three yards of beautiful fuschia linen. At that point in my life, I had an entry level job with a corresponding salary, so I was necessarily frugal and so nervous when I cut into that expensive fabric. Such a risk!! Even now, after years of sewing, that same quiver hits me when I cut into a favorite piece.
That was certainly the case with this lovely linen!
When I shop for linen at the fabric stores in Portland, earthy, natural colors are easy to come by, but it’s hard to find vibrant, rich brights! So, I was so thrilled when I found this linen on-line (Fabric.com), on sale at the end of last summer.
The pattern I chose for my casual jacket is one I’ve sewn before (here), McCalls 7333. I loved and wore that jacket so much, I was really eager to try the pattern again.
There are many reasons to love this design; the drawstring waist, the off shoulder look, the tab sleeves, but I’m crazy about this magnificent hood!
I’m not sure why I love hoods so much. Maybe it’s because I live in the Pacific Northwest where Rain Rules. Whatever the reason, I’m a fan of this one. I love the way the collar drapes nicely into the jacket lapel; so relaxed yet stylish.
About the Pattern: The instructions were easy to follow. I found the sizing straightforward, but generous (XS-XXL). The style is very loose and the collar gives weight at the neck, making it quite wide, so if you cut a size too large, it could easily slip off your shoulders. Since I have narrow shoulders, I took 5/8 from the shoulders. I also cut a size smaller than my measurements, and it’s still a good fit.
One nice detail with this pattern is the two-piece sleeves with button cuffs. They add a polished element that gives this loose jacket some structure. They wereeasy and simple to insert as are the buttoned cuffs.
It’s definitely linen season here (finally!) and I think this pattern was the perfect use for my cherished fabric. I’m wearing this jacket here with my Ginger jeans, which are in heavy rotation in my wardrobe! There’s another pair of those in my future too.
On my sewing table: I’ve just cut out a Blackwood cardigan, and a new springy top for Faye’s Tops that Pop challenge (lots of inspiration on her blog)! Look for those posts soon. I’m also planning an update on my RTW fast experience and will be participating with Me-Made-May.
I love linen, and am always happy to find a new style that works with it. I have another green piece in my stash that I’ve been considering for a bright Spring trench. To do so, I’d have to underline the coat, I think, since linen is crisp but maybe not quite crisp enough. Have any of you ever underlined linen?
After completing my two dresses for the Day/Night Dress Challenge, I needed something to cleanse my sewing palate. Usually, when I’m in that mood, I choose a simple pattern to complete. But this time, I decided to make a fun outfit including a new pair of Ginger Jeans. So in this post I’ll talk about the jacket first followed by the jeans.The jacket – – Yes, it’s March but it’s still cold and damp here. That’s why I decided to make my jacket from fleece, a first for me!
I love slouchy jackets with big pockets so I couldn’t resist Simplicity 8468, a jacket with curved seams, deep pockets and cozy lapels.
I made it from double sided fleece that I found at Mill End Store. Fleece is easy to sew too, if you know a few tricks.
You don’t have to finish your seams because fleece doesn’t unravel. I did choose to serge my seams though, but only because I like the finished look it gives to the inside of the jacket, but it isn’t a crime if you don’t.
To keep bulk down, trim your seams and clip your curves.
Topstitching can be tricky because the fabric is so thick. Walking foots are nice for this, although I managed without.
The fit of this jacket is loose so I cut the smallest size but still had room to spare. It was a quick fun sew (less than four hours with cutting time). The jacket is unlined and the fit comes from the curved seams so it’s a breeze to sew. I’m so happy with this make. It’s the sort of jacket I love to wear, casual but polished. I’m sure I’ll make this pattern again!
My first Ginger Jeans: Even though I’ve made several pairs of jeans before, I still feel some trepidation when I consider sewing another pair, especially when it means trying a new pattern. There’s the time committment involved for one thing (this pair took 6 hours), and even if you put the time in, there’s the very real possibility the darn things will not fit or feel or look the way you want. It’s the risk factor that kept me from realizing my dream of Ginger jeans for so long. But, Wow! It was worth the risk because I love this pattern. I’m so glad I took the leap!
Things I learned:
I find that a block of dedicated time is necessary to make a pair of jeans so I dedicated an entire Saturday to this project. If I take a break, I lose momentum and it’s hard to get my head back in the game at a later time.
I made View B (high rise version) and used a dark very stretchy denim (Modern Domestic) that isn’t too heavy.
If you can, use two sewing machines, one threaded for topstitching.
I use wonder tape (I should invest in the stuff) to hold things in place at tricky moments (pocket facings, waistband, zipper). Pins can fall out of denim at critical moments.
Baste side seams so that you can rip them out if the fit isn’t just right.
Interfacing is optional on the waist band. I left it out and I’m glad I did for comfort.
Heather (Closet Case pattern’s designer) suggests that you cut the legs out one at a time, rather than cut them on doubled fabric. That way you’re assured each leg is on the straight of the grain which prevents twisting once they’re sewn.
Pocket facings – – okay, I really struggled with this step (it was hell, honestly). It could be just me, but the instructions made no sense. I ripped the pocket facings out twice before I resorted to referring to my favorite pair of RTW jeans and mimicking their construction. I also referred to the on-line tutorial on the Closet Case Files website, which really helps.
Back pocket placement – -The marked placement seemed low to me, so I raised them as high as they could go.
Okay, maybe they aren’t perfect but they’re close enough and so comfortable! The legs bag a little which is likely because I left them a bit long as I’m always nervous they will shrink again down the road (Ha, yes, this is probably impossible, but I freak out over these sorts of things). There might be a bit of a twist on the left leg, or maybe I’m standing in an odd way :), but it’s not too bad. Otherwise, I love these jeans! I’m really pleased with the fit. I think I may like this pattern even better than the Jalie’s I made here. I think I’ll cut out another pair soon. I need to make another pair before I forget how I did the pocket facings, LOL!!
A new outfit that will be transitional for Spring, yay! What’s your go to jeans pattern? Have you ever made a jacket from fleece?
A love the four Helmis I made this year, so much so, they might make it into my Top Five Hits for 2017! But unfortunately, those shirts aren’t warm enought to wear alone at this time of year. So, my Helmis became the perfect excuse to sew a new jacket!
As you all know, I love anything with a peplum, so when I found Vogue 9214, it was instant love. It’s a knit jacket, which means it’s super comfortable to wear with a cute pleated peplum and an exposed zipper down the front.
Vogue 9214 is a Very Easy Vogue too, which means it’s fast and easy. The collarless neckline is finished with bias tape. It’s close fitting through the bust, so it’s a nice smooth layering piece. I love the exposed front zipper and the pleated peplum.
I was surprised and pleased at how easy this jacket was, and for me, the fit was spot on. I used a ponte knit from my stash in a cranberry red (a conveniently seasonal choice), that manages to look good with two of my Helmis. The exposed zipper was reallyt easy to insert. In fact, it seemed easier than the last standard insert zipper I tackled. The neckline is a breeze, because it’s just a bias tape finish. The peplum is created with four pleats, and as long as you have them marked well, it’s not hard at all. That means this is a very doable project at a very busy time of the year. I was able to cut and sew this in an afternoon.
It’s always great to find a quick easy pattern with a bit of style that you can whip up without a struggle! I’m inspired to make this again out of a sweater knit. All sorts of ideas are churning around in my head!
Another project I finished this week, a collection of glittery paper ornaments. If you follow me on Instagram, you’ve seen these, but they were so fun to make, I had to share them here too.
I’ve been trying to figure out how to do something similiar with fabric scraps, as I saw a ornament in a store that was fabulous. The paper version has accordian folds that are fanned out to make the circle. I just can’t figure out how to do the same thing in fabric so that the folds stay put. Thoughts? Maybe spray starch?