The Reveal: Day and Night Dress Challenge

img_1040-2

img_1209
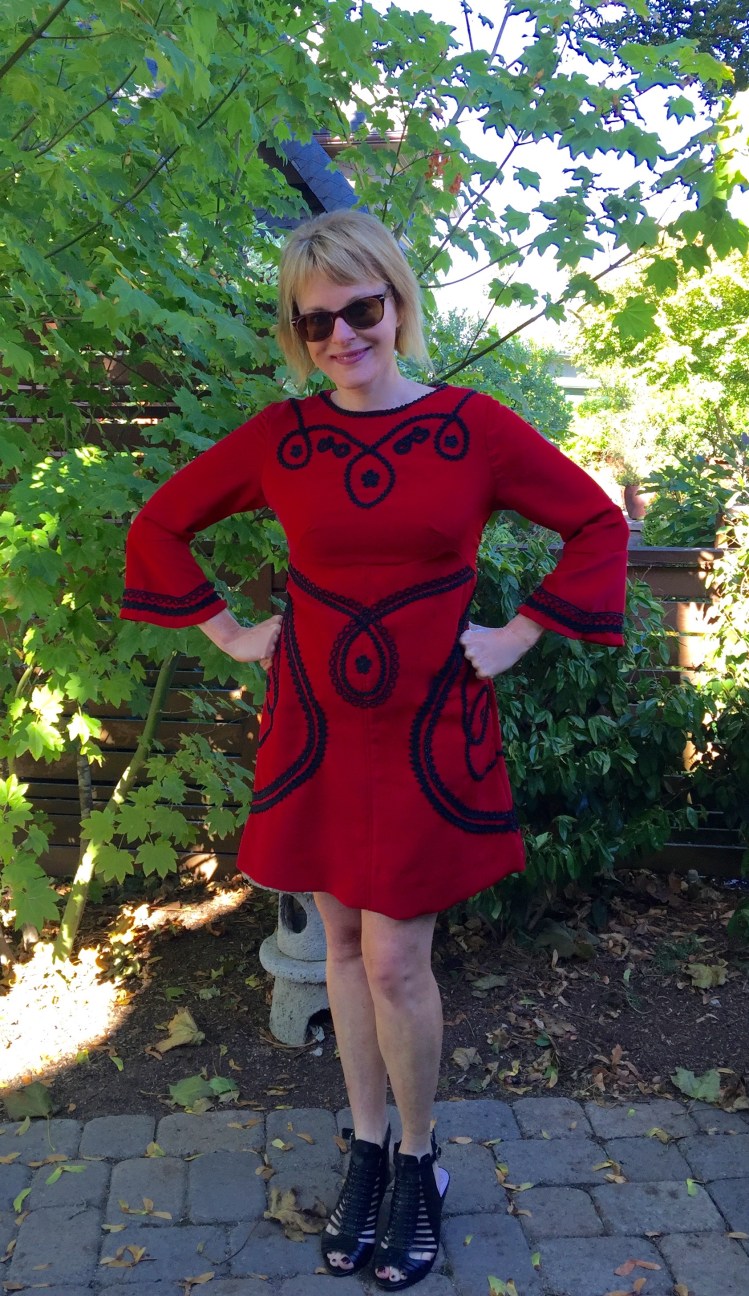
Hi all – – I’m pleased to be showing you my dresses as part of the Day and Night Dress Challenge Blog tour. Thanks to Elizabeth of Elizabeth Made This for this challenge. What better way to jump-start our sewing after the holidays! There’s a blog tour and a community challenge so check it out for some inspiration. You’ll find a list of the bloggers that are participating and links to their sites at the end of this post.

daynightgraphicdone680

My Day Dress: 

img_1004I’d wear dresses every day if I had enough of them! Dresses are perfect for everything a day can dish out: running errands, a business meeting, or (!!) happy hour. But to me, a day dress just has to have pockets. I feel weird if I don’t have somewhere to stick my hands! That’s why I picked McCalls’ 7464 for this make. It has curved pockets, a design element that mimics the line of the curved inset.The pockets were lined, but very easy to sew. The challenge was cutting and placing them on my plaid woven cotton. There’s nothing like a plaid matching challenge to test your determination!

img_1027I love how the curved insets add shape at the waist. I used a solid ponte knit for the insets and the sleeves so that it would provide a calming contrast to the busy plaid. The ponte knit, although stable, has a teeny bit of give, and since it’s placed at the waist, this means this dress is really comfy.

McCall’s 7464 is a pretty easy pattern to put together, yet it has a lot of fun detail.

 I modified the design only slightly. I added a short knit collar to give my dress a more casual look, and finished the sleeves with a narrow knit cuff too. I know I’ll wear this dress a lot.

My Night Look

img_1196I’m crazy about lace (as if y’all didn’t know that!), and when I saw this black lace at the Mill End Store, it was love at first sight. For the challenge, our night dress needed to be black, so I knew I’d use the lace as part of that look.  I decided to make a simple, unfussy dress so the lace could shine.

img_1184I paired the lace with black velvet, because, well…it’s velvet! To make the dress, I lengthened one of my favorite top patterns, Vogue 8952.

I like the Raglan sleeves on the top, and thought they’d look interesting in lace.img_1177 I love Swing-y dresses when I go out, because they have a dressy-vibe, without being fussy. To get the swing look of this dress, I extended the a-line of the top pattern by 8″. Then, I added an 8″ border of lace to the hem. I didn’t line the lace border, because I like the see through quality of the lace. With black hose/tights, I hope it’s not too revealing, just dramatic?  I know this LBD will get a lot of use.

img_0962

The Day and Night Dress Challenge blog tour is a great way to visit some new blogs and find some inspiration for your own makes. Thanks to Elizabeth for putting this together for us all to enjoy! There’s a community challenge too, with cool prizes and great sponsers. You can find the details on Elizabeth’s blog, Elizabeth Made This.

THE DAY AND NIGHT DRESS CHALLENGE BLOG TOUR SCHEDULE:

Sunday, Jan 8th: Elizabeth of Elizabeth Made This, Brittany of Brittany J Jones

Monday, Jan 9th:  Maria of How Good is That?,  Tonya of Sew So Petite

Tuesday, Jan 10th: Je’Tua of Robertswife, Meg of Cookin’ and Craftin’, Melanie of Its Melanie Darling

Wednesday, Jan 11th:  Linda of Elle Gee Makes, Tee of Maggie Elaine

Thursday, Jan 12th: Bianca of Thanks I Made Them, Daniela of On the Cutting Floor

Friday, Jan 13th:  Melissa of Mahlicadesigns, Rachel of Sew Redy, Renata of Runnningnstyle, Sonja of Sewing ala Carte

Saturday, Jan 14th: Doja of Elewa blog, Judith of Judith Dee’s World, Tanya of Mrs. Hughes

Check them out! If you decide to make a dress, I’d love to know so that I can feature your dress (s)  in a post here.

Happy sewing and thanks for stopping by!

A lacy designer-inspired top

IMG_6707

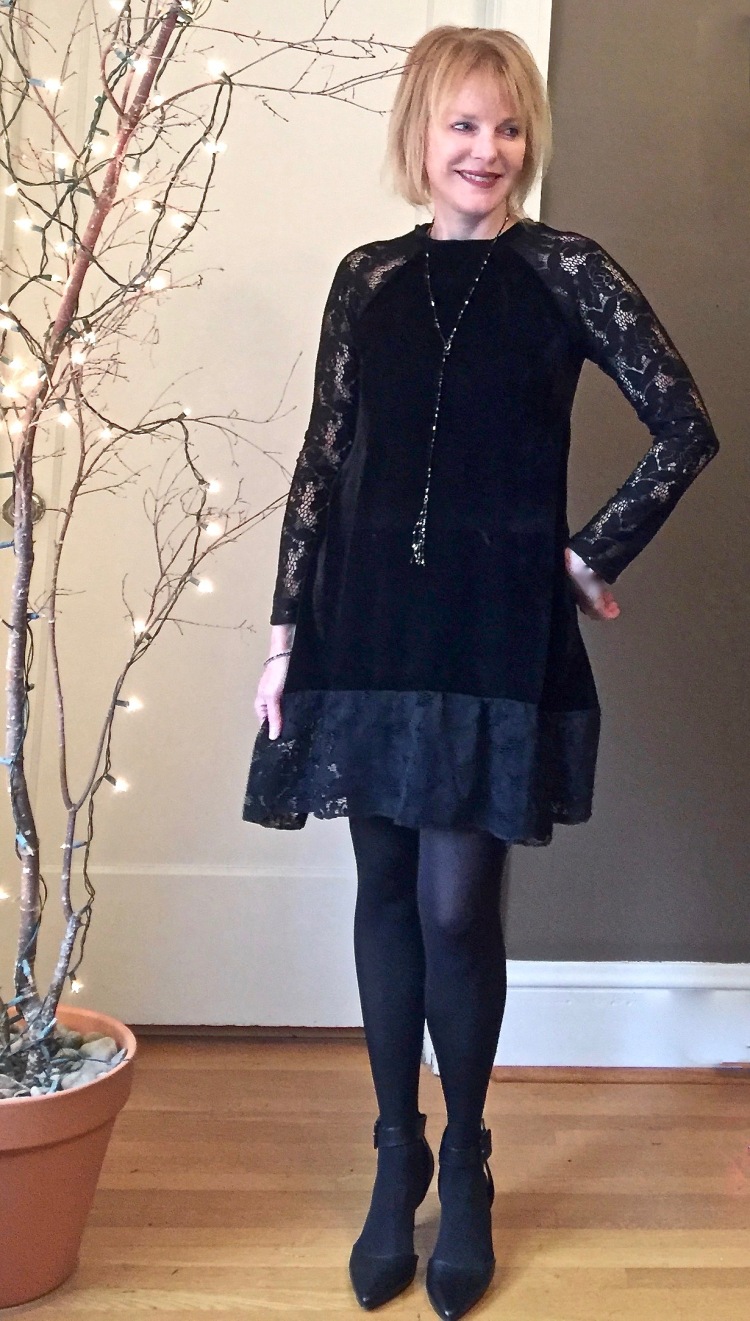
Well, it’s time to deck the halls and ourselves too! It’s December, a month so cold and gray, we’d probably all go crazy if we didn’t have a few parties to attend.Today, the party I’m thinking about is here, in the blogging world, Designin’ December, a sewing initiative created by Linda of ‘Nice Dress, Thanks I made it’. The idea is to find an inspiring frock from a Designer then create your own version.

My lacy top was inspired by a Alberta Ferretti design that I first noticed in a Vogue magazine article.

img-thing

When I saw the lace detailing, it was instant love. I had to have that look in my closet. After studying the photo a bit, I realized the elements of the basic sweater were simple. It was really the lace embellishment that made it unique.  So, I found some red and black herringbone sweater knit in my stash and decided to embellish it with black lace, a combination that would work well for holiday dressing.

IMG_6710

The pattern I used is McCalls 6614, a simple, close fitting pullover top with princess seams and a narrow hem, but any basic knit top pattern would do as well. Of course, I wanted to use this pattern because I’m obsessed with princess seams, but they aren’t critical to the design. I opted to color block the side panels and the neck band for contrast.

The biggest challenge? Finding the right lace – – it had to be wide enough to be the focal point of the sweater. Needless to say, I became obsessed. After driving all over town in the rain, I finally found the perfect lace at Fabric Depot. To add the embellishment to the top, I simply marked the bodice pieces and the sleeve pieces with tailor’s chalk, then basted the lace to the fabric at my markings. Then, I finished assembling the bodice, adding the side panels and inserting the raglan sleeves. The raw ends of the lace were hidden in the side and sleeve seams.

This is an easy pattern but the placement of the lace was challenging, and it was hard to keep the fabric under it smooth as I based it on. The process was a bit time consuming, but I like the end result. This top will be easy to dress up or down, and it’s cozy too, a plus at this time of year.

After studying Alberta Ferretti’s designs, I’ve become a fan.

The fabrics are rich looking (brocades and velvets, among them) and her color combinations are inspiring. If only we could find anything close to those brocades in the stores….but I digress :).

I can’t wait to see everyone’s creations during Designin’ December. The fashion runways are full of inspiration, especially at this time of year, so who knows? There may be another designer inspired ‘make’ from me before this month is done.

Happy sewing and thanks for stopping by!

Seeing Red!! An embellished version of Simplicity 3833

IMG_1136s This This Fall, there’s a new kid in town, the Little Red Dress. While the Little Black Dress and the Little White Dress have always been favorites of mine, there’s something fierce and unexpected about a red dress. For one thing, you can’t be a shrinking violet if you’re wearing red at a party. You will be noticed. You might feel a bit powerful, too.

I decided to make this dress from red because when I looked at my Fall wardrobe, only one word came to mind – Somber! Everything I saw was gray or black.  Eeek! Is there anything worse? I decided it was time to find a new favorite color. Then, I met this fabric. True love! It was the most perfect shade of red; not too orange or pink, but a true, cardinal red.

My lovely cardinal fabric became the back drop for embellishment, courtesy of the second round of the Pattern Review Sewing Bee. We were asked to make the fabric our own by using surface embellishments. It took me a few days to get my head around that one (clock ticking, ticking, ticking). But once I got used to the idea, the embellishments used by Italian designers, like Dolce and Gabbana came to mind. Inspired by their swoops and swirls, I decided to try my hand at it.

IMG_1438Because I suspected the trim and appliqué would be heavy, I decided to make my dress from a medium weight rayon (woven) with some body and weight. I’m glad I did that, because the finished dress is surprisingly heavy.  Just think what the royals have to deal with, given the size of their medals and jewels!
Dress Pattern: I used Simplicity 3833 for the bodice but added self drafted sleeves because I wanted them to be bell-shaped to match the a-line shape of the dress’s lower bodice. The embellishments on the sleeves are meant to match the themes on the dress bodice. I highly recommend this pattern. It’s really fun and easy to sew. The curved seam between the upper and lower bodice gives it a unique look, I think. I chose an a -line style because the skirt is wide, a nice blank slate for embellishments.

IMG_0928The embellishments:
  • Before constructing the dress, I made a template of the swirled pattern, so that the design would be consistent on both sides of the upper and lower bodice which I knew would be tricky.
  • Then, I transferred the finished designs to the right side of the fabric with basting stitches. Nightmare. I could have used one of those lovely invisible ink marking pens, but I discovered with a test swatch, that the ink didn’t disappear on this fabric. Since I knew I’d make mistakes, I didn’t dare use one.
  •  Following those markings, I laid the trim onto the fabric pieces, adjusting the curves as I went so that the swirls wouldn’t look forced.  This took forever as it had to be done in stages – – so that the curves of the swirls would be remain perfect and symmetrical. I hand basted each trim to the fabric to keep it from shifting, before using my machine to secure it with a appliqué stitch.
  •  I created the appliqué flowers and trim from lace, then appliquéd those embellishments to the center of the swirls.
The best part of this project, was deciding where to put the embellishments so that my figure would be (ahem) enhanced by the design.  I created the swirl design templates with the a-line shape of the dress in mind. The largest swirls were put at the center of the upper and lower bodice to create a focal point for the eye. The secondary swirls were placed at the side of the a-line skirt to draw attention to that shape, while also (hopefully) adding a slimming line to the design. The design of the front embellishments are carried through to the back of the dress in a continuous line.
IMG_1041
Part of the fun of this project was creating the design templates, then applying the design to the fabric in stages. This was a long process, but it was fun to do this in layers. Each time I added a new line of embellishment, the dress took on a new look, so the design sort of ‘evolved’.
IMG_1051
One challenge I didn’t expect was locating the right trim for the embellishments. To make the design have a bit of energy, the trims needed to be of varying weights and styles. I drove all over Portland, looking for trim and bought everything I saw. So, Portland-ites – – there’s nothing left for you!   If I had to do it again (with more time), I’d probably have ordered some interesting trims from other sources for more variety.
 Ultimately, this was a fun challenge and because of it, I now have a new special occassion dress. And sewing with a color as vibrant as Cardinal was definitely inspiring. I’m determined to add some color to my fall wardrobe, maybe some jade, a bit of gold, a touch of fuchsia? Lots of warm, vibrant colors.  I’m excited to start sewing with some lovely prints too!
How is your fall closet? Happy sewing and thanks for stopping by.

Me, Amal and Lace 

Blame it on Amal Clooney. I would not have attempted this dress if it wasn’t for her.  Not only is she a brilliant attorney with a enviable last name, look how well she wears Dolce and Gabbana.

23788b4d00000578-2847905-special_guests_anna_wintour_was_a_special_guest_at_amal_s_weddin-93_1416867431334

Here’s another great example. The lace detailing accentuates the shape of the dress and makes it pop. Yet, the dress doesn’t look too fussy or girly.

_KIM0469.1366x2048

Inspired, I decided to attempt a knock off.

I used New Look 6209, a sculpted sheath with contrasting side panels and yoke. When I saw the photo on the front of the pattern envelope, I wondered if you could  achieve the same sort of contrast with lace appliqué. I also liked the unusual sleeves, with the pleated sleeve caps.

DSC02714

Part of the charm of the Dolce and Gabbana dress for me, was that the lace was appliquéd over tweed. So, I used a stable Ponte knit of light gray for the dress, thinly striped with black. (purchased at Fabric Depot.)

I cut the dress out of the Ponte first, then sewed the front to the side panels and the yoke (also cut from lace). Once the front was assembled, I measured the length of each side panel seam to determine how much lace I’d need for the contrast.

That’s when I realized just how complex this task would be! The lace had to be placed just so along the side panel’s seams, or it would draw attention, (maybe even exaggerate!!!) the parts of my body that just didn’t need it.

To avoid that, I had to figure out exactly where to stick that lace, if you get my drift.

DSC02724

First, I tried to pin the lace on the front of the dress while I stood in front of a mirror.   Let’s just say, that was a Very Bad Idea and leave it at that.

After a bit of trial and error, I decided to pin the dress front to my dress form (seems so obvious now!) and adjust the lace placement until it was right. Then, I hand basted the lace to the fabric.

Now for the crafty bit.

I used my trusty Bernina to appliqué the lace on, tracing each of the curvy edges with stitches. At first, the patience required for this was a bit out of my wheel house. Not only that, but I realized a wrong move would mean that I’d have to rip out a lot of stitches (not my favorite way to spend an afternoon.) Panic!

But as we all know, “Do or do not. There is no try.”

I forced myself to persevere. Not only was it a Growth Moment, but I had way too much money invested in lace and fabric to give up the ship.

The appliqué stitching took a long, long time. Two old movies later though, it was done! The day brightened! I went on to finish that dress.

DSC02715

Oh, one other thing. I added a bit of lace on the bottom of the sleeves too, a six inch swath of lace sewn on to the bottom of the sleeve as a cuff.

DSC02713

The pattern was easy to assemble with very little adjusting. But when it was completed, I wasn’t sure I liked this dress, wasn’t sure lace was my thing. But after spending SO much time on it, I had to take it out for a spin. At a dressy evening event, it was kept up with the best of the LBD’s, so I’ll probably wear it again.

Have you tried to recreate a designer look? I’d love to hear about your ‘knock off’ efforts.