A Burda Sweater Dress you can make in a day

A simple pattern that feels stylish, and on-trend. There’s nothing better, eh?

The pattern for this sweater dress is one I’ve used before, traced patiently from a Burda style magazine pattern sheet. Once I’ve taken the time to trace a pattern, it’s always pleasing when I’m inspired to use it again!

This pattern is Burda 1/2019/111, destined to be a tried and true pattern for me. There are two things that attracted me to it ; the cocoon shape….

and the ‘audrey hepburn’ collar!

UNSPECIFIED – CIRCA 1955: Photo of Audrey Hepburn Photo by Michael Ochs Archives/Getty Images

In-seam pockets are so useful and stylish, don’t you think?

Construction Details: My fabric is a unusual textured knit I bought last year on sale at Joann’s. The knit is incredibly comfortable to wear, but I do have to admit, the stretch recovery is a bit on the relaxed side. As a result, the cocoon shape of this dress isn’t quite as pronounced as my last version (here.) Even though I’m a tad bit disappointed, the dress is fast becoming a favorite, worn over leggings, even jeans. Live and learn. I’ll be more careful when I choose knits for dresses in the future. Other than that, construction of this dress was pretty straightforward. I used my serger ( so easy) to sew and finish my seams. All in all, this dress only took about three hours!!

The Burda pattern magazine is so inspiring, but to be honest, I haven’t renewed my subscription for this year. The price tag is pretty hefty (in the States the price has increased to $100 per year), and I’d have to trace alot of patterns to make the montly investment pencil out. Instead, I’ve subscribed to the Burda on-line newsletter, (recently updated). I hope to get my monthly dose of Burda that way! We’ll see how long I can resist the urge to renew….

This weekend, I pulled a few pieces of linen and cotton from my fabric stash. I’m getting in the mood for Spring sewing. How about you?

Happy sewing and thanks for stopping by!

#sewjapaneseinjanuary times two!

You probably won’t be surprised to hear that I’ve been inspired by yet another Instagram sewing challenge! January in Oregon can be pretty dull and gray, so I’m often tempted to turn to Instagram for a bit of stimulation. Last month, the #sewjapaneseinjanuary challenge caught my eye. So, I dove into my pile of long neglected Japanese pattern books. Here’s one of my favorites.

Although some japanese pattern books are translated into English, wouldn’t you know, this favorite by Asuka Hamada is not!! No matter….we’re up the challenge, eh? Asuka Hamada’s designs are well worth the effort….chic without being too complicated.

Of course, when you sew from a Japanese pattern book, you have to trace the pattern…sigh. Well, here’s the good news. Now that I’ve done this a few times, I can honestly say, I actually enjoy the process. It’s sort of….meditative. For me, the concentration required to pattern trace is a lovely distraction! It’s like putting a jigsaw puzzle together…you have to be completely absorbed in the process or it just doesn’t happen. Here is the pattern I chose, a simple shirt with really great sleeves.

Since I don’t understand Japanese, the illustrations guided me.

Sewing from line drawings was simpler than it looks. It was freeing in a way and the process went faster too. Honestly, I may never read the pattern instructions again…LOL.

The shirt is slightly oversized which makes it great tucked into a pencil skirt or worn loose with jeans. My fabric is a lovely linen purchased at Bolt fabric. I enjoyed sewing this shirt so much, I had to make another version (minus the collar) from a linen cotton blend.

This Spring and summer, this shirt will be in heavy rotation with the striped linen skirt I made last summer.

Well, now that I know language isn’t really a barrier to trying new pattern books, who knows what will happen!? Maybe I’ll have to add another shelf in my sewing room for some new Japanese pattern books, eh? If you have any favorite pattern books…please share. I’m in the mood for a shopping spree.

Happy sewing and thanks for stopping by!

A New Gelato Top for the Holiday

Yes, it’s a busy time of year, but I managed to squeeze in a bit of sewing…a Gelato top! This lovely relaxed top might be my holiday attire of choice. I don’t know about you, but on Christmas, I prefer a day of relaxed fun…cooking and eating with friends and family, playing games, sitting on the floor by the fire, maybe even a holiday movie! Given my agenda for the day, relaxed dress isn’t optional, but required. This gelato top in bright poppy and teal will work perfectly.

This pattern is lovely for many reasons, but the detail that caught my eye was the button-up back.

I first saw this top on the blog, Girls in the Garden. Lori’s version was so cute, I had to try to make my own. The cut of the top, is relaxed and loose, but fun and flirty. The Gelato top is designed by Liesl and Company. It comes with two views – – a top like mine or a long shift -style dress.

I quite like both options, don’t you?

I made my version out of a beautiful rayon with lovely drape. Because of the oversized nature of the bodice on this top, you wouldn’t want to make it from a stiff fabric.

Construction: The button back detail looks harder than it is. The tab for the buttons is made by folding the fabric twice and stitching. The toughest part is the buttons and button holes which I made with my machine. Fit was easy because it’s a loose fitting pattern. The neck is finished with bias binding…also quite easy! The top came together in three hours including pattern layout and cutting.

I love my new top and am so glad I squeezed a bit of sewing time into the holiday schedule.

Happy holidays and thanks for stopping by!

A Sierra Jacket in Forest Green

Whoa….It’s been awhile since I’ve posted!  My mother-in-law died recently and it’s been a sad, low energy time for me. I drifted into a space where I had very little time or mental space to create. The experience of being away from sewing deepened my appreciation of it though. I’m so happy to be back with a new make, the Sierra Jacket from Closet Case Patterns. 

The design of this unlined jacket has such a cool ‘french’ vibe to me. From what I understand, Heather of Closet Case Patterns was inspired by a old canvas maker’s jacket she owned. The pattern includes two views, a long version that’s cinched at the waist and a shorter, boxier version with buttons down the front. 

Of course, an unlined jacket is the perfect opportunity to practice some nice seam finishings. I flat-felled most of the seams to keep the inside looking neat, then added some bias binding in a contrasting stripe to the front facing. It makes me so happy to look at the inside of this jacket!

The fabric I chose is a medium weight twill in deep forest green. It’s the perfect weight for days when you need a light layer. It’s pretty cold here now, so I’ve been wearing my Sierra like a blazer under my coat, but will use it as outwear in the Spring and Fall. 

Details I love…There’s a cool side tie and an extra pocket inside the front for carrying your cell phone or what ever. You can even put a pocket on the sleeve. I didn’t have enough fabric for that this time around, but will definitely add that next time. I love the two piece sleeves too, and the cinched waist. The shorter version has buttons and sleeve pockets. Trust me…I’ll make that one soon, maybe out of corduroy .

The fit of this jacket is oversized and a bit boxy so be forewarned. I like it that way, but will cut one size smaller next time. Construction steps are well explained as is the usual with this company.


I’m in love with this jacket in part because of the color… forest green. For some reason, it seems hard to find these days! The jacket is so fun to make and wear..I know I’ll make the shorter version soon!

Happy sewing and thanks for stopping by.

A New Look Knit Dress from Neglected Fabric

Do you follow #magamsewalong on Instagram? I find the monthly sew alongs created by @suestoney and @sewinginspain to be so inspirational. This month’s theme is Neglected. The idea is to create a project using somethng you’ve ignored for too long. This fabric has languished in my stash for years. I have no idea where I bought it or why!  Now, finally, the neglected has become a dress.

You can see my friend Mitchell had to participate in this photo shoot. If I want some attention from him, I just put on a pair of black tights, LOL.

Knit dresses are really my wardrobe go-to at this time of year. (see others here and here). You can throw them on them over a pair of cozy leggings and still manage to look polished. 

Speaking of neglected…I’ve been using so many Indie sewing patterns, I’ve neglected the new offerings from the Big 4 pattern companies. A few weeks ago I took the time to peruse their Fall offerings. New Look 6632 caught my eye because of the princess seams and empire waist, details you can’t always find in a knit pattern. Also, it has in-seam front pockets…perfection!

Of course, I couldn’t resist using a bit of contrasting fabric on the side panels. It always feels good to use a remnant I’ve saved from an old project!

Construction of this dress was pretty easy. There isn’t a zipper. Instead, the dress slips over your head. I modified the pattern and finished the neck with a contrasting knit band instead of the suggested bias binding. I cut a size ten based on the pattern envelope measurements, and the pattern fit welll without adjustment. 

Of course, I had to make the optional cowl neck that’s removable…so cozy! I love my new dress made from neglected fabric. Thanks to #magamsewalong for inspiring me!

Happy sewing and thanks for stopping by!

Sewing a Patchwork Shirt from Remnants

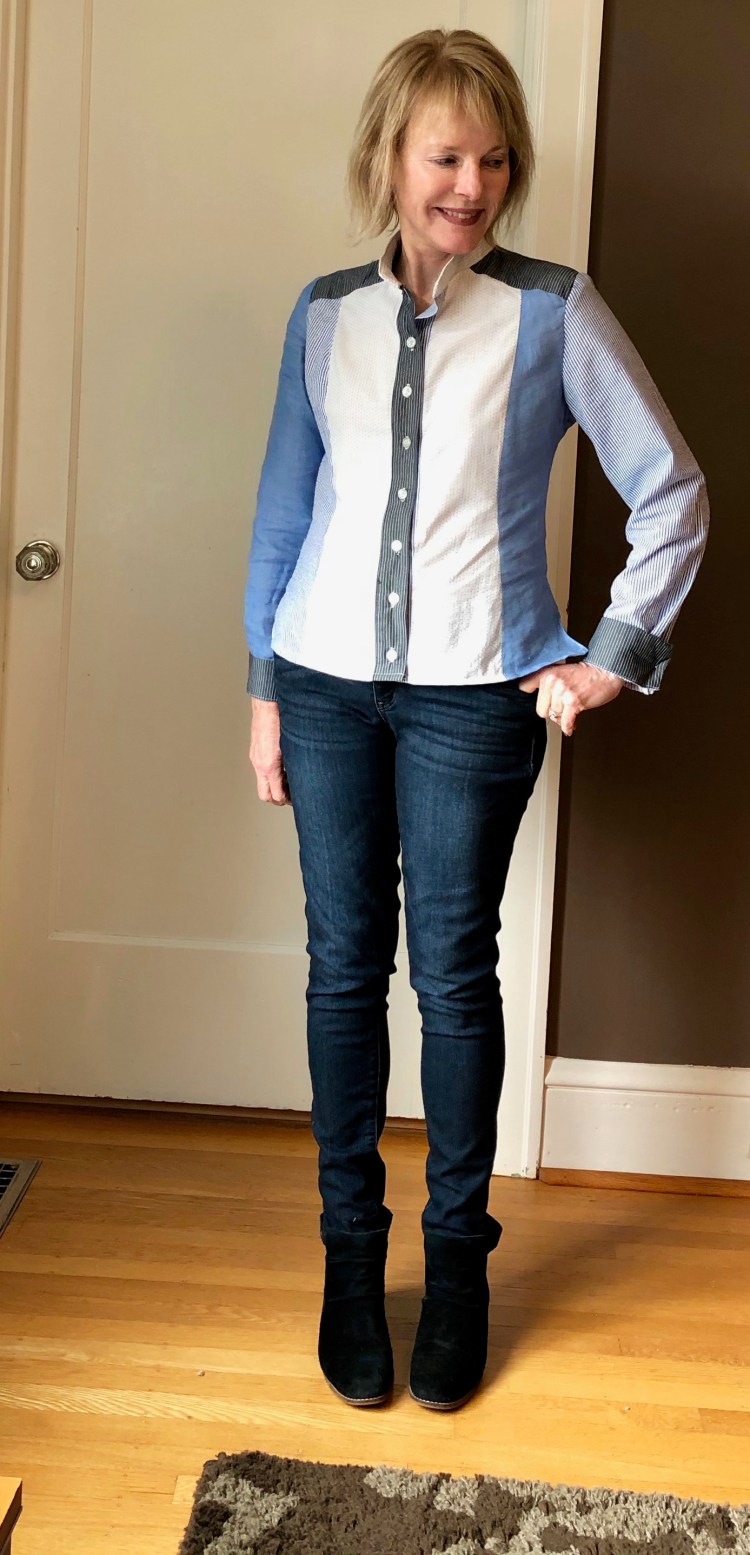
If you’ve been sewing for as long as I have, you’ve likely accumulated a large stash of fabric remnants. I find it hard/impossible to part with the lovely leftover bits when I’ve finished a project, so my remnant stash is HUGE, and overwhelming. Recently, I decided to sort and catalog the pieces. That’s when I made a lovely discovery… the colors and textures all work together.

So I decided to use the pieces to make this shirt.

Pattern: For my project, I used a tried and true shirt pattern so that fit would not be an issue. McCalls 6124 has a back yoke, two piece sleeves, a collar band and princess seams…so many opportunities to explore!

Process: Because I patchworked both the front and back, I was able to use three types of shirting and three colors of linen, about a quarter of a yard of each. Sewing was easy as I’ve made this shirt a time or two.

The best part of this project was figuring out fabric coordination and placement. In fact, I enjoyed it so much, I had a ‘moment’ when I imagined myself as a quilter. (Just what I need…a new reason to accumulate fabric, LOL!!)

I’m pleased with my shirt and am so glad my remnant stash has shrunk a bit. The good news is my shirt works well with the denim skirt I made a couple of years ago, so I know it will be worn again and again.

Of course, I’ll still be on the look out for new ways to use my lovely leftovers, so if you have ideas…please share!

Although I’ve had a bit of a challenge easing back into sewing ‘post vacation’, I’m definitely inspired by the Fall colors here in Oregon. Our cool weather has me thinking about sweaters and jackets and coats…ideas are brewing! How about you?

Happy sewing, and thanks for stopping by.

A Kalle Shirtdress Becomes a Coat

This week, I marked the beginning of Fall by completing my first cold-weather sewing project. My new denim walking coat was just the kind of project I needed to cope with ‘post vacation blues’. It’s a topstitching extravaganza, just the therapy I needed. Some sewists find topstitching to be stressful, but for me, the focus required is actually a relief that my brain craves when I’m down. 

My inspiration for this coat was a denim coat, designed by Madewell. I saw Cobie Smulders wear it on the already cancelled show, “Friends from College.” It’s a loose-fitting coat, made of mid-weight denim with a hidden placket and a tie belt. 

Although Colbie wore it as a dress on the show, I saw it as a long coat for Fall. Many of my knit dresses (here and here) are below my knees, so this coat will accomodate that length easily.

Pattern: To make the coat, I modified a tried and true pattern, the Kalle Shirt Dress. This pattern has so many options, I recommend it highly.

I chose this pattern because the fit is great, but loose and classic. To make it coat length, I added six inches to the bodice. To create the back vent, I eliminated the back pleat and added a seam instead, open at the bottom. Otherwise, I left the pattern pretty much as is.

 The orginal pattern has short sleeves, but I purchased the long sleeve extension from the Closet Case website. Instead of the classic french cuffs suggested by them, I eliminated the closure on the cuffs, and just folded them back.

Fabric: I used a medium weight denim from my stash for the with a darker denim for the collar, cuffs and pockets. The Kalle has one pocket, but I drafted three more. I used double topstitching on the pockets to make them pop.

I always love using a tried and true pattern in an unexpected way. As a coat, the Kalle does not disappoint! With this make, I’m officially accepting that Fall is here. It’s time to pull out the knits and wools from my stash and sew cozy

Happy sewing and thanks for stopping by!

Italy: My Favorite Linen Travel Dress

Hi All! I had a wonderful trip to Italy and am now easing back into real life. I’m still battling the effects of the 9 hour time difference, but last night I slept through the night so things are looking up!

Although the weather here in Portland is a bit on the cool side, I wanted to share the dress I wore the most in Italy – – a linen dress that I finished the day we left, LOL!!! As usual, I decided at the last minute to add a dress to my travel wardrobe.

These photos were taken in the Villa Cimbrone Garden in Ravello Italy, a breath taking town perched on a cliff high above the Amalfi coast.

This linen dress was my go-to garment on the trip because the weather was warmer than expected. I thought I’d wear this dress with a tee shirt under it to protect my upper arms from the sun, but it was hot so the tee shirt stayed in the suitcase. I chose to stand in the shade often and managed to avoid a sunburn.

Dress Construction – To sew this dress, I modified my favorite loose fitting top pattern, the Grainline Hadley. The cut of this top is so flattering on everyone I think, with two neck options to choose from.

For the dress bodice, I used the sleeveless Hadley without the back pleat and lengthened the Hadley bodice by 6 inches. This became the A-line shaped bodice of the dress, complete with high – low hem.

The back button placket is a non-functional add on, just for looks. To make it, I sewed together two long strips of fabric then added buttons. After the placket was in place, I focussed on drafting the skirt. I cut two huge rectangles, that were 1 and a half times the bottom width of the Hadley. These I sewed together, then gathered and attached them to the bottom of the bodice. That’s all there was to it.

Fabric – Linen was the perfect fabric for Italy. It made me comfortable no matter what the weather. Personally, I could care less about the wrinkles. For this dress, I used a solid blue linen from my stash, purchased last season at the Mill End Store. The striped linen is from Joann’s.

This dress is so fun to wear!

Swinging wasn’t in my vacation plans, but when you’re on the Amalfi coast, why not? I enjoyed wearing linen so much on my trip, I’m determined to find ways to sew with it year round! Any thoughts on this idea?

Sewing plans – As the travel fog lifts and I put away my summer clothes, I know I’ll be inspired to sew a few fall things. I hope there will be a new trench coat, maybe a short wool coat too so watch for those posts.

Happy sewing and thanks for stopping by!

Travel Mix and Match: Burda Culottes with Two Linen Tops

Hi All! In two weeks, I’ll be traveling to Italy, and there’s nothing like a deadline to get you motivated to sew, sew… SEW. Although I love to travel with dresses (this linen Burda will go with me) I’m going to stretch my options a bit by packing a few mix and match separates too.

IMG_2967.jpeg

Burda refers to this pattern as shorts, but I consider them to be culottes. I love the wide cut in the leg contrasted with the paper bag waist. This pattern was in the Burda magazine (07/2019 #107A) and there were only TWO pattern pieces to trace…Yahoo! Because I was going for the culotte look, I lengthened them by two inches. Cut from linen, I think they’ll be perfect for Italy’s soaring temperatures.

107_large.jpg

The paper bag waist is formed by pleats that are stitiched down at the waist. I decided to add a belt to make the waist more dramatic when I wear them with a shirt tucked in.  I also added in seam pockets – – honestly I can’t live without pockets!

IMG_2897.jpeg

I’m wearing the culottes with my new Cuff Top by the Assembly line. I love this pattern. It’s simple but unique with sleeves that are gathered at the cuff by wide elastic. Because the sleeves are cut as part of the bodice, it’s really pretty easy to put this top together. The design details are what make this top special to me…the front seam (flat felled and top-stitiched with a double needle) and the wide boat neck (also topstitiched with a double needle).  Because the front of this top is seamed, you could use contrasting fabric to great effect. I’m imagining another version in a stripe! This fabric is a lightweight gray linen, which should be perfect in the heat. 

My second travel top is also made from linen, New Look N6601. 

IMG_2816This wrap top looks much harder than it is to sew. The neck is pretty simple…faced with bias binding.  Luckily, I had enough fabric to make my own. If you’ve never made your own bias binding, I highly recommend it.  It’s really a easy way to make the inside of your garment special. If you’re curious, check out the many tutorials on U-tube. IMG_3066.jpeg

Fit can be a bit tricky for me with wrap tops, but this is drafted so well, I made a slight adjustment for narrowed shoulders and called it good.

I’m really pleased with these additions to my travel wardrobe…there’s nothing like some new pieces to really heighten your anticiaption of a trip!

I know linen wrinkles, but I’m determined to travel with it anyway. It’s perfect for hot weather, and I’ll pack a portable clothing steamer for a quick touch up when needed. I still plan to sew more items for the trip, but time is running out……fingers crossed that I persevere!!  Happy sewing and thanks for stopping by.


Making a Wiksten Haori from a Mid-Century Modern Curtain

This Wiksten Haori was once a curtain in someone’s house.

IMG_1847.jpegThe leaf design on this fabric is typical of the mid-century modern style. It was all about the exotic, so tropical themes were big. Vintage drapes can cost as much as $200 per panel on Ebay. One Saturday afternoon, I got lucky.  I found mine at a estate sale for $10.

Estate sales can be such a great place to find vintage fabric and notions. My interest in them grew after I participated in the  #tableclothrefashion challenge on Instagram. I made a couple of tops from vintage tablecloths (here and Here) and had so much fun, I started exploring other vintage fabrics as well. I do love taking something old and making it new. Now, I can’t pass by an estate sale without taking a look.

IMG_1743.jpegThere was only one drapery panel at the sale so I didn’t have alot of this fabric to work with. This drape wasn’t lined, which meant it was ready for my project right away. The trickiest part of the make was figuring out how to best place my pattern pieces to let the leaf design take center stage.

This is the second Wiksten Haori I’ve made (first is here) so this make was pretty easy for me. I do love how the pattern is drafted so that the jacket is reversible.

Kimono_Flat_Sketches

IMG_1719.jpegThis is the short verion of the Haori, lined with soft Chambray, the perfect fabric mate for my drapery barkcloth. Although I could reverse my Haori and wear it blue side out, I doubt I will – – I love the barkcloth side too much!

IMG_1820.jpegAs in my other version, this Haori has a lovely feel, in part because the barkcloth is soft but heavy.  That’s one of the reasons I love to wear this one so much. It feels substantial, but not too stiff. In my opinion, a medium weight fabric lined with a sleek lightweight fabric makes the perfect Haori.IMG_1847.jpeg I love the boxy shape of this jacket and the casual feel of the fabric. I know I’ll wear it again and again. Honestly, there’s a reason this is one of the most popular patterns around. It’s so fun to sew and wear. I can’t wait to make another!!  Now, if I could only find more vintage fabric….Sources anyone?

Happy sewing and thanks for stopping by!