Butterick 6378: Two tie neck tops

IMG_6452
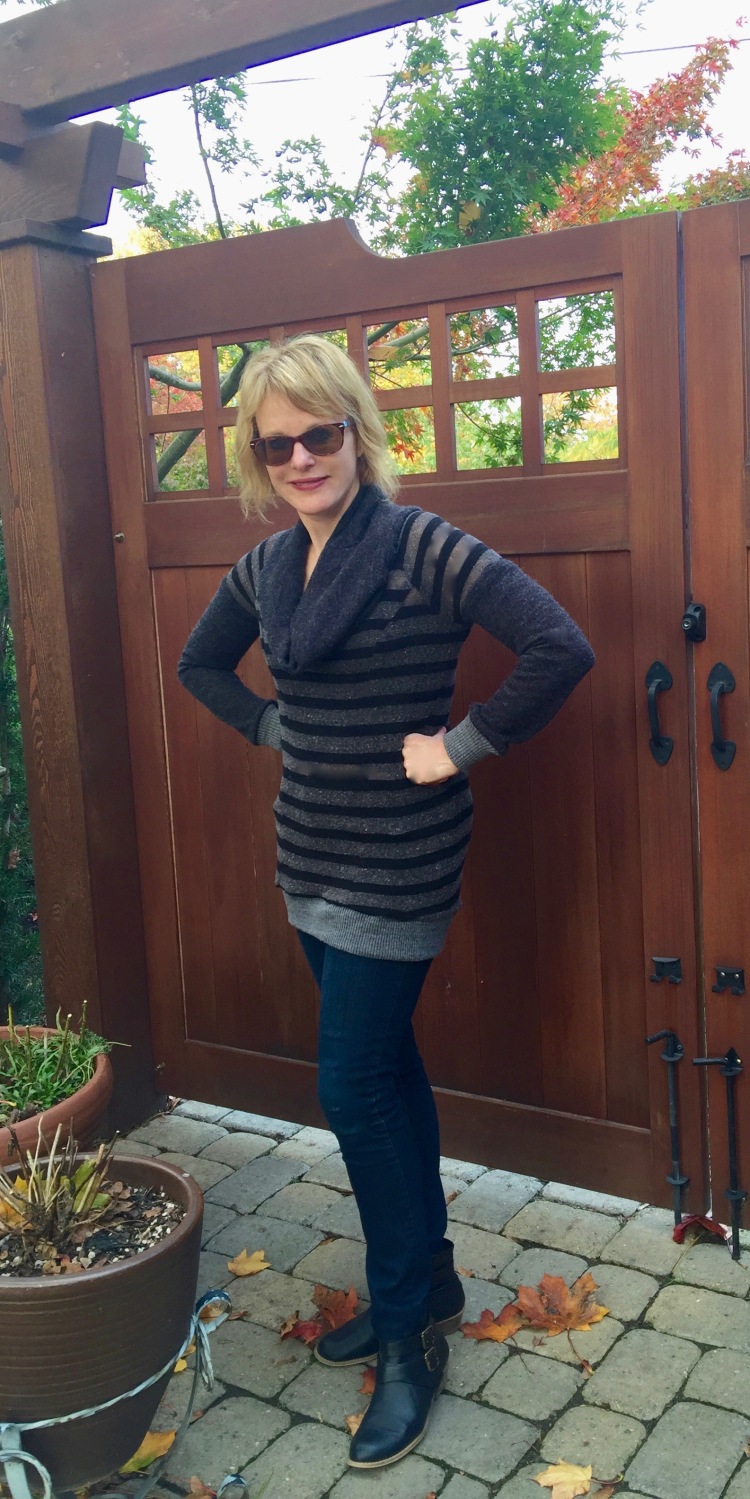
Sometimes, you make one version of a pattern, and you love it so much, you rush have to make another.

IMG_7328

It wasn’t just the versatility of the pattern that inspired me to sew two (2) versions, it was envy too. When I saw these versions in ready to wear, I had to have one (or two) for myself.

Version 1 is by Sea, and version two is Chloe. You can wear either one with the tie ‘tied’, or not, depending on your mood and it still works!


This pattern is part of Butterick’s fall collection. It offers several options, a narrow tie collar, and a broader tie that’s incorporated into the neckline.

Because the tops slip over your head, they’re easier than some to sew. But as usual, the devil is in the details. I found the two collar options to be quite different to sew.

The bow collar on this version is part of the neck line finish. It’s only two pieces which are sewed onto the collar opening….so easy!!! It becomes the facing and the collar – – so efficient. This version is made from a very stubborn rayon, that was a bit tricky to sew, but feels great to wear.IMG_6640

The fabric was very ‘shifty’. This version is ‘as designed’ with one modification. I eliminated the elastic on the sleeves and added a self-drafted 3″ cuff.

Version two is the narrow tie option. I made this out of a yummy rayon (fabric depot.com).

IMG_7261

This version (shown here with my jeans skirt) was a bit trickier to sew because there is a narrow collar that is sewn on after you insert the narrow ties. Narrow ties are hard to turn, for one thing (an understatement. My finger tips will never be the same). Then, the ties have to be placed just ‘so’ before you attach the teeny-tiny collar. Sure, it’s not impossible to get it right, but you need a bit of patience :).

I love both versions and can imagine making antoher in silk with, maybe….Hmmm….bell sleeves?!? I am not done with that look yet! Anyway, I’m giving this pattern a thumbs up. It’s a great transion look, I think, a nice bridge between the seasons, and if I could find some great fabric like the Chloe or Sea versions, I’d be all over making version number three.

Long sleeves….I think that makes this a ‘Fall’ project, even though the temperature is in the mid-90s here! Have you started your Fall sewing yet?

Happy sewing and thanks for stopping by!


A cold shoulder top, dress or tunic

IMG_4728

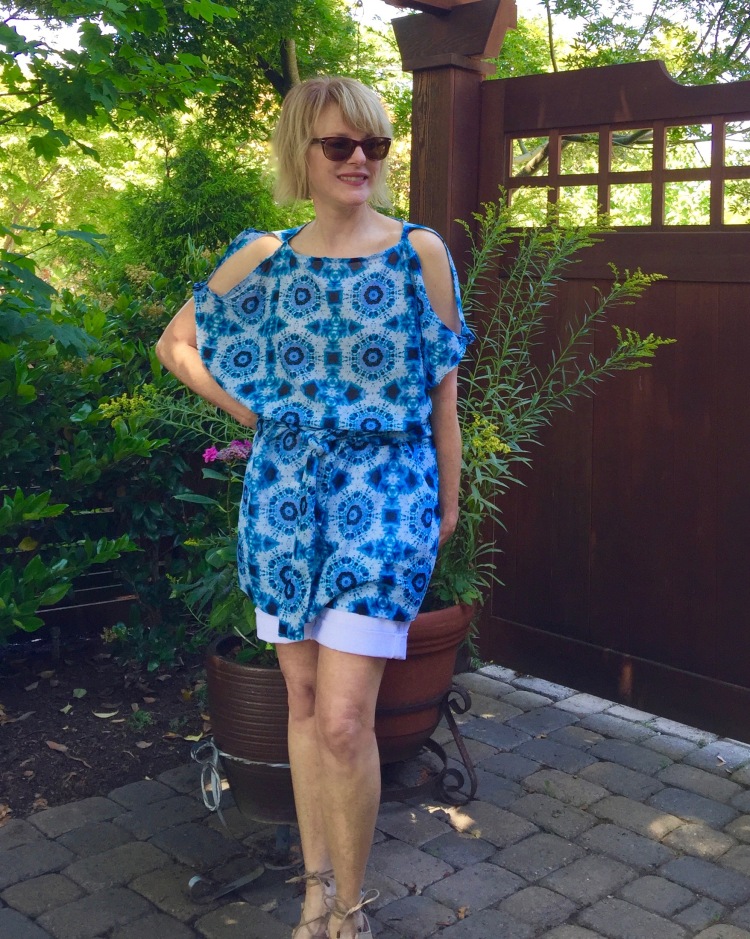
I cannot get enough of the cold shoulder look. As with most trends, when I finally get on board, I don’t let go!  This is my second cold shoulder project (first one here) and I can tell you, it will not be my last. Here’s the reason I love the cold shoulder look. Showing a bit of skin at the shoulder gives even a loose, summery top or dress a bit of a sexy vibe.

What’s even better about this top, is that it’s so versatile! By hemming it a bit on the long side, I can wear it either as a top or a dress! Here it is loose and unbelted for a hot day.

IMG_4652

Here it is over jeans, perfect for a day that’s a bit on the cool side.

IMG_4508

I think this pattern plays to the advantage of a cut-out shoulder. Even though the cut of the top is unfitted, the shoulder gives it a bit of interest, and makes it look more shapely than it is. You can belt it, or not, as the mood strikes.

IMG_4714

The pattern is Butterick 5889, an easy top, tunic and belt.

It’s a bit oversized with a slit opening at the sleeves that could not be easier to construct. The sleeve hems and the sleeve splits are just finished with a narrow hem. So fast! The cold shoulder look is created when you tack the sleeve split together at the top and bottom.

The shape of this top is rather loose and boxy, so I choose a very lightweight cotton with great drape (Mill End Store) so that it wouldn’t overwhelm my small frame. The hardest thing about this top, was getting the pattern perfectly lined up on center front, so you know this top is easy!!

IMG_4746

I can imagine wearing this top/dress both ways, belted or loose (although the unbelted version might be a bit of a man-repellant, if you’re worried about that sort of thing, LOL).

From cut-out to finish, this top took only a couple of hours to create. It might have taken less if I wasn’t watching High Society (Grace Kelly could not be more gorgeous. And the clothes!)

This top is such a fast, fun make, I might try it again out of a rayon challis. View B also has pockets and a front placket, so I might give that a go at some point. If you decided to try it, I recommend sticking with a drapey fabric, as it does have a very generous cut. The pattern came out in 2013, but it’s still easy to find and on-trend now.

What do you think?  Do you prefer it as a top, a tunic or a dress?Isn’t it nice to have some easy projects during summer? There’s so much to do outside, away from one’s sewing machine.

Happy sewing, and thanks for stopping by!

Vogue 8831: A sweater knit top with zippers

IMG_7063 (1)

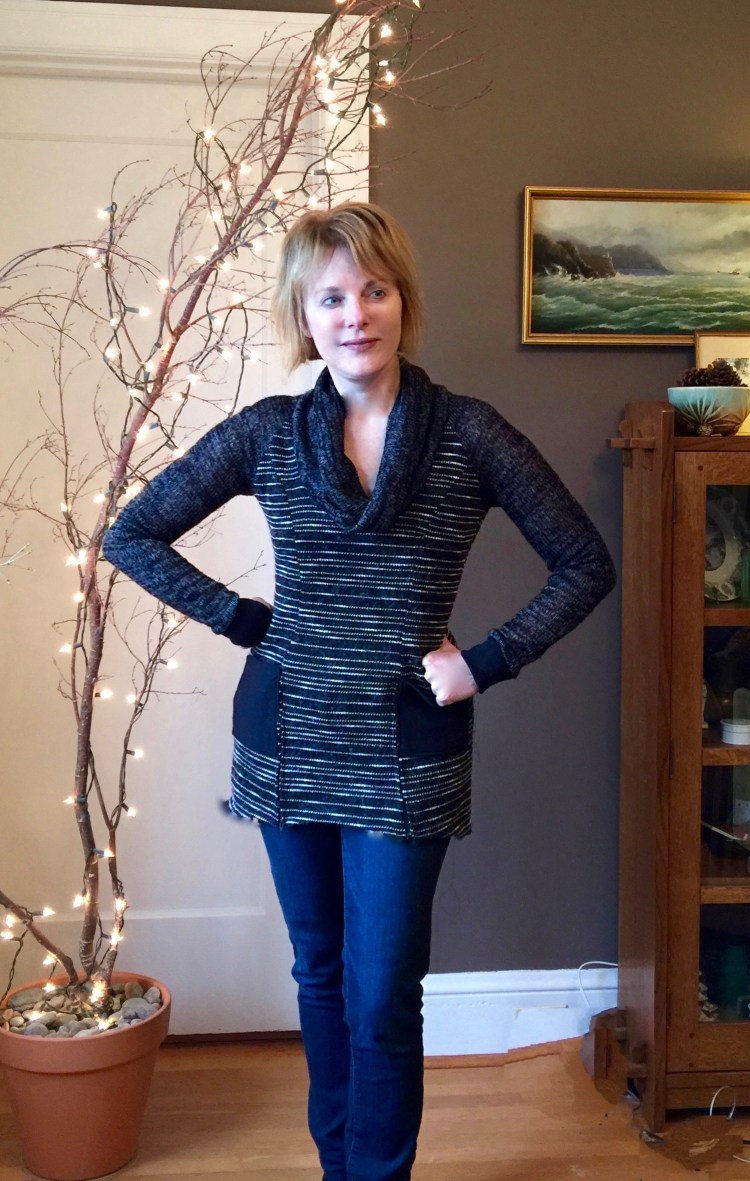
Since I don’t knit, I’ve become a huge fan of sweater knits. With only a few yards of the cozy stuff, you can cut and sew almost any style sweater you want. Here, in rainy Oregon, a person can NEVER have too many sweaters.

For this top, I used two coordinating sweater knits from my fabric stash (yay); a striped textured knit for the bodice, and a solid sweater knit for the arms and cowl. For fun, I also added a couple of pockets to the bodice, sewn from a untextured knit of solid black.

IMG_7222

I used the same fabric to add sleeve bands, and, because I’d fallen in love with a RTW top with zipper detail at the hem (it didn’t fit, rats), I added two seven inch zippers to the princess seams at the hem.

IMG_7270

The pattern I used is Vogue 8831,  a top with princess seams and a cowl neck. I’ve made it before here, and will likely do so again as I love the cowl neck and the princess seams in the bodice.

V8831

Because this sweater knit was so loosely woven, I added stabilizer to the seams before stitching in the zippers. This gave the fabric enough body to support the weight of the zipper and also helped protect the seam from unraveling. I also finished all the seams with an overlock stitch. I love sweater knit, but when it’s loosely woven, it can be a bit….touchy.   I was really glad I chose a pattern that I knew well, because the stitches seemed to just disappear into the fabric. If I’d had to unpick any of those seams, it would have been a night mare!

IMG_7228

I learned a bit more about sweater knits as I worked on this project. The things I want to remember for my next project include:

  1. Always use the right needle. On this project, a jersey needle worked best.
  2. Finish the raw edges to keep the weave together.
  3. Stabilize seams and hems (especially if they have to carry the weight of a zipper ).
  4. Try not to pull the knit as you sew. It does stretch and can lose its shape (My hem isn’t as perfect as I’d like because I stretched it out when I put the zippers in.)
  5. Keep your cat out of the sewing room especially if he’s orange and his name is Dustin.IMG_7077

Putting in the zippers required a bit of thought and added some extra steps, but I’m glad I did. I like the look of the zippers and they make the top a bit unusual. To change up the look, I can wear it with the zippers open or closed. And if I eat too much, hey, all I have to do to get a bit of room is to unzip. Ha! Too bad I didn’t have this top to wear over the holidays!

I still have quite a bit of winter sewing to do, but the linens and cottons in my stash are calling me. Pretty soon, I’ll just have to give in and shift my focus. My spring plans are to make a couple of light weight dresses and tops that will travel well. And pants! I have to find a pants pattern that I love. Recommendations are appreciated!

I’d love to hear about your sweater knit experiences and if you’ve found any secrets to success. Happy sewing and thanks for stopping by…


Vogue 8831 – A long cowl for layering

IMG_5985

I’ve always loved fall fashion…the chunky coats, the heavy sweaters, all perfect to wear with boots!  But I didn’t know what true love was until I found sweater knits. When it comes to cozying up for winter, they are the real deal.

Fall means layering pieces for me, and when I sew a base layer, I think monochromatic. That way, I can go crazy with additional layers, adding color and texture over that simple base piece.  The trickiest part with that base layer for me though, is making sure it’s not too bulky. I try to stay away from the chunkiest sweater knits. I don’t want to look like the Michelin Man (although, I’ll bet that guy is warm!!)

IMG_5988

This ‘fifty shades of gray’ sweater is a base layering piece for me, cut from a cozy sweater knit that’s a bit of a mystery fabric. I found it languishing in my stash, hidden under a heavy piece of boiled wool that I’ve had for several years. What a great surprise! Since I’d all but forgotten about it, its appearance seemed magical, so I had to use it right away.

The pattern is Vogue  8831 (OOP but still available on-line. Vogue 9055 is similar), a close-fitting, pullover top and tunic with a draped collar, side front/side back seams and stitched hems. What’s great about this pattern is that it includes several cup sizes which means you can get the fit just right.

V8831

I varied the pattern as follows:

I cut the short sleeves from the same fabric as the bodice then added a lower sleeve in a solid fabric, basically making two piece long sleeves.

I added cuffs of contrasting ribbed knit.

I added a band of ribbed knit to the bottom.

I cut the collar from a solid knit.

IMG_5979

Challenges? There were a few.  Matching stripes on princess seams is no picnic, especially when you’re working with a knit that wants to stretch when you touch it. I pinned and pinned and pinned, trying to make sure that stretchy knit didn’t shift. It turned out okay – – not perfect, but ripping seams out in a sweater knit is not easy.

In fact, this might be the biggest downside of sewing with sweater knit. Stitches get lost in the weave and you can’t ever find them again. And if you do find those stitches and try to take them out, you can easily rip up that fabric.  So….it’s best if you don’t make any mistakes (Ha, not happening in my world)!!!

IMG_5981

After getting a bit angsty over the whole thing,  I finally decided to give up on perfectly matched stripes in order to keep that sweater knit intact.

I love my cozy sweater! Because it’s long, I’ll wear snug fitting pants and skirts with it to balance out the oversized look of the top.  And, I can easily layer this up a bit with a long vest, even a coat over that.

Have you sewn any cozy layers lately? If so, I’d love to check out your makes! Happy sewing, and thanks for stopping by….

Color-blocking a wild print into submission

IMG_1034

When it comes to fabric, I am not a big fan of prints. Yes, I love the way they look on others (the wilder, the better!) but on me? Not so much. Yet, my wardrobe needs a few prints to make it more interesting. After all, one cannot live on a diet of solid fabrics alone!

But for a shrimp like me, finding the right print can be challenging. I’m often attracted to prints that overwhelm my smallish frame. The fabric I used on this dress is a perfect example of my exuberance when it comes to color and pattern. When I saw this blue printed linen at Fabric Depot, I could not take my eyes off it. Yes, I’m a blue fanatic, and this was the most lovely shade imaginable.  Of course, the fabric jumped right into my shopping cart and made its way home with me.

IMG_1069

But when I draped the printed linen on my mannequin, I could not believe how bold and busy it looked. A serious case of buyer’s remorse! The blue was so bright! And those floral designs seemed to be swimming all over the place! I couldn’t imagine the fabric would ever work on  me.

But, I couldn’t bear to  part with it either. So, color blocking…to the rescue!

I’ve always been fond of wearing black with blue, so I draped black linen over the blue print, and, hallelujah, to my eye, it tamed that wild fabric down.  So, I went for it.

IMG_0922

The pattern I used is a Tried and True, Vogue 8840 (also seen here). I lengthened the tunic version by 6” to make it dress length. (The tunic itself is already pretty long on me, so it doesn’t take much to make it a dress.)  I cut the short sleeved version.

V8840

Color blocking modifications:

Cutting: For the color blocked pieces in the front, I cut one piece of white linen that was six inches wide and the length of the center seam of the dress. I also cut two black strips, the same length as the white piece, but only  3” wide.

Application: After sewing the center front seam on the dress, I pinned on the color block strips, using the center front seam as my guide. The white strip was centered on that seam, and the black pieces were edge stitched to each side of the white strip. After I did that, I added a bit of trim that I had in my stash on the seams of the color blocked pieces to make them pop a bit. I also added a black linen band to the bottom of both of the sleeves to pull the color theme together.

IMG_1067

Once the color blocked strips were sewn on, I finished the tunic according to the standard instructions.

The linen was a dream to sew on, and it breathes even when the air is hot and thick. And the pattern? There is a reason it’s one of my tried and trues. It’s so easy to modify and it fits well. My color blocked dress is still pretty bright for me, but at least its wearable. And I had so much fun playing around with the fabric on this one!

IMG_0968
Happy summer, happy sewing, and thanks for stopping by!

McCalls 6883 morphs into a top!

It’s a little late in July for red, white, and blue. Never-the-less, this Cotton and Steel print begged to be worn.

IMG_0713

I was first attracted to this fabric because of the crazy mish-mash of red, white and blue checks sprinkled on a back drop of cream. But, when I touched the fabric, I had to possess it. The weave of this rayon is so fine, you imagine you’re wearing silk.

IMG_0737

That’s what motivated me to make this fabric into something really wearable, a wardrobe essential I’d have reason to wear again and again. For me, that means a go-to top that can be worn with jeans, or dressed up with a skirt or some nice pants. I wanted something that looked casual, yet structured. So,to challenge myself a bit, I decided to make the top by using two patterns combined; the bodice of a fitted dress and a peplum from another pattern. I couldn’t tell you what inspired me to put these two patterns together (no, there was not wine involved, I swear). But, once the idea grabbed hold, I had to give it a try.

The neckline of the dress (McCall’s 6883) is what made me buy this pattern. It’s a wide neckband with a bit of a vintage vibe.

M6883M6883

To shift the dress into a top, I cut it off at the natural waistline, then attached a loose peplum, adapted from Vogue 8815.

V8815

This is what happens when I go crazy for a neckline, but not so much for the rest of the pattern!

Modifications to McCalls 6883:

  • I cut the dress as designed, but shortened the bodice to the natural waist. I was able to get this modified pattern from a scant yard of fabric.
  • The lower bodice of my top is the peplum from Vogue 8815. To make sure it would fit on the modified bodice of my dress, I measured the bottom of the bodice,  as well as the waist of the peplum. I discovered there was an inch discrepancy between the two, so, in order to make them fit together, I had to widen the peplum waist by 1”. When attaching the peplum to the dress, I used a 5/8” seam, which placed the peplum slightly above my waist, which is where I wanted it. Yes, I was sweating this a bit, but miraculously, the bodice and peplum went together with very little pain and suffering.

Fabric: Cotton and Steel Rayon purchased at Fabric Depot

IMG_0758

Lately it seems, I’m modifying my existing sewing patterns rather than buying new ones. This is probably a good thing, since my pattern stash is HUGE.  It’s also a good way  to get the style I want, while using a pattern I know will fit me.  The risk though, is that the new version of my old favorite will be so wonky, it looks like a big mistake! Still, even though risky, I enjoyed this process of combining patterns. It used a part of my sewing brain that needs to be stretched from time to time, so I’ll probably do it again.

I hope your summer is fabulous and fun, and that you’re getting a chance to wear all of your favorite makes! Thanks for stopping by!

This Thursday’s Top is Simplicity 1693; Black + White = Cool

DSC03192
This week marks the sun’s Big Debut here in Portland. We’re expecting a weekend sizzler with temperatures over 100 degrees! Panic! We are wimps, so a forecast like that can cause a bit of freak out around here. We faint at the mere idea of a hot day, and if you throw humidity into the mix, trust me. The streets of our fair city will be deserted. Everyone will be holed up in their air- conditioned houses with fans humming.
I, on the other hand, will be feeling fresh as a daisy, dressed in summer’s perfect fabric – – linen!
DSC03191
In anticipation of the heat, I crafted a new frock for my Thursday Top – – a three-hour wonder with an a-line shape that’s sure to please. I had great fun making this easy piece. I used three fabrics (3!!); two prints and a solid, making this project a Stash Busting Gem.
Pattern:  I used Simplicity 1693. It’s a  top with length, sleeve and waist variations. It was simple to sew and the instructions were clear.
DSC03190
Style: 
If there was a Best Top for Any Figure competition, I’d have to nominate this one for the title. It’s simple, to be sure, an A-line that’s fitted at the yoke and slightly flared at the bottom. What’s not to like about that? This top accentuates the good parts of our figures, while forgiving the not-so-good parts.
Modifications:
Yoke: Because I wanted to use some remnants in my stash, I cut the one-piece bodice into two pieces –  a yoke and lower bodice. To do this, I made a cut across the bodice, eight inches from the neck, remembering to add 5/8 “ on both pieces for the seam allowances.
DSC03186
Front stripe: To make the front stripe of fabric, I cut a 4″wide piece of  fabric  the length of the center front. I turned under the edges and edge stitched it before sewing it to the Center Front of the garment (An easy way to mark the stripe’s placement is to press in the center fold, and use that line as your guide when applying the stripe).
 Fabric: The bodice and sleeves are linen, purchased at Fabric Depot, the yoke and stripe are japanese cotton, purchased at the sewing expo. All of it breathes and is super comfortable to wear.
DSC03183
So, bring it on, Mr. Sun! I am ready!
What’s your favorite style of pattern to sew with linen? What’s your favorite shape for your figure?
Happy sewing and thanks for stopping by!

Thursday tee: A gauzy top keeps its cool

DSC03117
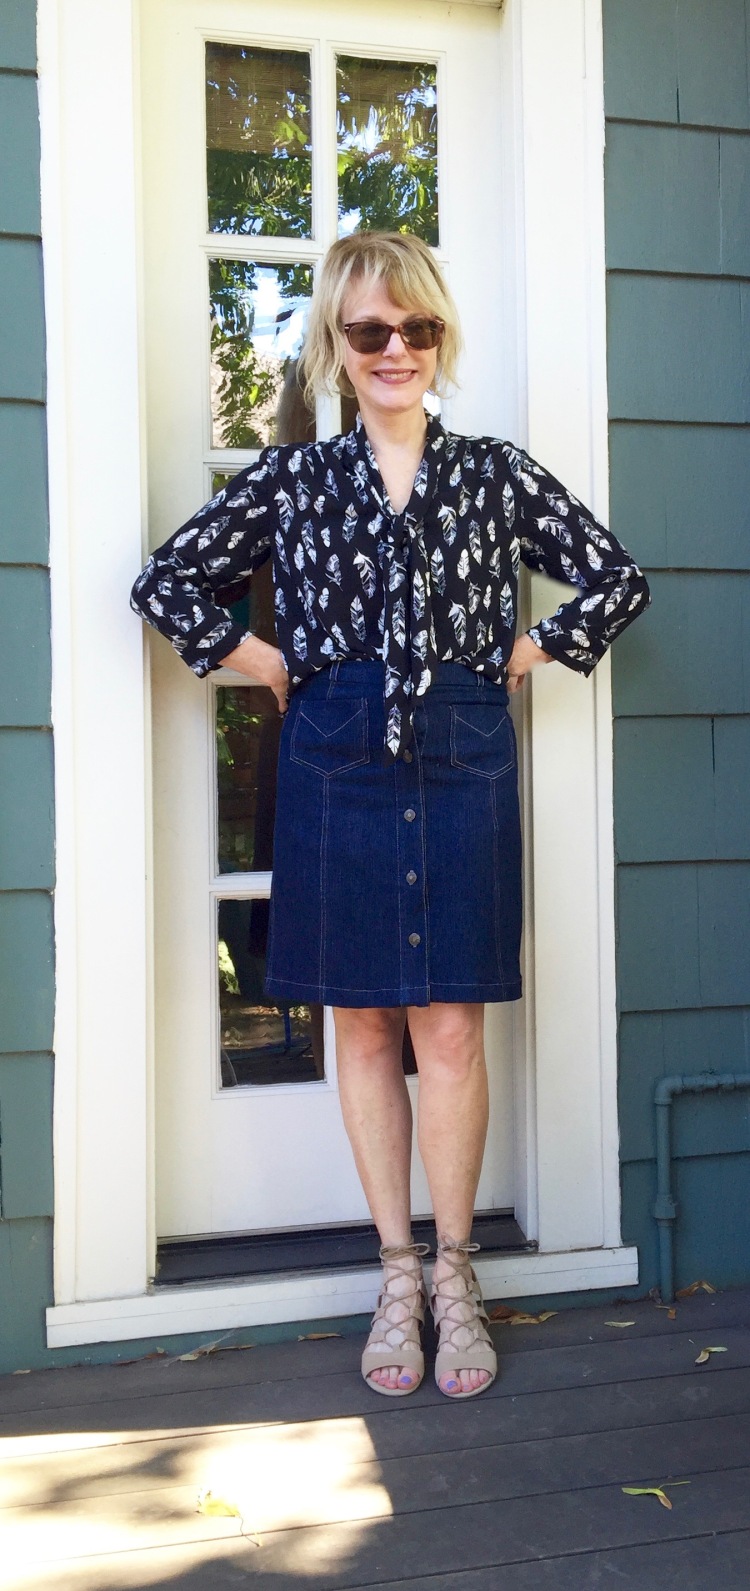
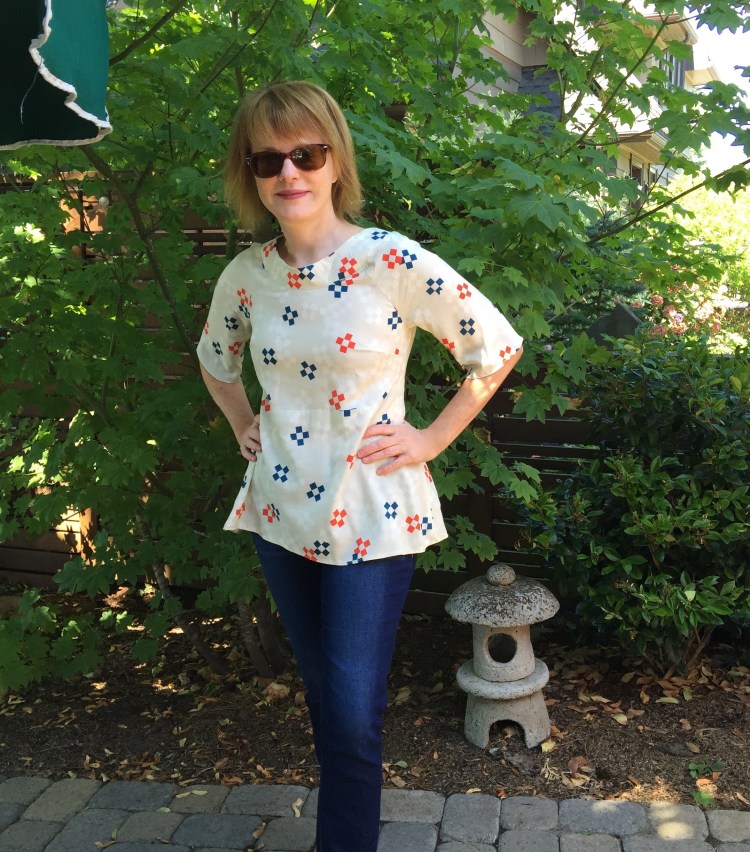
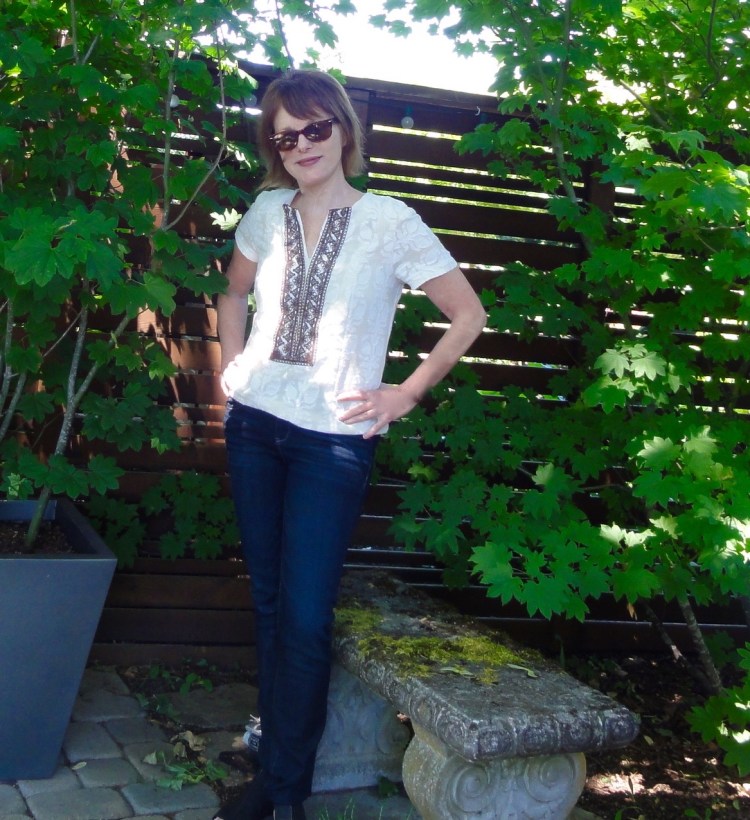
When it comes to the summer tops in my closet, not all are equal or flattering, which means there’s always a reason to try another. And another. And another.  Perhaps that’s why I never stop wanting to sew another top!
The most beloved tops in my wardrobe are the ones that are comfortable, but not shapeless, with a bit of classic styling. And if a top has a design element that’s a bit unique, that’s even better.
DSC03085
Of course, it’s always easy to find a new pattern to try. The problem is finding one that you can love forever. Sometimes, I’ll think a top is perfect, only to find after wearing it a few times, its shine dims. Maybe the print is too busy or the color feels too dated. Or maybe it clings too much.
 I guess that’s why I own more than a few. And I don’t even want to count the number of patterns I’ve purchased in my quest for perfection!! Don’t make me! It would be down right embarrassing.
1461
So, when I thought about purchasing Simplicity 1461, I groaned as I quarreled with myself. Really? Another tunic top pattern? Will you even make this one? But I’m glad I succumbed to temptation because this pattern is a keeper.
4b5069b255c4f3d481fe936f5859fa48
It’s a tunic top that has a bit of a boho look to it. It has princess seams (always flattering!), a number of neckline and sleeve variations, and trim variations. I chose to combine views, going with a short sleeve version.
The good news about the pattern for those with a narrow back, is that there’s a center back seam which makes adjustments easy. I cut the smallest size so that the fit wouldn’t be too loose. I used some textured lightweight cotton (so cool!) in cream and white from my stash. Constructing the top was super easy and fast. The challenge was in the neckline trim.
Since I’m drawn to brown and cream, I found some brown lace at my local fabric store, then played around with it a bit ( a craft project!!). I twisted the lace around, squaring it off at the bottom to create my neck trim, and discovered that the lace, when placed side by side, made sort of a zigzag pattern, an unexpected but fun detail. I used a lot of pins to hold it in place, then stitched it to the top with matching thread.
DSC03115
Not a difficult top to sew at all. It’s easy to wear too and the open neck makes it cool and comfortable.  I’ll probably make this pattern again with long sleeves, maybe out of a gauze or a silk. And I’ll  play around with a new trim at the neck.  I do love a good craft project!
DSC03114
Do you have tops that you’ll love forever? Or are you as fickle as I am?
Happy summer and thanks for stopping by!

A Lisette cutout frock for sunny California

I have been sewing like crazy because I’m going to Southern California in a couple of weeks, the land of sun and fun!  The weather will be outstanding – – guaranteed. What better excuse to sew with linen, right?

DSC03005 (1)
When I saw the newest Lisette dress/tunic pattern from Butterick this Spring, I immediately said, California here I come!
B6168
It had an unusual cross-over bodice with tucks, two design elements I couldn’t wait to try. Not only that, but a couple of yards of Cotton and Steel linen was calling to me from my stash (Call me a group if you must, but I’m addicted to Cotton and Steel fabric).
B6168 (1)
Butterick 6168 is a pattern designed by Liesl Gibson, of ‘Oliver +S’ fame. (check out the Liesl and Co. website for lots of inspiration!) At first glance, the pattern looks ‘easy’, and, in some ways, it is. There are no button holes, or collar points that require precision or patience. In other words, you don’t have to perform dangerous sewing feats to make this pattern.
B6168 (2)
But need I say? Looks can be deceiving! For a short bodice girl like me,  the challenge was in the fit.  The very things that attracted me to the pattern (criss-cross bodice and tucks) made it essential that I Go the Extra-Mile to create a trial bodice out of throw-away fabric.
Even though I cut the smallest size, the dress stuck out in the chest as though it expected Marilyn Monroe’s breasts to live there. Hilarious! So, I increased the depth of the tucks a bit, and the wrap worked fine. No gaps or embarrassing pointy areas. But, when I applied the same adjustments to my lust-worthy linen, I didn’t get the same results. I freaked. When I calmed down, though I had an epiphany. It was all about drape!!! My linen was stiffer than my ‘throw-away’ cotton, so the front stuck out again, begging that I bring more to the table than my ‘A’ cup breasts. Not going to happen.  So, I had to do a ‘tear down’ of my cleverly built bodice to adjust those tucks again. The good news – the problem was fixable.  It just took a bit of patience.
 DSC03006
 My advice? If you’re a bit ’non-standard’ in the chest/bodice area, Knock Out that Bodice in a remnant of throw-away cotton (that piece you wish you’d never purchased in the first place) with the same drape as your chosen fabric. That way, you won’t have a depressing mess on your hands.
DSC03011
After I adjusted the bodice, the dress went together nicely. If I was in the mood to be critical though, I’d say the pattern was designed with too many gathers in the skirt. When you stand to the side, you do look pregnant. I suppose, if you’re in a ‘family’ way, that’s cool. I am not. Of course, if you use a lightweight fabric, this problem might be less of an issue. Also, I did make it sleeveless in anticipation of Southern California heat.
All in all, it was a fun project that I learned a lot from. I’m sure I’ll wear this top again and again.  If you’re interested in making the dress yourself, there’s a Lisette Sew Along on their website.
Have you had issues with fabric drape before? What about chest/cup size adjustments? Any tips?

Dress or tunic? That is the question!

My latest sewing project is having a bit of an identity crisis. It’s a bit too short to be called a dress, but a bit too long to be called a top. In spite of this, I have to call it something to blog about it. So, I’m going to call it a dress. In fact, to be specific, it’s a Little White Dress (LWD), my second one, a trend in my sewing that’s bit surprising since white is definitely not my color.

DSC02708
I blame this garment’s identity crises on the fact that it was made from unrelated pieces of linen, found in my large, unwieldy fabric stash.
I don’t know about you, but my stash’s girth issues are a direct consequence of my frequent visits to the irresistible remnant selection of my local fabric store. There are so many gorgeous pieces there, all priced to sell, usually at about 50% of  retail. How can one resist?
 But here’s the problem with that. The down side of these ‘economical’ purchases is that, inevitably, finding ways to use the remnants is a challenge. These pieces of gorgeous fabric may be cheap, but they’re often less than a yard. But as my mind registers this fact, my heart says, “It’s not too small!! Go ahead. Buy it. There’s enough fabric here to make…..something!!”
Remnants are such teases.
My latest LWD is made from those remnants; a half yard of graphic print linen and 3/4 yard of white linen. Alone, neither was enough to cover much of…anything! But together, they became a dress.
 DSC02725
 I used one of my favorite basic patterns, Vogue 8840, (see it also here, and here) a tunic top with dropped shoulders, a round neckline, and a front and back center seam. This pattern is a favorite because it’s so easy to modify. With its center back and front seams, it’s also easy to adjust to fit my narrow shoulders.
I used the pattern as designed with one modification. I added a long but narrow eyelash dart to both sides of the back. This was necessary to give the pattern a bit of taper at the waist, a must because this particular piece of white linen was a bit stiff.
 DSC02709
After cutting the main tunic from the white fabric, I cut a ten inch border from my print, making it the same width as the tunic and sewed it to the bottom of the tunic, converting it into a dress (?). Of course,  I could have made it a bit longer if I’d had a little more fabric, (and who’s fault is that?). I did the same thing to add a border to the sleeves, which gave them a bit more body and finish. I also top stitched both sides of the front and back center seams for interest.
I love this pattern. Because the sleeves are cut as part of the dress, it’s easy and fast to sew. The neck is finished with seam binding, also super fast and easy.
But, even though this pattern is simple, the project wasn’t boring at all. I enjoy simple patterns because they give you room to add something. This time, adding the border was the fun part of the project. Also, because the top is so basic, I had fun shaping it with my own well placed darts.
 DSC02769
Here’s my finished remnant creation! Even as I look at it now, I’m not sure what it is, though. A dress, a tunic…who knows? But that’s what happens when you do the remnant shuffle right? Maybe, it’ll be a long top until Summer, when the hot temperatures will make it the perfect dress. And yes, it’s wrinkled and always will be. But that’s okay! I give wrinkles a free pass when they’re on wonderful, beautiful linen!!
What about you? Do you find the remnant section enticing? What do you do with those lovely, but strangely sized pieces?