DIY Jeans and a Burda Spring Top

IMG_1471

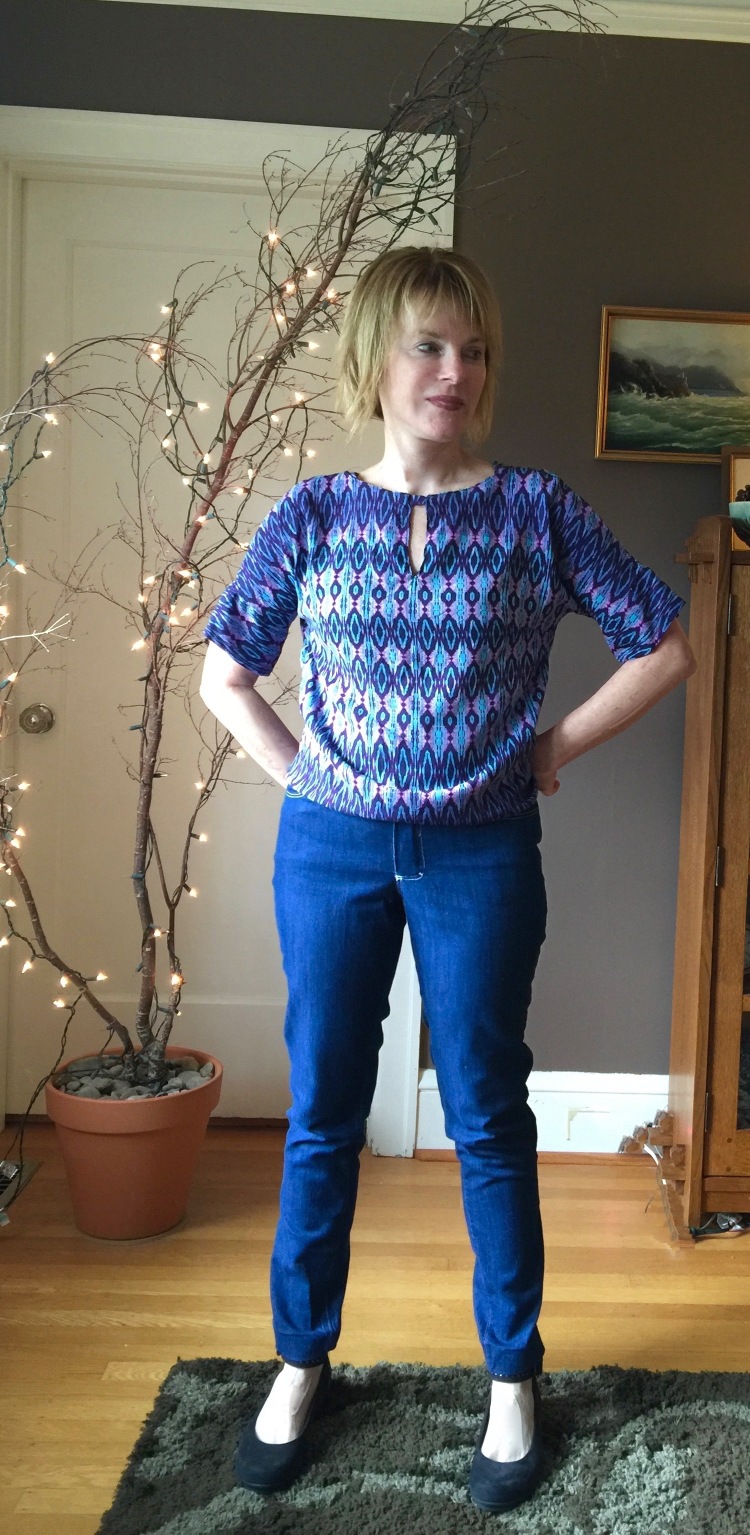
Hi all! Yes, I have FINALLY finished my first pair of jeans. My class at Modern Domestic here in Portland is over and I squeaked over the finish line with only five class minutes to spare! It feels sooooo good to have this project under my belt. I have wanted to sew a pair of jeans forever, but deep fear led to serious procrastination. But now I know. People, it is not that hard! Seriously, if I can, you can.  I’m already planning my next pair.

First, for those that don’t care about jeans, I’m going to give you a quick run down on this Burda top with a cool cutout in back.

IMG_1619

Pattern: Burda 114 from Issue 4/2016. Instructions were easy to follow (not always the case I have found with Burda) and you can make this top in about four hours or less. There’s also a dress length version. My fabric is a lightweight rayon that wanted to move around a lot, but after multiple tries, I did finally get the pattern pretty straight and centered on this wild print. Of course, the pattern doesn’t include seam allowances so don’t forget to add those :). One nice detail, the sleeves are short but finished with sleeve bands. I love the finished look this gives. It’s an easy pattern and the fit is very loose so I had no issues there.  I plan to make another one, maybe even a dress as I love anything with a bit of interest in the back.

The Jeans: There are so many tutorials in blog-land and on UTUBE that take you through the process of sewing jeans step by step so I will not bore you with that here. Since I’m generally impatient and easily frustrated, I took my first spin into Jeans Land under the Guidance of a Trained Professional, and I’m glad I did. My teacher was great and has made about 30 (?!?!) pairs of jeans. She has it down to a science and can whip out a pair in about four (4) hours. I think my pair took me only twelve (12) class hours. LOL

IMG_1445 (1)

Pattern: Jalie is the one we used in class because it has lots of sizes to play around with. The instructions are good, and the diagrams are clear. Yes, there are ALOT of steps, but they do a good job of holding your hand through them.I chose the low rise version and it was just right.


FIT: This is the part that scared me the most. The trick? Swedish Tracing Paper (I’m probably the last person to know about this great stuff?) It’s the same texture as interfacing so it doesn’t rip easily.  We traced our jeans pattern pieces onto it, then just basted those puppies together on the machine to check fit.

IMG_1622

Because this is durable paper, it doesn’t tear easily so you can try the paper jeans on then mark any necessary changes right onto the them before using them to cut out your jeans. HANDY! I hate making muslins (so much so that I never do which is not good) but this worked for me. BTW, the legs on this pattern are wide, so I straightened the cut of mine from the thighs down.

Interfacing: We used shape flex, which has a bit of give, a necessity on the waist of jeans. Tip…Cut it out with the grain (I forgot to do this first time through) so that you get a bit of stretch on the waistband when you need it.

IMG_1459

Topstitching: I used white thread (ARGH!!!). If I had to do it again, I would not. It made me crazy and my class got a good laugh as I took out things out over and over again. Pick a thread closer to your jeans color and save yourself some Grief. TIP; My Bernina isn’t fond of topstitching thread, so I used two spools of regular thread which could be pulled through the wider eye on a jeans needle. (don’t look too close at my white topstitching, LOL)

IMG_1451

Pockets: There are lots of templates on Pinterest for topstitching designs. Anything goes! I made up my own design and used a tracing pencil to mark it.

In summary, I like my jeans and will definitely make another pair using this pattern soon. The trickiest bits were the seams around the crouch and I didn’t love making bar tacks (not sure what that’s all about as it’s basically a tight zigzag stitch?), but I think those things will be much easier second time around. I also wish my knees weren’t so baggy. Not sure what to do about that?

What I will do differently next time. I will not topstitch with white. I will not topstitch with white. I will not topstitch with white. Ha, famous last words….

Happy sewing and thanks for stopping by!